360 Multiuser or Single-user Experience
Single-User (Self-paced) Configuration
Setting the 360 Image or Video
Hide 360 video controls for participants
What is the maximum viewable resolution for a 360 photograph?
360 Streaming Video Conversion
Using Multiple 360 Videos in One Space
Navigating between 360 Videos with links
360 Spaces
Using a 360° as a background requires a space created using the 360 template.
The width/height ratio for correctly formatted 360 media is 2:1, so an image 2000px wide will need to be 1000px high to be correctly mapped. If your image is smaller, it is recommended to “pad” it with an appropriate color at the top or bottom, as opposed to changing it lengthwise. |
The space will be created with a completely white background.
360 Multiuser or Single-user Experience
By default the 360 template is setup for multiuser experiences. The Virtual meeting room setting is on by default in the dashboard settings for the 360 space.
Multiuser 360 experiences allows participants to see and communicate with each other in the same 360 space.
Multiuser 360 video experiences also allow the use or video synchronization enabling presenters to control 360 synchronized video playback for all participants.
The hotspots are configured to allow minimal movement to minimize apparent discrepancies of 3D avatar scale vs 360 background.
The 360 template uses avatar heads or bust rather than avatars with legs to further avoid discrepancies of scale. You can enable full body avatars in the space settings if you wish.
Single-User (Self-paced) Configuration
For a single-user experience
- Uncheck Virtual meeting room

- Expand the Show advanced settings
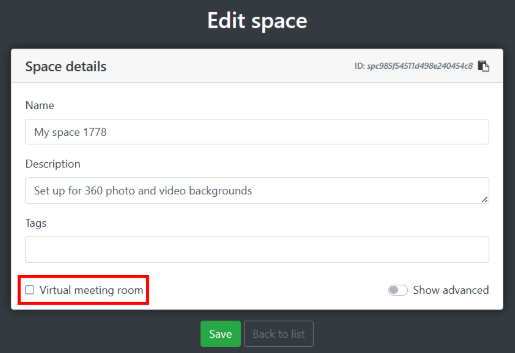
- In the Experimental settings panel set Force users to join audio call to Disabled
- Save
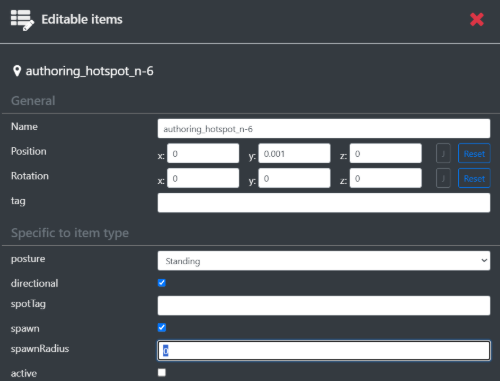
- Enter the space
- Set the Spawn hotspot > Spawn radius to 0 (zero)

- Uncheck the alternative navigation hotspots Active field to off (or alternatively delete them if you will not be using bots in the space)
Setting the 360 Image or Video
Have a web link (URL) to a 360 image (.jpg) or 360 video (.mp4) or 360 streaming video (.m3u8) ready.
- Access the space
- Click the Pencil+ icon in the toolbar (
 )
) - Choose Panorama 360°

- In the modal that opens, insert the URL of your 360
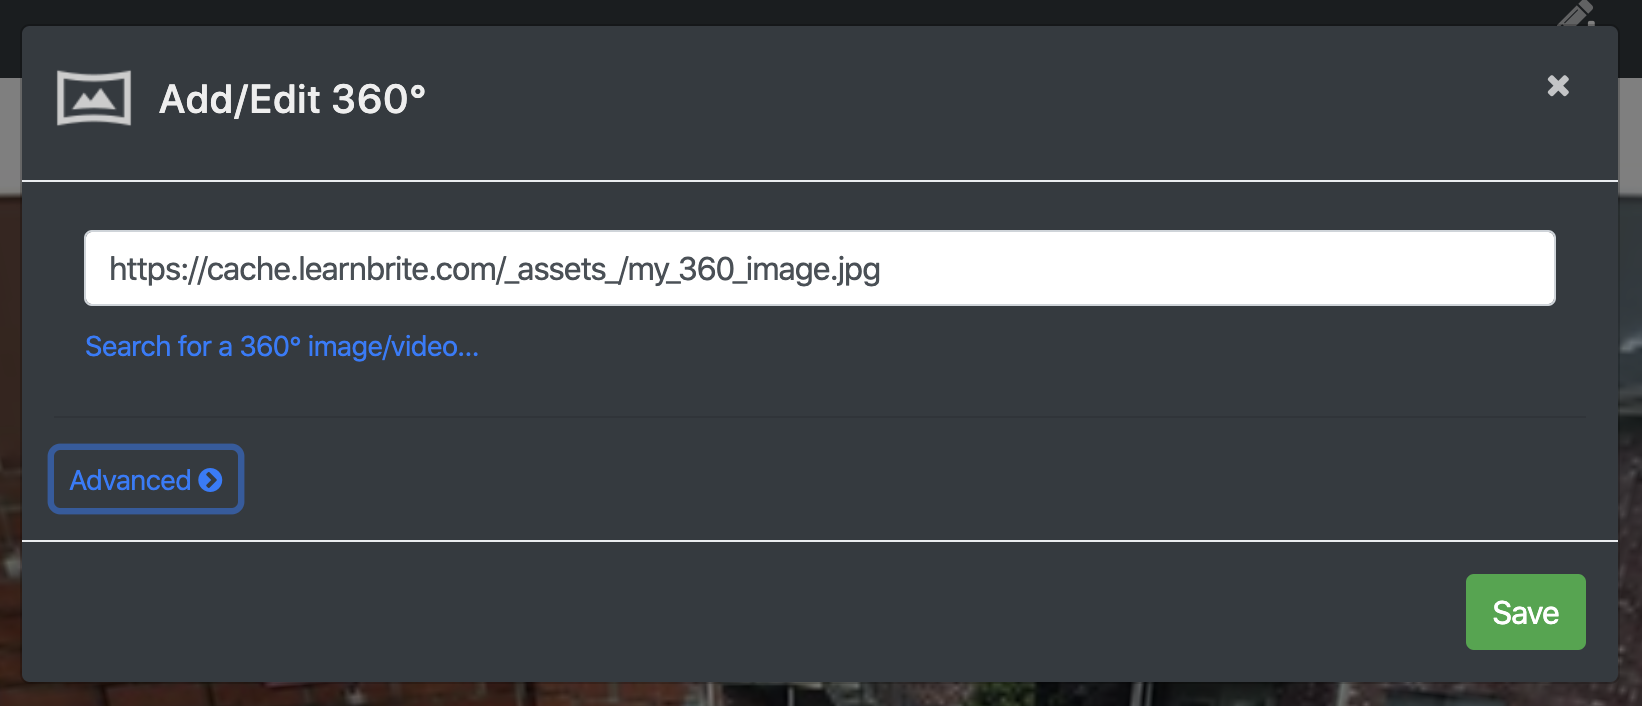
- Click “Save”
The 360 will update immediately.
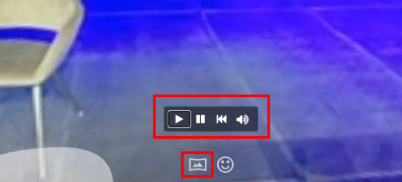
360 Video Playback Controls
360 Video controls appear for all participants.
Multiuser
Self-Paced (Single User)
Hide 360 video controls for participants
360 Initial Viewpoint
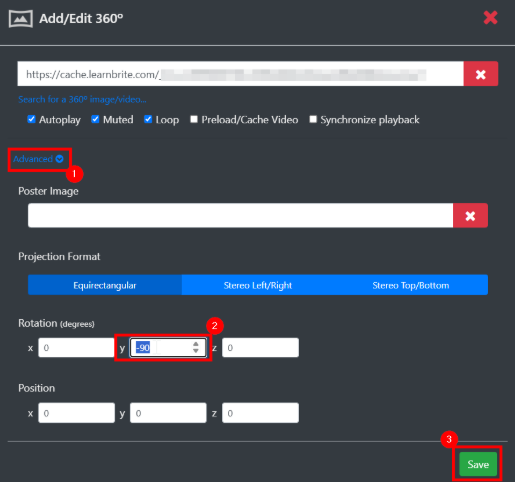
Change the starting viewpoint of the 360 by adjusting the Advanced settings Y Rotation to a value between 0 and 360 degrees.
Most commonly the horizontal rotation is desirable to adjust for the initial view.
360 Image Upload
Storage
You may upload 360 images as .jpg files to https://storage.learnbrite.com
What is the maximum viewable resolution for a 360 photograph?
Here at LearnBrite we typically use 8192x4096 and 4096×2048 , jpg for spherical panoramas. For cube maps for each face we use 2048px.
A great answer to this question has been supplied on Reddit
https://www.reddit.com/r/oculus/comments/5ypto4/what_is_the_maximum_viewable_resolution_for_a_360/
The default monocular horizontal FOV of the Rift is 79.55°, the horizontal resolution per eye is 1080 pixels, the render target size is ~1.7 to compensate for distortion, so the render target size per eye is ~1404×1560 and has ~17.6 PPD (pixels/degree). For the different 360° formats this means :
- 360° equirectangular : 6354×3177
- 360° 3D equirectangular : 6354×6354
- stereo cubemaps : 19056×1588 (the OTOY format used on the Gear VR is 18432×1536)
Michael Abrash made a prediction that in 3 years headsets would have ~30 PPD, so if you want to be able to view your photos without loss of quality in these headsets this means :
- 360° equirectangular : 10800×5400
- 360° 3D equirectangular : 10800×10800
- stereo cubemaps : 32400×2700
If you want to store your files for the longer term you should maybe use an even higher resolution. The average visual acuity of the Human eye is ~85 pixels/degree (for comparison the Rift has ~13.6 PPD), so to be mostly future-proof (except if you've perfect vision at ~120 PPD) this would mean :
- 360° equirectangular : 30600×15300
- 360° 3D equirectangular : 30600×30600
- stereo cubemaps : 91800×7650
But by this time and probably before 3 years I think we'll have other 360° formats (based on light fields probably) which require a lot more images.
360 Video Upload
You may upload .mp4 files to https://storage.learnbrite.com delivery performance may vary, so we recommend using our streaming service explained below.
You may also link to files on Vimeo for streaming.
360 Streaming Video Conversion
Hyperspace has support for video streaming, including 360 video streaming. The conversion of mp4 files to streaming format is on request.
- Upload the mp4 to storage
- Highly recommended – ensure the mp4 filename does not include any spaces or special characters
- Provide
- The storage URL of the mp4 (eg. https://cache.learnbrite.com/….)
- Identify if the video is portrait, landscape or 360
- Message Hyperspace Support with the request to convert it to streaming format
- Hyperspace will respond with a URL to the .m3u8 within 72 hours (typically sooner)
Streaming files are stored on Amazon S3, a streaming URL .m3u8 will be supplied back to you for inclusion in your project.
Hyperspace plans to automate and make this feature self-service in the future.
M3u8 videos display only a black/blank first frame (texture) before they are played, unlike mp4 videos. A Poster Image (.jpg) to display before the video starts can be added manually in Panorama 360 > Advanced settings. This picture can be a frame from the video, or a custom thumbnail.
Timed Media Triggers
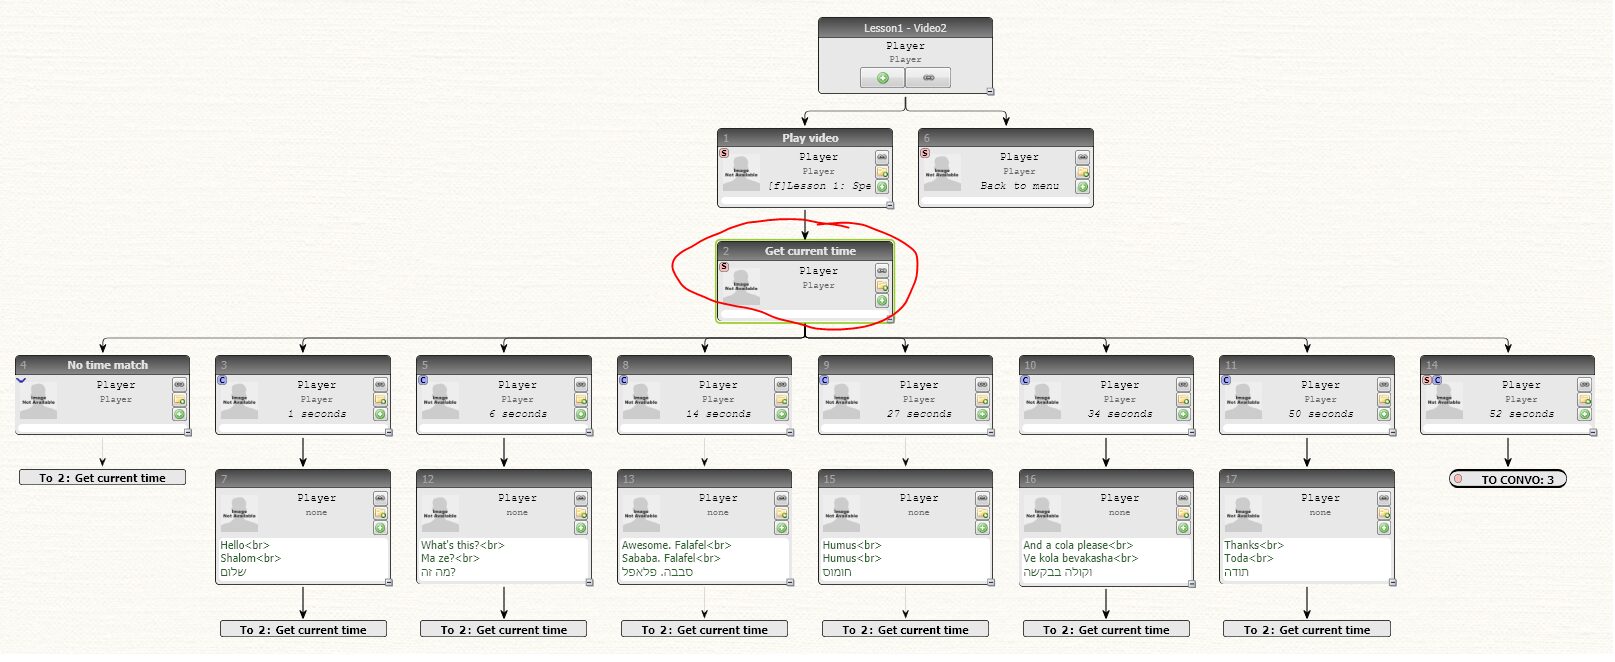
ChatMapper nodes can be triggered to execute at certain times when the Media Element (360 video) is playing. An example CMP can be found here: TimedMediaTriggers.cmp
This is achieved in a parent node with a Script which constantly updates a variable to equal the current Media Element time.
First we create a ChatMapper Variable nowTime of type Text
Script:
Variable["nowTime"] = $("#video_Skybox")[0].currentTime; |
Then children nodes contain a Condition to check if that time has been reached or exceeded. To stop the node from being executed over and over a check against the SimStatus is used. If the child node has been displayed then it will not be shown again.
For example checking nowTime is EQUAL to 2.2
Dialog[5].SimStatus ~= "WasDisplayed" and Variable["nowTime"]>=2.2 |
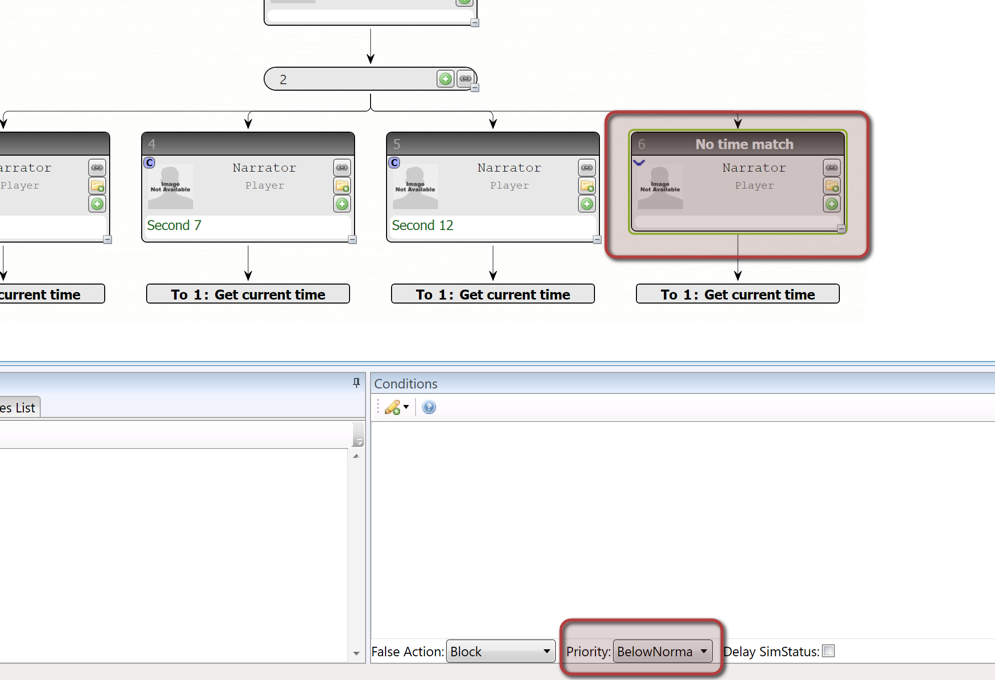
Additionally, a “catch-all” node is inserted, so that whenever the time does not match a condition the conversation goes back to checking the video’s time. This is an empty node, with no condition but Priority set to “BelowNormal”
360 Video Play & Pause
Using a Script to Play
LB.Actions.setVideoboardControls({videoProxy:false,video:"Skybox",videoForcePlay:true,executedFromEA:true}); |
Using a Script to Pause
LB.Actions.setVideoboardControls({videoProxy:false,video:"Skybox",videoForcePause:true,executedFromEA:true}) |
Using Multiple 360 Videos in One Space
First we need to get a handle on the 360 background using a Script. The 360 background that is included in the 360 Template you used to create your space. It is called “Skybox”.
First we create a new ChatMapper Variable MediaElement of type Text
Variable["MediaElement"]=LB.Utils.findItem("Skybox"); |
Then using a Script set it’s diffuseMap to a media URL ending in .m3u8 or .mp4, or a direct URL to an online video service such as Vimeo.
LB.SceneAuthoring.setField(Variable["MediaElement"],"diffuseMap","https://s3.amazonaws.com/lb360/hls/my_video/master.m3u8"); |
Loading Image / Poster
Before the video has loaded or can be displayed the space/screen will be black. To avoid this you can use a poster parameter with the diffuseMap URL to show a 360 loading image.
Just add the following to your URL , “?poster=URL_OF_IMAGE”
LB.SceneAuthoring.setField(Variable["MediaElement"],"diffuseMap","https://s3.amazonaws.com/lb360/hls/my_video/master.m3u8?poster=https://cache.learnbrite.com/my_image.jpg"); |
The Media will be paused by default. You will need to execute a Script to Play the video (see 360 Video Play & Pause section)
Navigating between 360 Videos with links
The best approach to visiting different 360 Images and Videos is to use multiple spaces and combine them into a World. By navigating from space to space you can travel from 360 to 360.
Add doorways or icons to the 360 and use the sendUserToSpace action.
Ensure you are accessing the World URL when moving from space to space.
Legacy 360° before 2.10
- Access the space
- Click the edit icon ()
- Choose “Show items list”
- Scroll the list to find “Skybox” (or “Panorama” in some cases)
- Click the “Edit” button – the object’s properties will unfold below
- Change the “diffuseMap” to the URL of your 360 photo or video
- Click “Save item”
Legacy video tutorial https://www.youtube.com/watch?v=yKYxEXteNqk
