We've worked hard to deliver great metaverse experiences, but we're still tracking some known issues. If you find others, please Give us feedback.
Does the trial have restricted functionality?
What is “Built-in conferencing”
What counts as usage for built-in conferencing?
What is the done-for-you (DFY) LMS integration?
How do I invite other users to a space/world?
Does LearnBrite work in China?
How can I change the version of a space/world?
Which version of Scenario should I use?
Creating spaces & using templates
Blank Template has Invisible Floor
Building from a Blank Template
What is the recommended image size for the banners in the Virtual Conference space?
Bringing Multiple Spaces together in a World
Navigating to different Spaces in a World
How should I optimize my own models/textures?
Why are some avatars semi-transparent?
How do I change the settings of a space?
Virtual Meeting checkbox – collaborate in a space together
What is the “goggles” icon supposed to do (on different devices)
The Chinese Female voice stops before finishing the sentence
How can I track a score in ChatMapper?
How can I track a score within a space?
Make 3D items clickable and trigger actions (2.6+)
Make parts of a scene clickable (2.6+)
Stop Camera Position Changes after onclick action (2.9+)
Which YouTube URL should I use?
Setting the maximum number of visible avatars in a meeting space
What is the Maximum number of users in a space?
iOS 12 Chrome does not support Audio and Video conferencing
Treating Variables in ChatMapper as Text or Number
Troubleshooting ChatMapper Exports
Why do some actions (e.g. displayImage) skip the node afterwards?
How can I add a button to the Action editor? Do I need to use ChatMapper?
HLS streams do not appear on iOS 14
I cannot remove 3D items from my space
Trial & Licensing
Does the trial have restricted functionality?
The trial offers unrestricted access to everything in the platform.
Although the platform supports more than 10000 concurrent participants, the only limitation on the trial is a maximum of 5 concurrent participants.
The number of visitors is unrestricted, some of our larger clients having hundreds of thousands of avatar accounts.
Who is an “author”?
See our description of User Roles.
What is “Built-in conferencing”
As a platform, we integrate with a variety of conferencing/communication services (Zoom, Slack, Bluejeans, etc.), so we differentiate our "native" conferencing this way. In practical terms, built-in conferencing is what is active by default in any space or world you create, which you access by clicking on the phone icon in the 3D environment.
What counts as usage for built-in conferencing?
Built-in conferencing time is time spent on a call, or sharing screen/video, with the built-in conferencing. Simply being in a space does not use this time; using Zoom (or other services) for calls and screen/video sharing does not consume this time either.
What is the done-for-you (DFY) LMS integration?
Every space created comes with a 1-click export of a SCORM module that works with almost all LMSs and allows recording a score in them. In certain environments however some tweaking is needed (due to a variety of factors from security policies, to an LMS that is not standards-compliant or only uses LTI as a connection mechanism, to custom requirements on your part, etc). If your subscription includes the DFY LMS integration, we will work closely with you to integrate with your LMS.
Access
How do I invite other users to a space/world?
There are two ways to invite others:
- from within the 3D environment (see “How do I… → Invite other users to a space/world from the 3D environment?”)
- from Dashboard (“How do I… → Invite other users to a space/world from Dashboard?”).
Does LearnBrite work in China?
Clients have had success using the platform in China, but we do not have servers inside the country, and therefore recommend you run your own tests with colleagues to ensure the experience performs to your satisfaction.
Versions
How can I change the version of a space/world?
See “How do I… → Change the version of a space/world?”
Which version of Scenario should I use?
Any space you create will use the version currently set as default (2.16 as of December 2022). Later versions will give you extra features (if you encounter any bugs let us know!).
Creating spaces & using templates
How do I copy a space?
See “How do I… → Copy/duplicate a space?”
Blank Template has Invisible Floor
The blank template has an invisible floor which allows you to drag bots and items around. Just be aware this plane exists if you are trying to place items lower than the floor you won’t be able to unless you manually adjust the position “y” value to be a negative number in the edit items list.
Building from a Blank Template
Learn more about building a scene with 3rd party 3d models for rooms/scenes here: Building from a Blank Template
Editing
Advanced Transform Controls
To use advanced transform controls:
- In your space click the Pencil+ menu icon
- Choose Start editing
- Again, in your space click the Pencil+ menu icon
- Choose Show items list
- Find the item you wish to adjust placement for, click Edit
- Click the button Show advanced transform controls
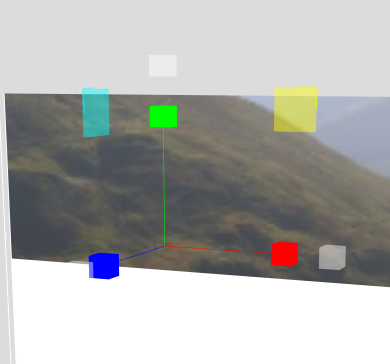
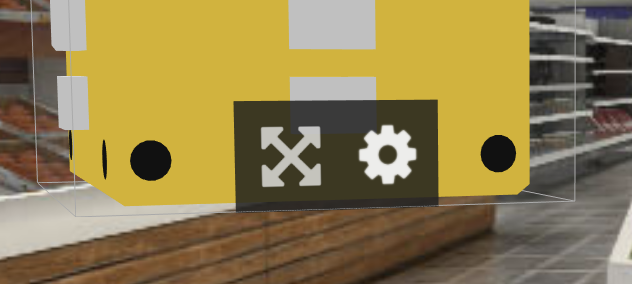
Now in the scene you will see a widget with axis and some extra buttons below the top toolbar.

Using Transform you can click the transform widget and drag the item in that axis to place it where you would like.
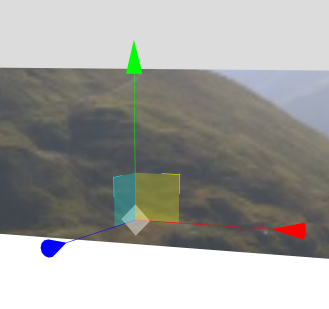
Using Rotate you can click the rotate widget and rotate the item in that axis.
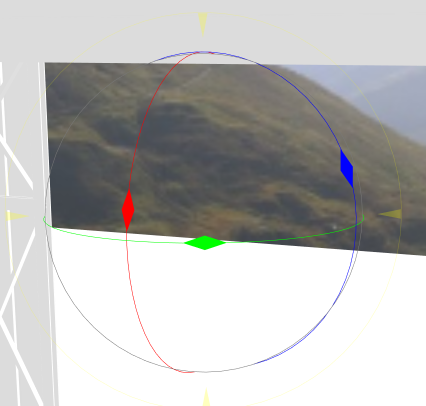
Using Scale you can click the scale widget and drag to adjust the item’s scale on any axis.
What is the recommended image size for the banners in the Virtual Conference space?
We follow the recommendations from the IAB (Interactive Advertising Bureau, iab.com). Any image with size equivalent to 970×250 pixels will fit the banners without distortion, though please note that the image must be rotated 90 degrees for the vertical banners (i.e. the dimensions of the image for vertical banners are 250×970).
The correct ratio for non-distorted images is therefore 97:25 for horizontal banners and 25:97 for vertical ones.
Navigation
Spawn (starting) hotspot
Where the user enters a scene is a special type of hotspot. With most templates when you arrive there are only the bots and you. Going into edit mode you can not move the spawn hotspot (you can’t move the hotspot you are currently occupying) so create a new hotspot in edit mode, stop editing, move to the new hotspot… now you can select and move the spawn hotspot in edit mode.
Be aware the spawn hotspot does not bring people exactly to that spot, but in a small radius around it randomly, this helps avoid when many users enter a space that their bodies are not inside each others.
Bringing Multiple Spaces together in a World
To do this, you will need to create a World in https://app.learnbrite.com/dashboard/worlds, and then add all the spaces you want to connect together in it.
Navigating to different Spaces in a World
See the actions sendUserToSpace and navigateTo
Note: you can also pop-up the locations menu, so that the user can choose which space they will go to instead of directing them to a specific one
See the action UI.openLocations
Example: call LB.Actions.navigateTo
Dialogue
[action:"navigateTo", spaceId:"YOUR_NEXT_SPACEID"] or [action:"UI.openLocations"] |
onclick
{"action":"navigateTo", "spaceId":"YOUR_NEXT_SPACEID"} or {"action":"UI.openLocations"} |
Script
LB.Actions.navigateTo({spaceId:"YOUR_NEXT_SPACEID"}); |
Optimization
My space loads slowly!
There are a couple of performance considerations to make when setting up a space. All the suggestions that follow should be weighed against the specific requirements of your experience. As an additional rule of thumb, if you are designing an experience targeting more powerful devices or areas with high connection speed, you can afford to have “heavier” scenes (i.e. scenes that include more objects, or more detail). LearnBrite items are optimized to be as light as possible.
More items = more things to load
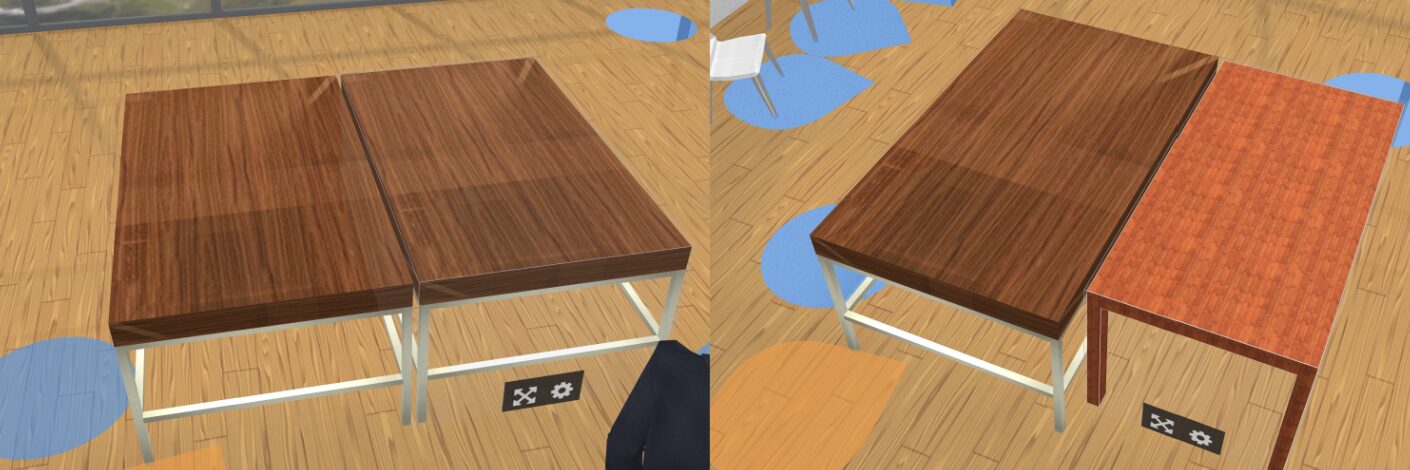
The more items are added to the scene, the heavier the scene will be to load. If multiple instances of a model are needed, it’s better to repeat the same model as opposed to having different ones.
For example, to fence off an area we might need 4 different fence models (one per side). By cloning the same model (i.e. a model with the same URL) multiple times, as opposed to using four different types of fence, fewer resources will be consumed. In the image below, the setup on the left will be more performant than the one on the right.
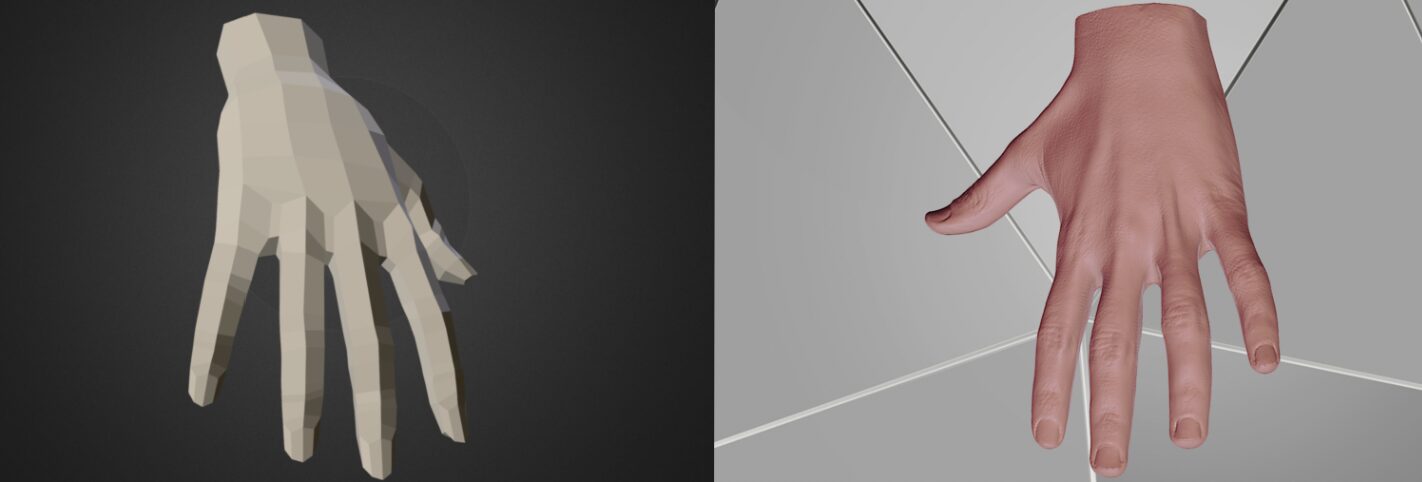
Realistic objects = heavier objects
While it depends on the optimization made by the original author, a good rule of thumb for models is that the more detailed they are, the heavier they will be to load. Conversely, “blockier” or more “angular” models are much lighter, as they include less polygons. It is often good to search for the “low poly” version of an object (e.g. by searching for “hand low poly”, or “office low poly”), and consider whether the detail on that object is acceptable.
In the example below, the hand on the left will load much quicker than the hand on the right.
Object scale ≠ object weight
An object might appear very small in the scene, but that does not guarantee that the object itself is lighter, as scale and detail are completely independent of one another.
Using cached resources
If you are using LearnBrite’s Storage solution, you should make sure that the assets loaded in the scene are loaded from it – or another CDN, in programmer-speak. You can confirm this by looking at the URL of the item (in the field lbAssetFile) in the object’s properties, it should start with https://cache.learnbrite.com. This will not help when a user first loads the space, but it will make any future visit load much faster.

A hint about the size of models can be found by their size on LearnBrite Storage, if the 3D model is uploaded there.
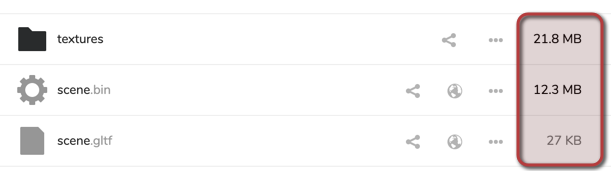
For instance, in the case of glTF models:
- If the model has a high complexity, the .bin file will be multiple megabytes; a 10MB .bin file might be acceptable if the model is of an entire room (i.e. it’s the “environment” in which you move), but otherwise you should consider optimizing the model, or choosing a different one.
- Texture size should also be kept in check, especially for mobile devices, by using either lossless compression (i.e. decreasing file size a bit without loss of quality, with e.g. ImageOptim on macOS, or FileOptimizer on Windows), or lossy compression (i.e. decreasing file size considerably with a loss of quality, the amount of which depends on the settings used – with tools such as Photoshop, or websites like https://compressor.io/ )
Using heuristics
Generally speaking, a 3D model that is well-optimized for the web (as opposed to e.g. realistic 3D games) will have a low polygon count, as well as small textures. It can be challenging to know the polygon count of an object without specialized tools, so we suggest using texture size as a heuristic: if textures are not well optimized chances are that the 3D model isn’t either. We are working on tools within the 3D interface that allow the user to know the size of an object when importing it in a space.
loadPriority
One other way to speed up initial load (and also be more accessible to older or less powerful devices) is to “stagger” the loading of objects in the scene by using loadPriority, which sets the loading step at which this object will be loaded, from lowest to highest. If multiple objects have different load priorities, the ones with the lowest number are loaded first; then the ones with a higher number; then the ones with a higher number still; and so on (e.g. all items with priority 1; then all items with priority 2; then with 3; etc.).
To enact this, edit the properties of each object in the scene (see “How do I… → Change the settings/properties of an object in 3D?”) and add a progressively higher number to the loadPriority field.
Let’s take the following scene as a clarifying example:
- 2 chairs (same model) with loadPriority 1
- 2 tables (same model) with loadPriority 2
- 1 armchair with loadPriority 3
- 1 lamp with loadPriority 3
The two chairs will be loaded first; then the two tables; then the armchair and lamp together.
It’s best to put “important” objects on a lower loadPriority than merely decorative ones, and to put especially heavy objects on their own level of loadPriority (i.e. make them the only item with that specific loadPriority).
How should I optimize my own models/textures?
There are a couple of aspects you can take into consideration to optimize your 3D models and textures.
- limit texture resolution as much as possible (for details that are further away from the user, e.g. a ceiling, we would suggest to go even lower than 1024)
- limit the number of materials (as they impact the number of drawcalls, the least materials the better)
- remove any triangles that are not visible
- remove any unnecessary detail from models (for instance, a ceiling can often be a simple plane, all detail given by the texture).
- bake shadows in the textures, which gives a much higher quality feeling with barely any cost
Why are some avatars semi-transparent?
If a number of avatars join the same space, some of them will start changing to a transparent version of themselves. This is done for reasons of performance, and is based on distance (avatars that are further away will be transparent, avatars that are close-by won’t).
This is also applied to the landing spot: it is usually very busy with avatars, which might impact users on less powerful devices that need to load all those avatars while they are still loading the 3D environment itself; immediately upon landing in a space, therefore, users will only see transparent avatars, which will progressively load into "real" ones. As soon as a user moves from their starting hotspot, the transparent avatar will change to the real avatar.
Space Settings
How do I change the settings of a space?
See “How do I… → Change the settings of a space/world?”
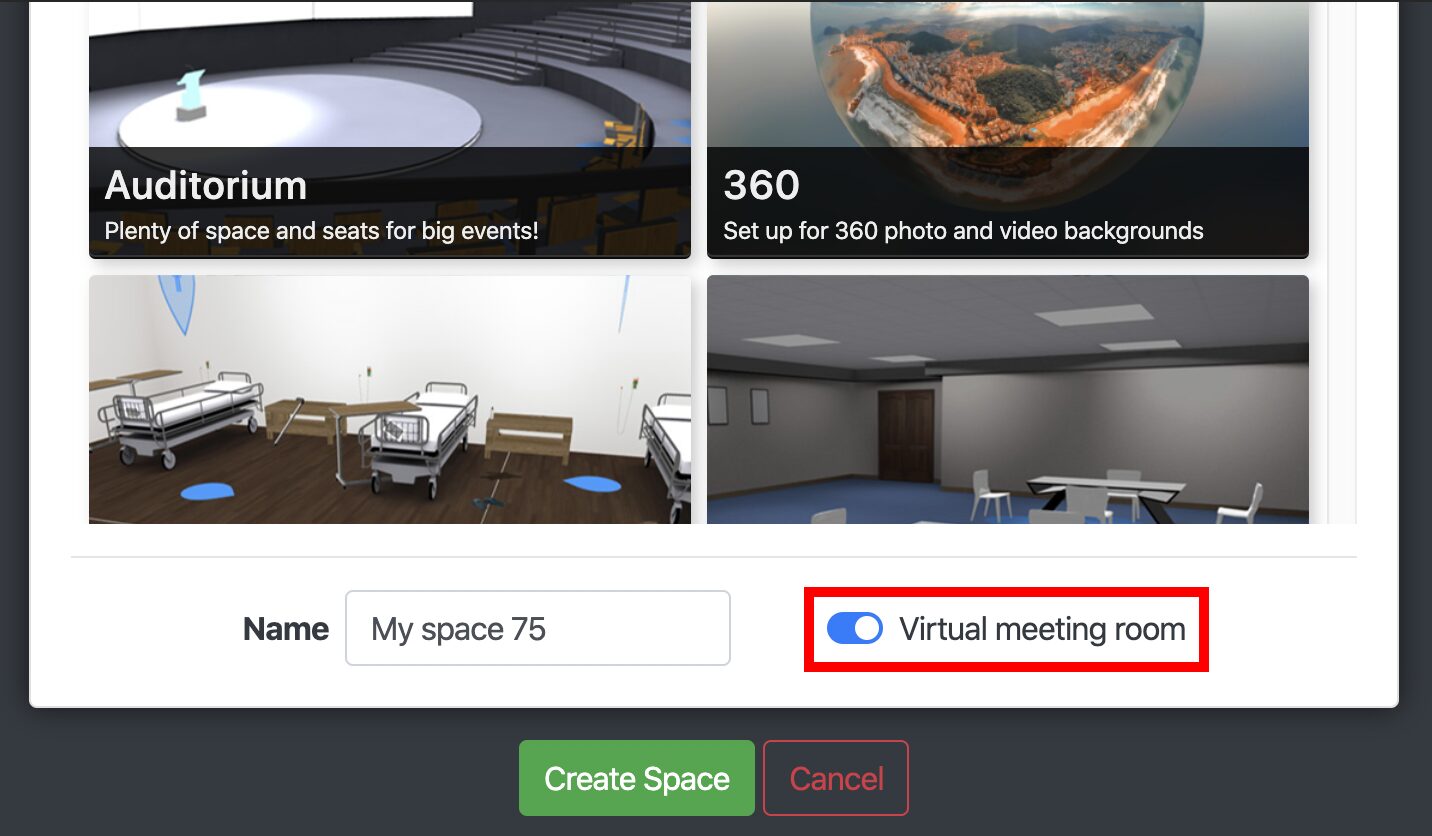
Virtual Meeting checkbox – collaborate in a space together
There are two ways to make a space or world multiuser: the first is by turning on the “Virtual meeting room” option when creating it:
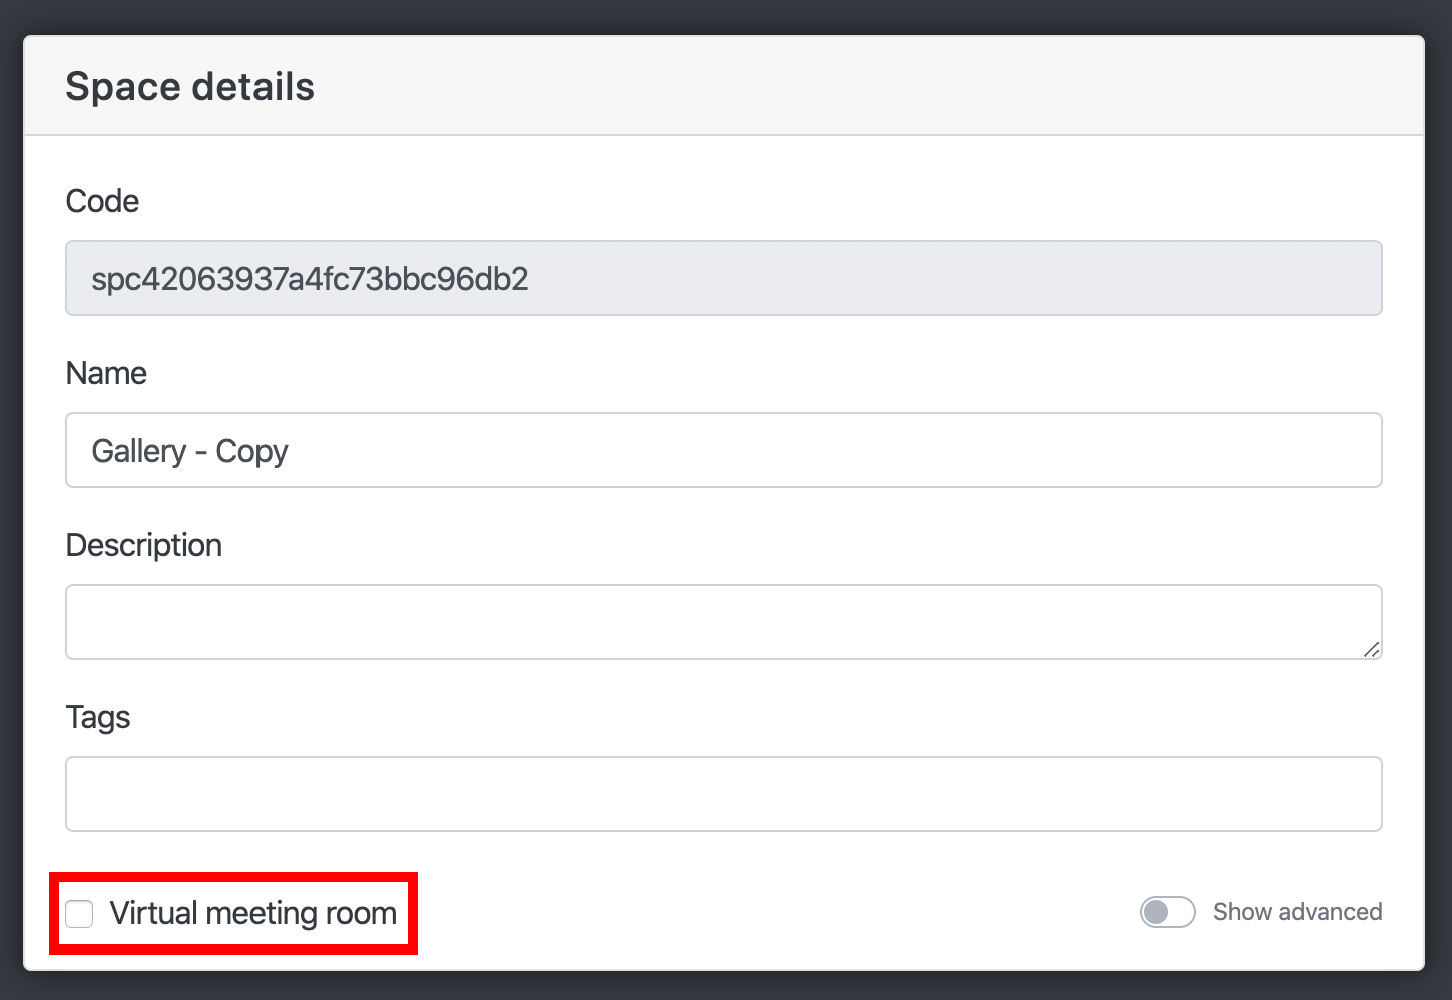
And the second is to turn it on by checking the “Virtual meeting room” checkbox in the edit page.
UI
What is the “goggles” icon supposed to do (on different devices)
- Toggle between 1st person and third person views on typical flat screen devices
- On mobile it may enter “magic window” mode
- On DayDream phones it will ask you to put the device in the headset
- In WebVR enabled browsers (with headsets connected) it will switch to immersive VR mode
Text-to-speech
The Chinese Female voice stops before finishing the sentence
Logographic writing (such as Chinese hanji or Japanese kanji, e.g. 中文) “tricks” the algorithm that calculates the length of text-to-speech.
If you are experiencing this issue, you can fix it by changing the “Enable time estimation for TTS” setting in the “Experimental settings” section of your space to “Disabled”. For a guide on how to do so, see the “How do I change the settings of a space?” section in this same guide.
Gamification
How can I track a score in ChatMapper?
Tracking a score for the user is done routinely with ChatMapper e-learning projects through variables.
1. Creating and updating the variable in ChatMapper
In ChatMapper, create a new user variable (CTRL+SHIFT+U) with a name of your choosing and an initial value of 0.
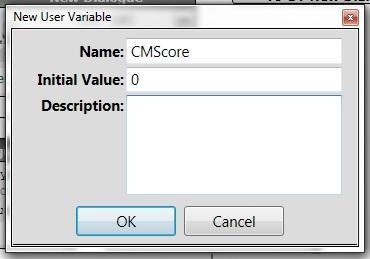
The same variable can also be created directly in code, by writing the following line in the Script Editor of the conversation’s first node.
Variable["CMScore"] = 0
The variable is thus declared and initialized (i.e. given an initial value), and can be then used during the scenario to record the learner’s progress, for instance by increasing it every time a correct answer is given.
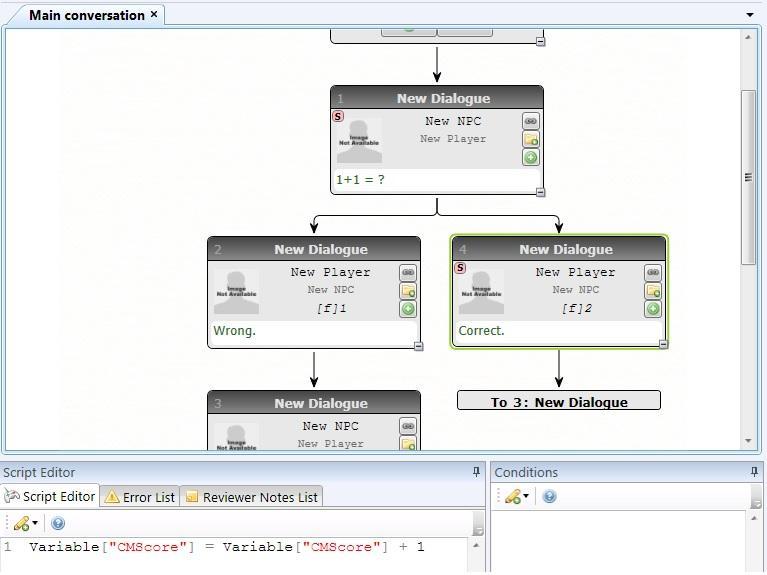
In this case, we’re increasing the CMScore variable by 1 for each correct answer, which can be done like so:
Variable["CMScore"] = Variable["CMScore"] + 1
2. Submitting the score
There is one last step in ChatMapper, which is to communicate the scenario’s outcome to the LMS. This can be done by calling “LB.Lms.submitScore”, like so:
LB.Lms.submitScore(Variable["CMScore"]);
Where Variable["CMScore"] will of course be the name of your variable, if it is different.
3. Publishing as a scenario
A series of video guides that go through the process step-by-step can be found here: https://learnbrite.com/vr-scenario-academy-scenario-authoring/. On a high level, this process consists of :
- Publish the scenario (will create a .json file)
- Create a new Scenario (https://app.learnbrite.com/dashboard/scenarios/create) and Upload the .json file
- Create a new space (and select the Scenario created in the previous step during creation).
How can I track a score within a space?
The easiest and quickest way to test that a score can be submitted by the platform to the chosen LMS is to create an object in the space, and call submitScore from it.
- In the edit menu, select “Add content”, then add any model (for instance you can search for “cube”)
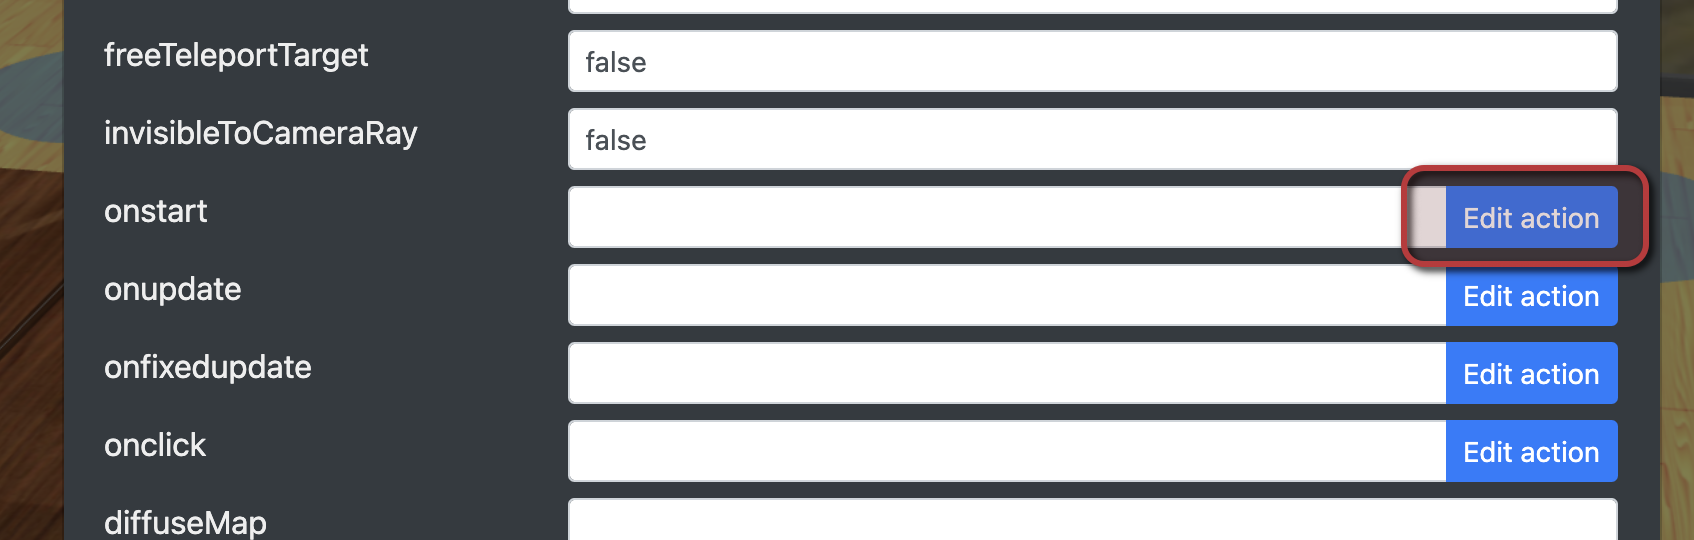
- After the model loaded, enter edit mode, and click on the gear icon
- In the onclick field, click on “Edit Action”

- Click on “More” (the rightmost of the blue buttons at the bottom)
- Select “Custom action” from the dropdown
- Fill it with the following parameters:
- Action Name: callFunction
- name: LB.Lms.submitScore
- parameter: 100
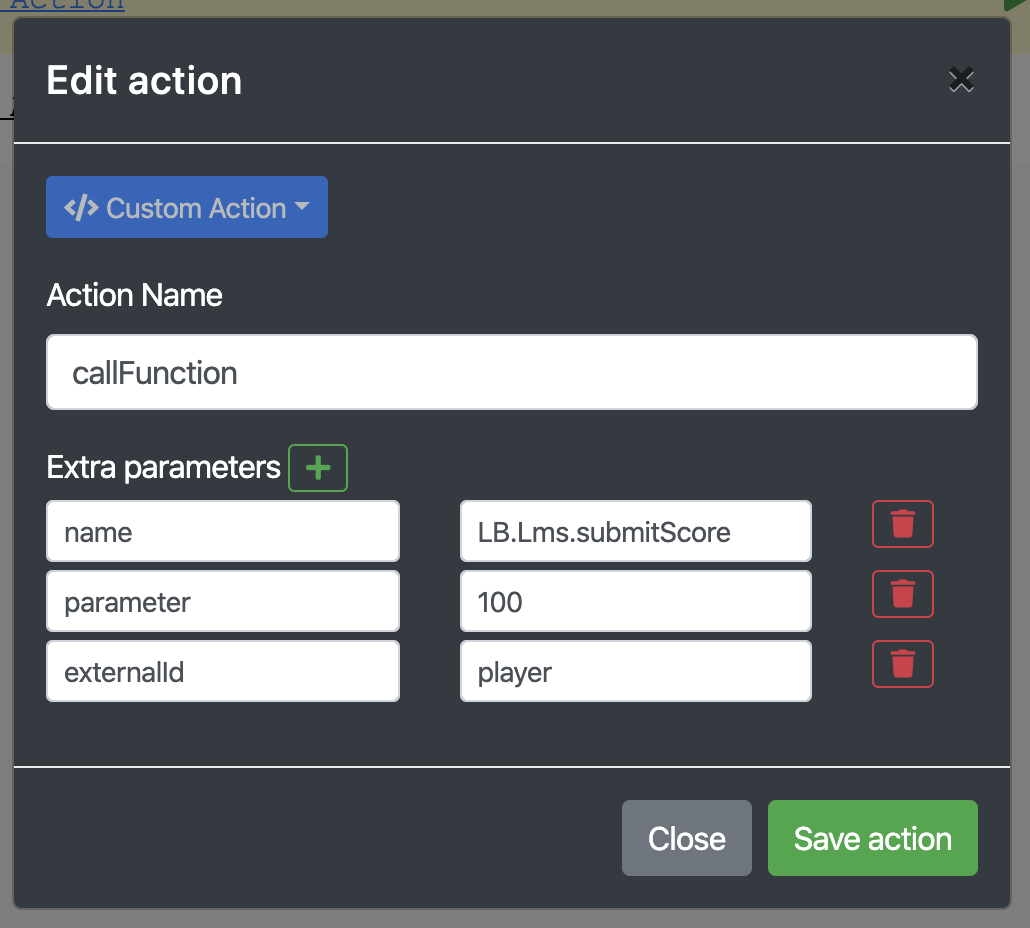
- Then click or tap on “Save action”, then “Save” at the bottom of the previous popup.
- Exit edit mode.
By clicking on the item now, a score of 100 will be submitted, and you can check that it’s reported correctly in your LMS of choice.
How can I add achievements?
For a complete guide about achievements/tasks, see the Trophio guide.
Actions
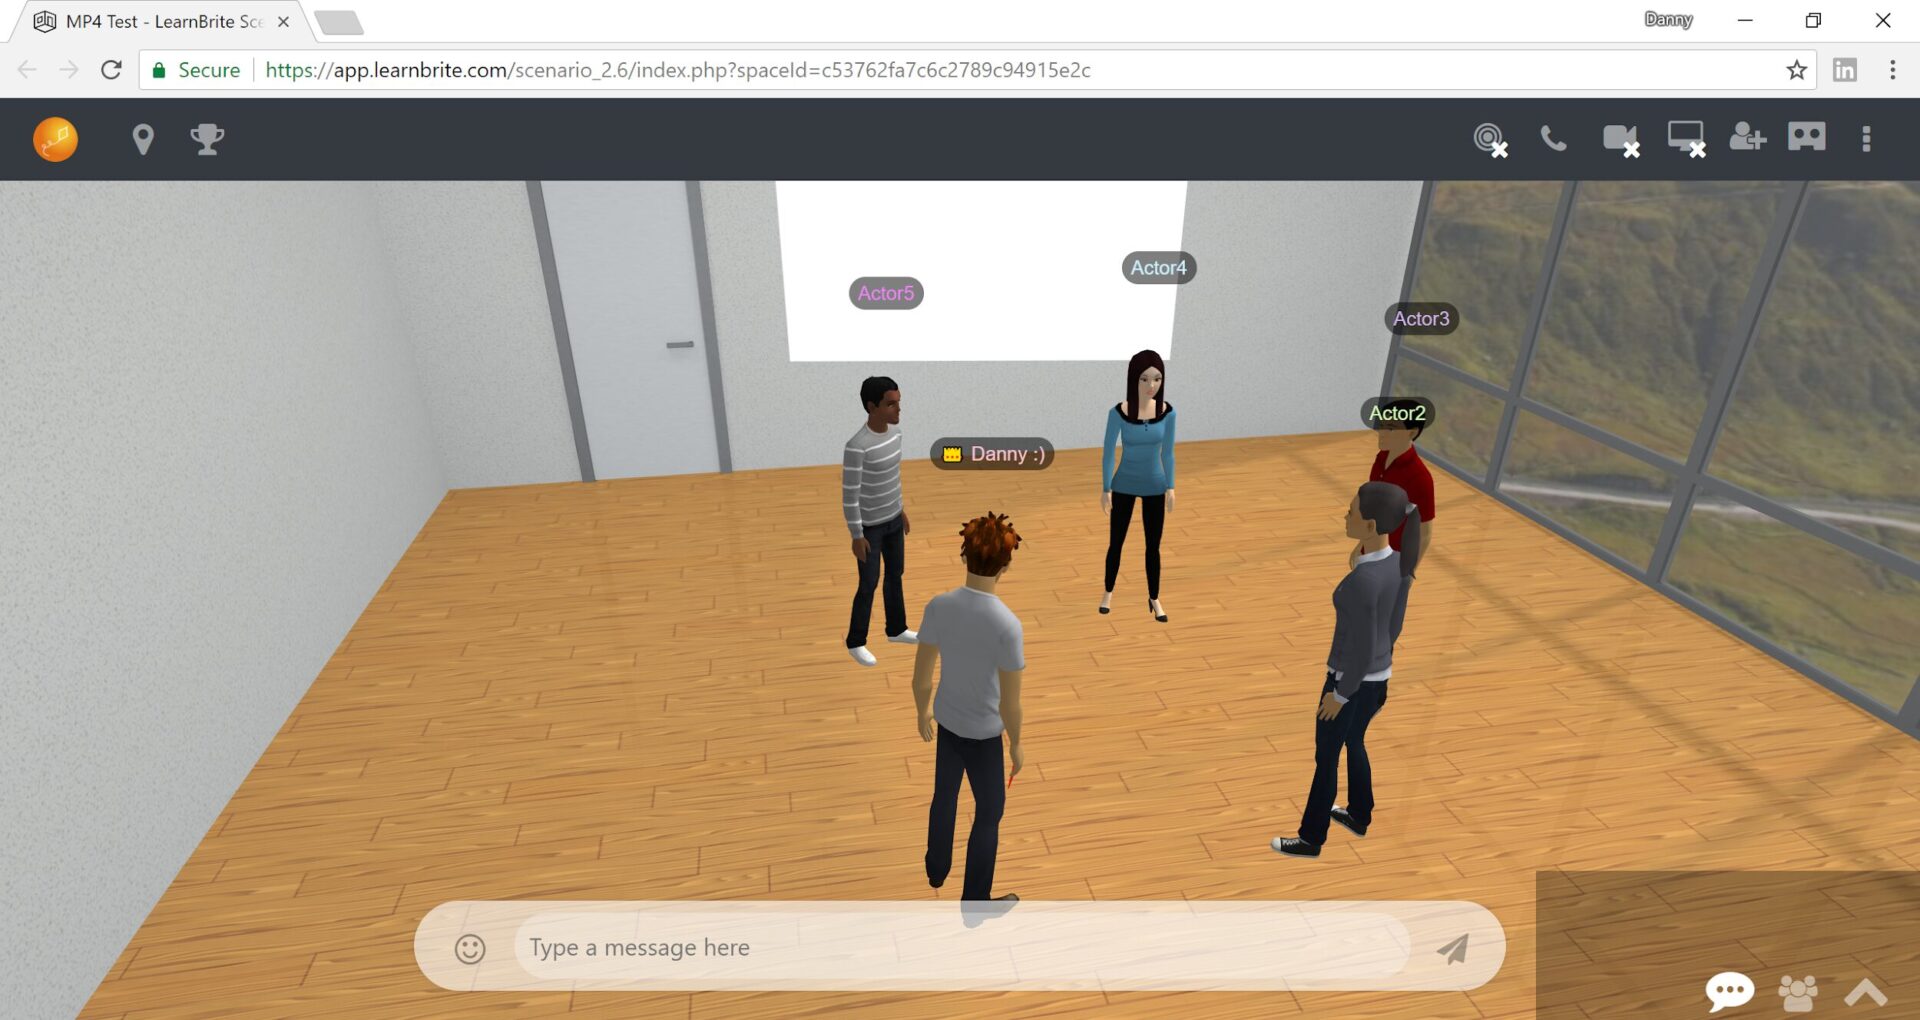
Make 3D items clickable and trigger actions (2.6+)
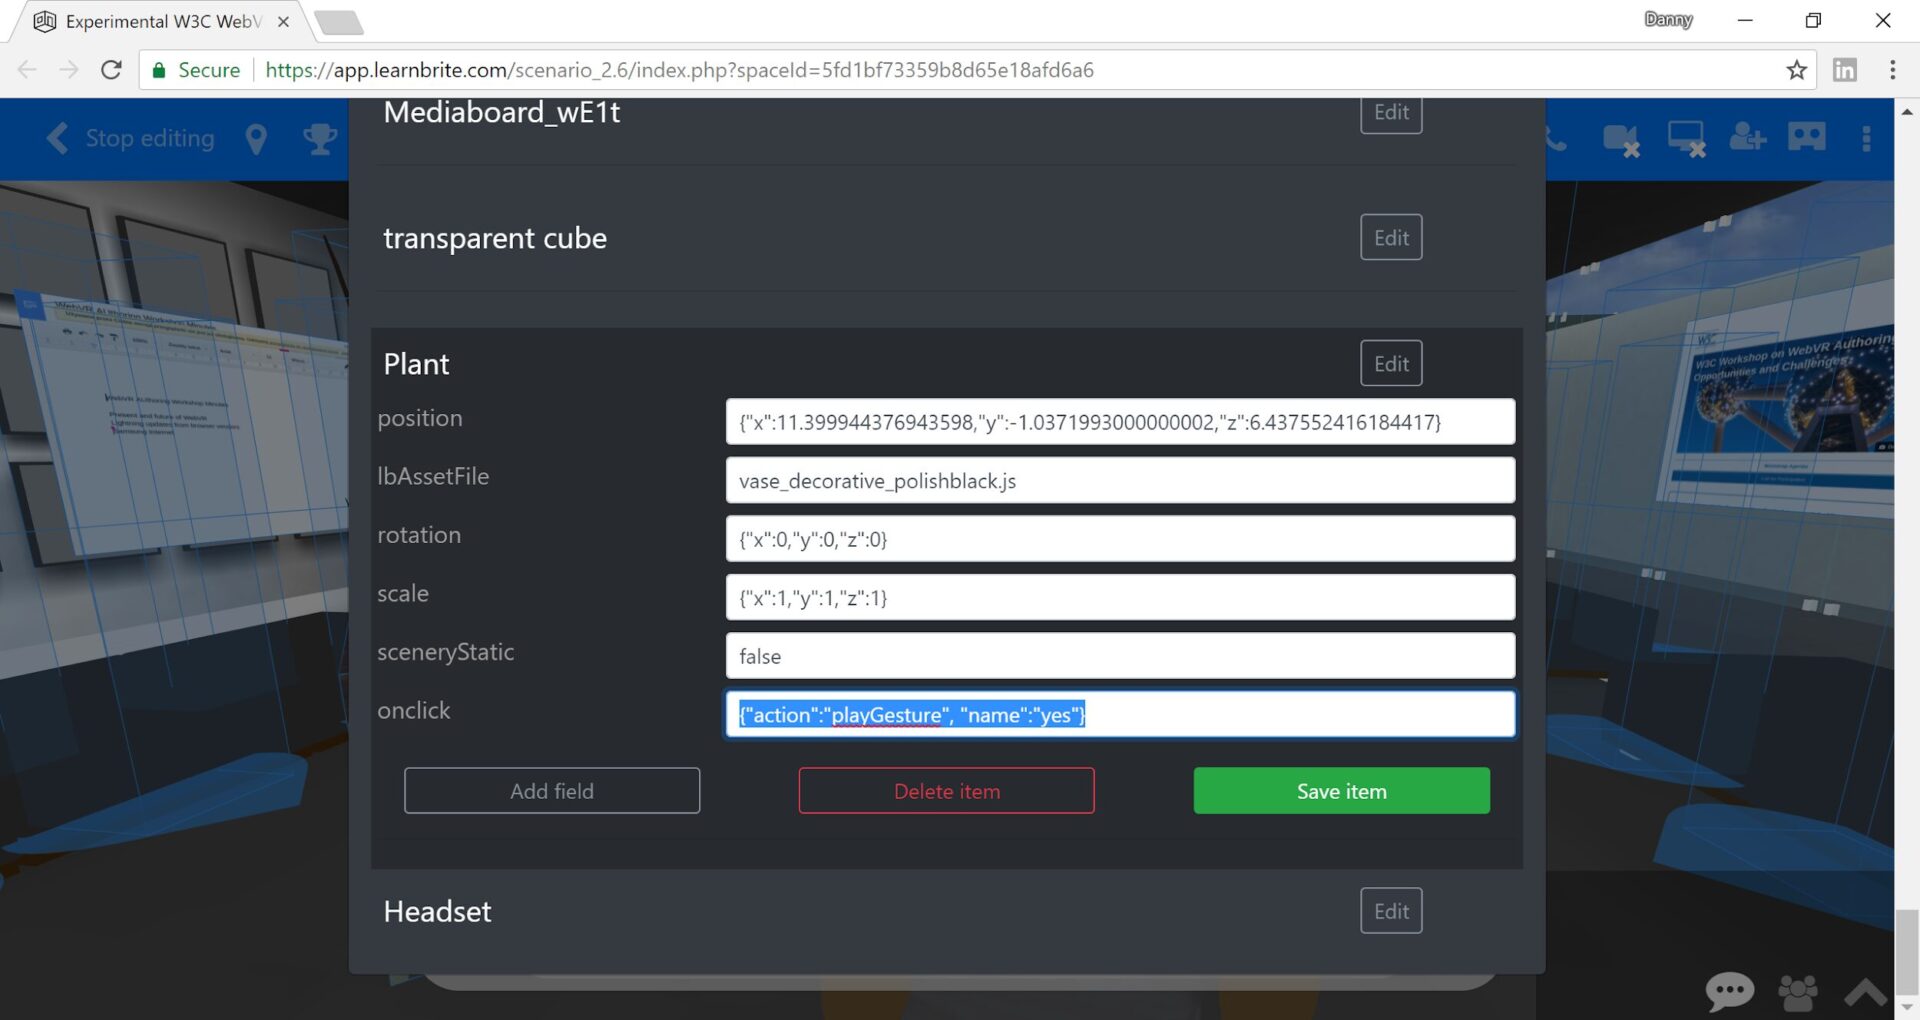
Version 2.6+ of scenario added onclick to supported fields for 3D items. (see Scenario Actions for more details on available actions).
Edit mode → Items List
In the example below we’ve added {"action":"playGesture", "name":"yes"} as an onclick event so now you can click on the Plant in the scene and your avatar will play the head-nodding gesture.
Make parts of a scene clickable (2.6+)
With Scenario version 2.6+ a new feature allows you to place transparent cubes in a scene and add an onclick trigger to them. This can be useful when you want to make static 3D models interactive. Often 3D models and scenes come as one combined model, using the transparent box trigger you can make parts of a scene responsive without needing to break the 3D model into separate components.
Edit mode → Items List → Add New Item
Name: BoxTrigger
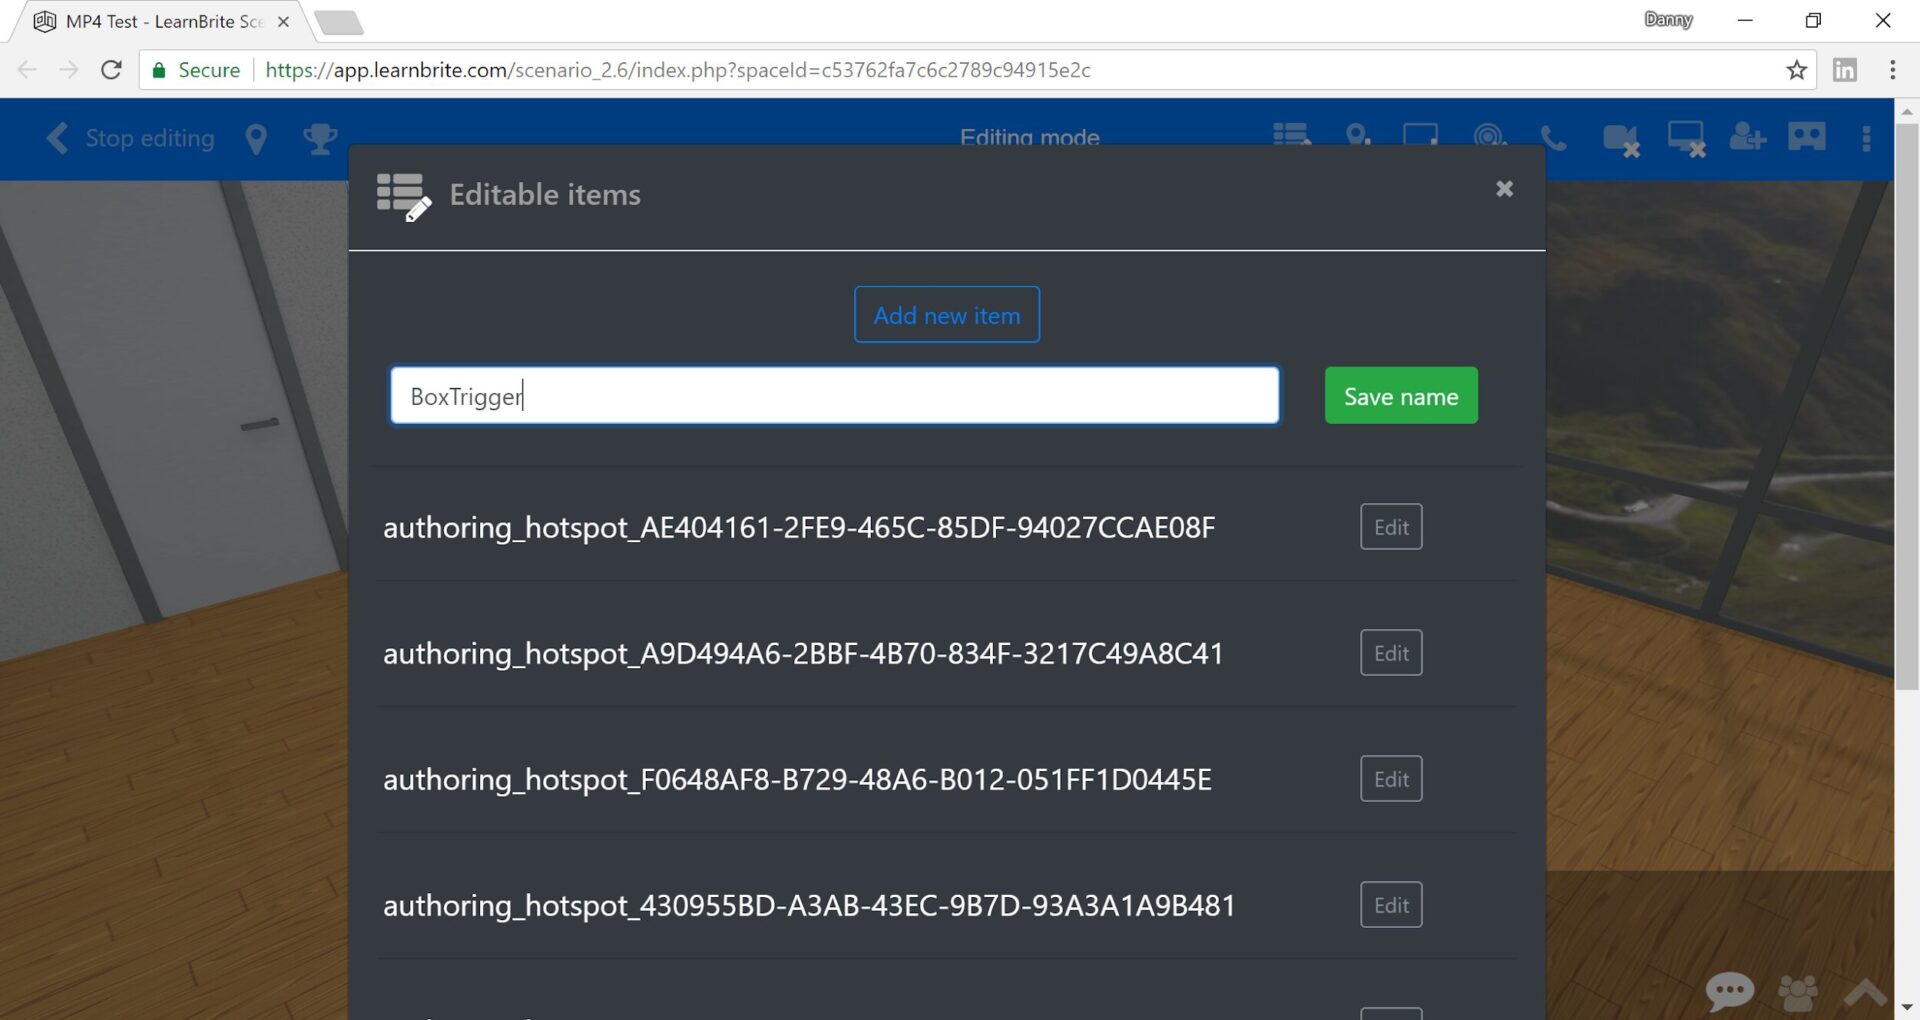
Click [Save name]
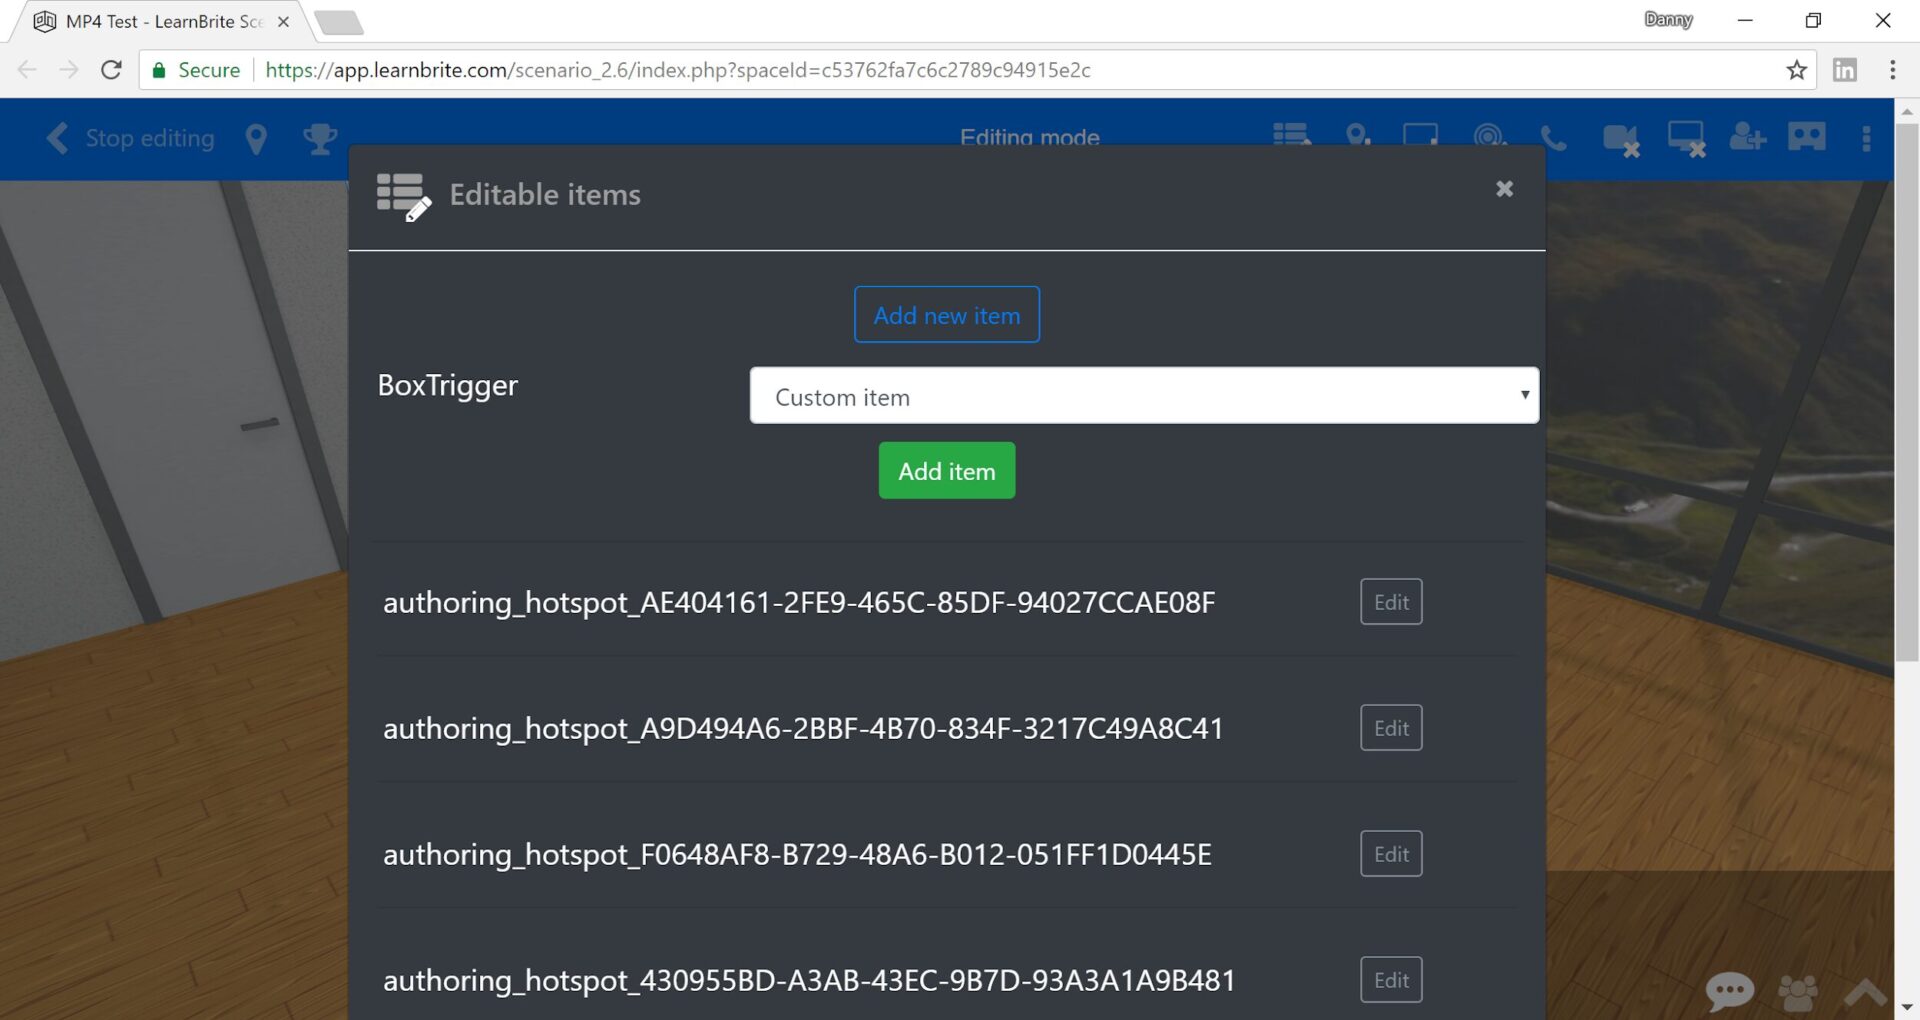
Choose `Custom item` and click [Add item]
Copy the following URL
https://app.learnbrite.com/assetdb/transparentcube.js |

Paste into the field, click [Add item]
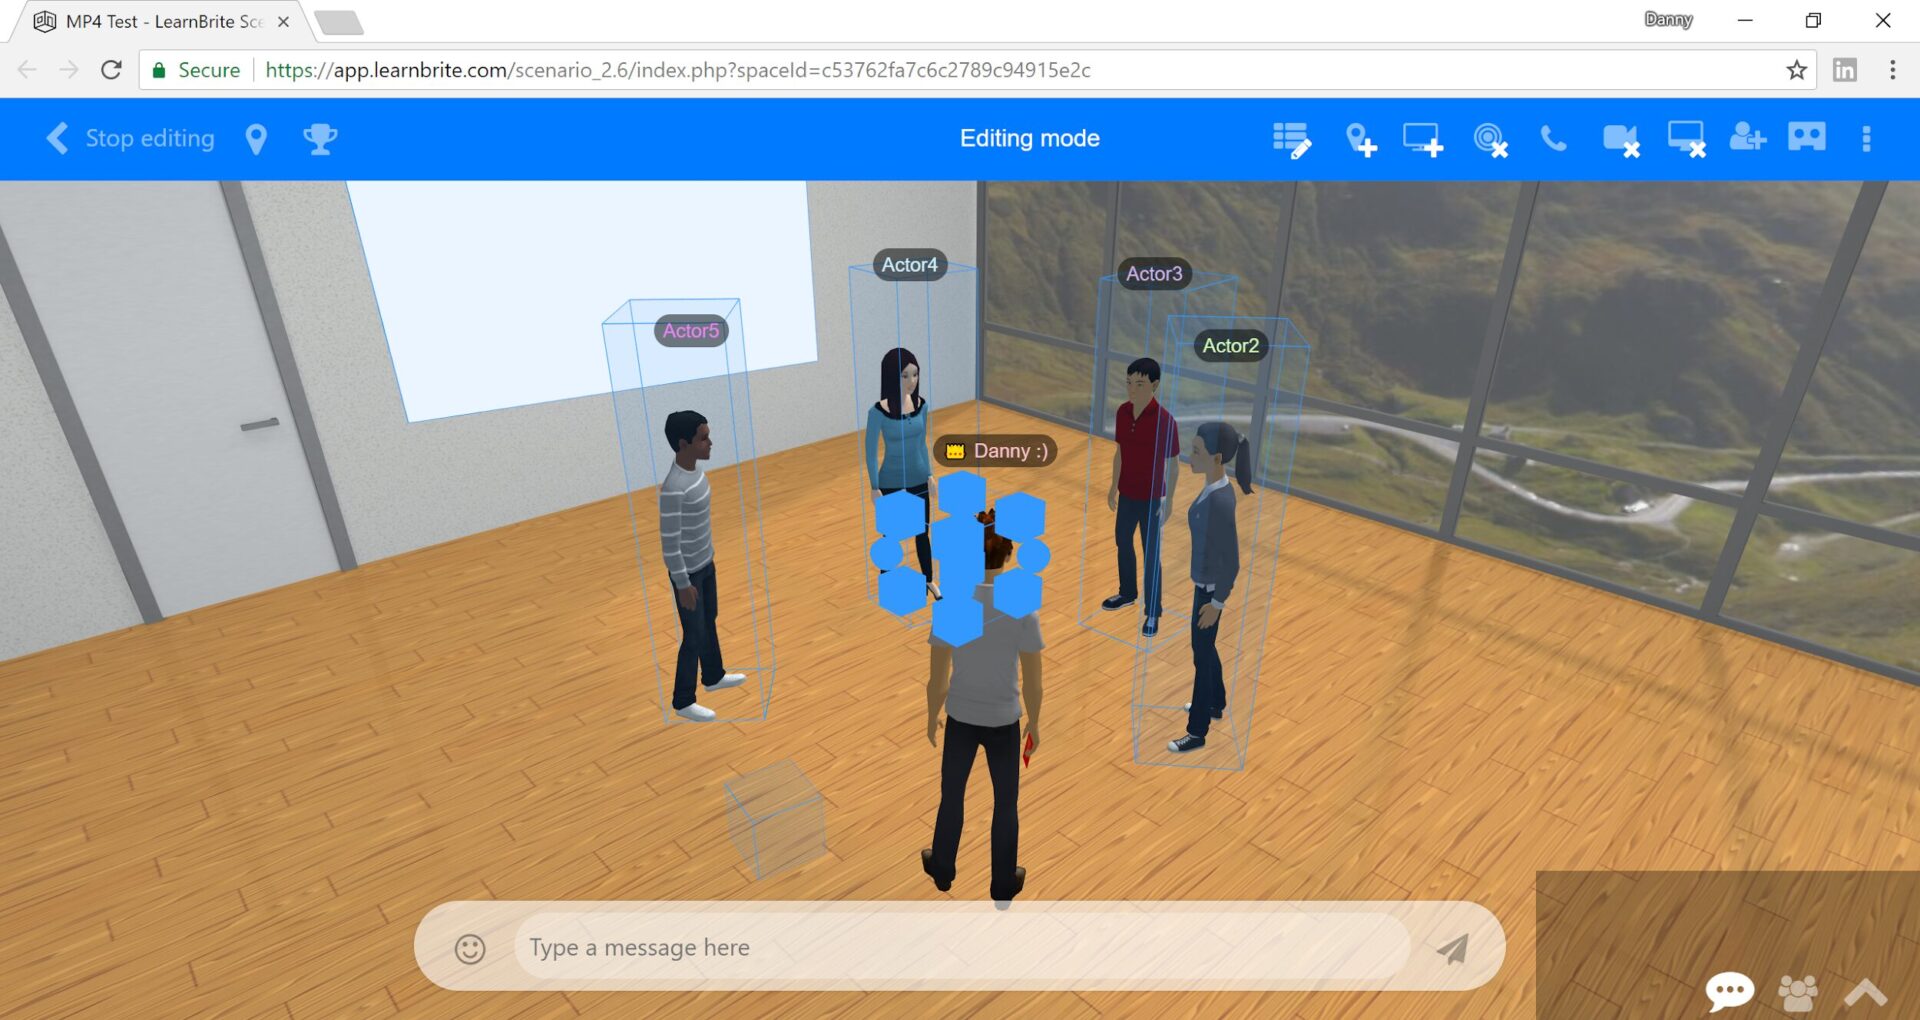
A transparent box appears in the scene.
Click the Edit list icon
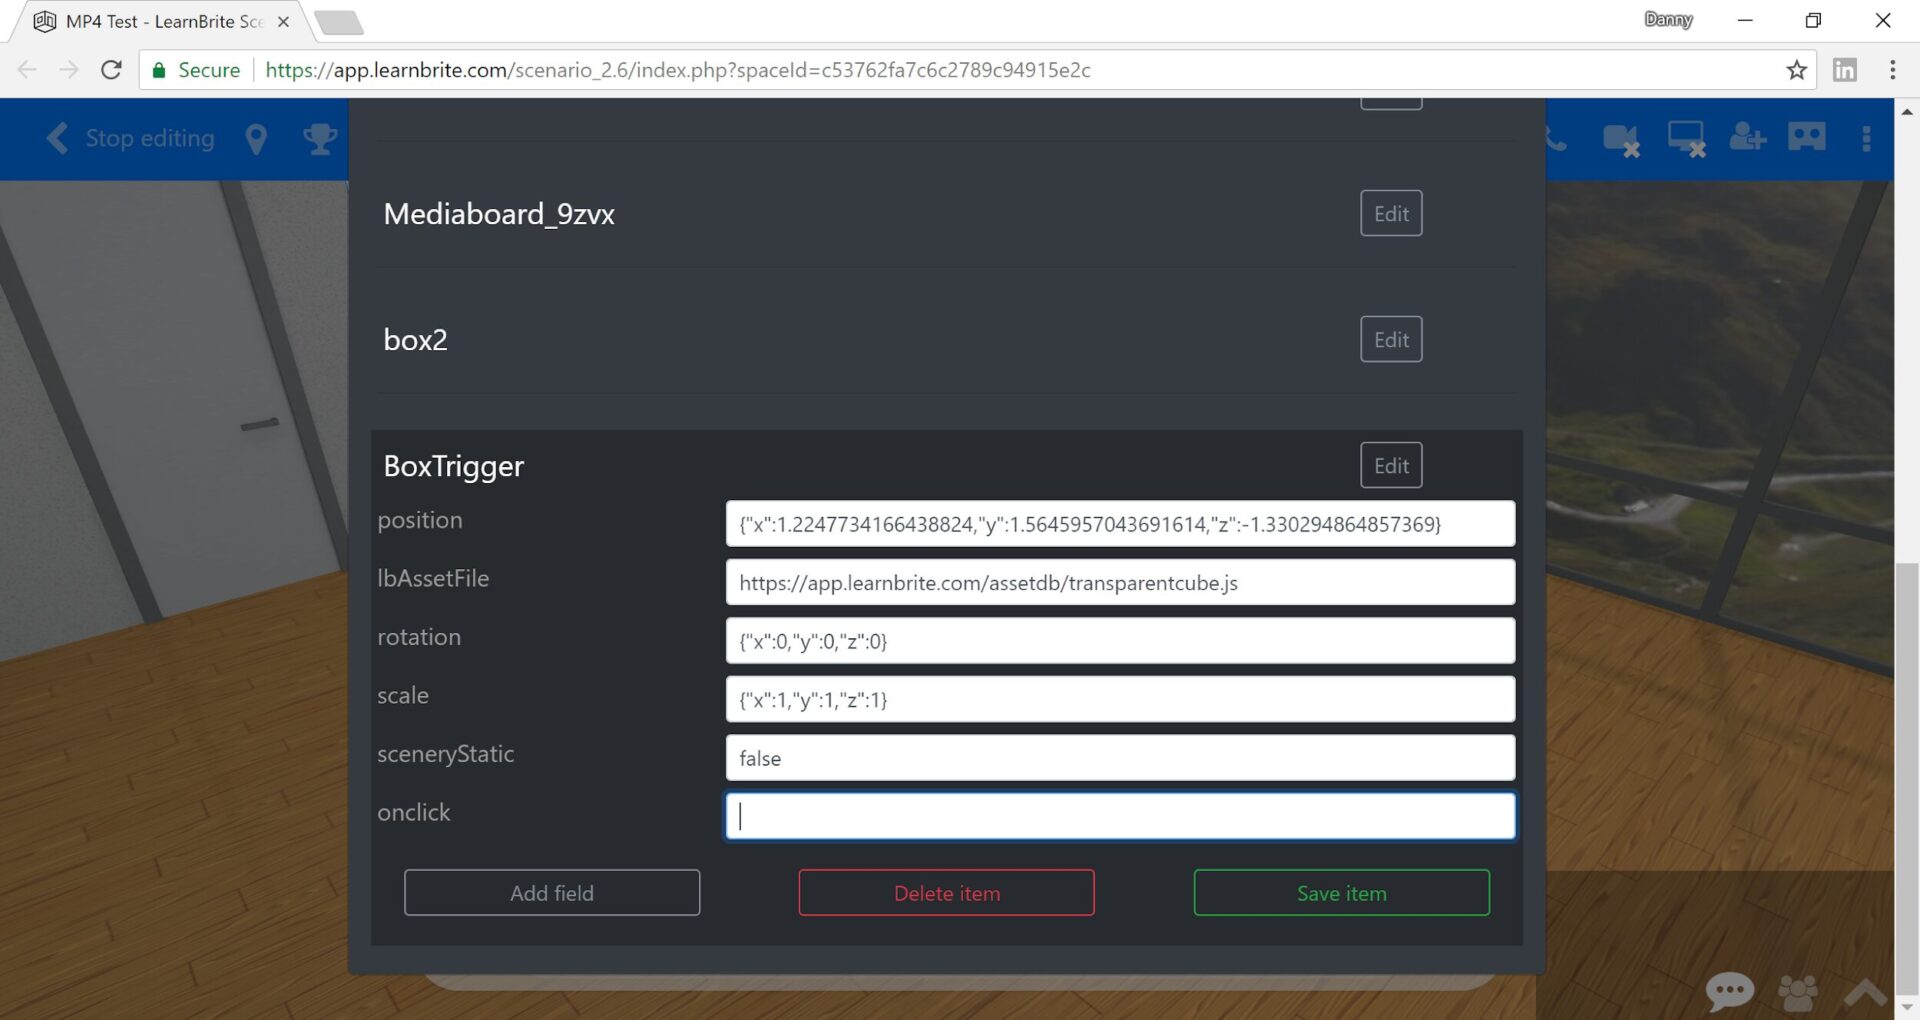
Find the BoxTrigger, click [Edit]
Now you can enter any scenario action you would like in the onclick field. (see Scenario Actions for more details on available actions).
For example, try the following:
{"action":"playGesture", "name":"yes"} |
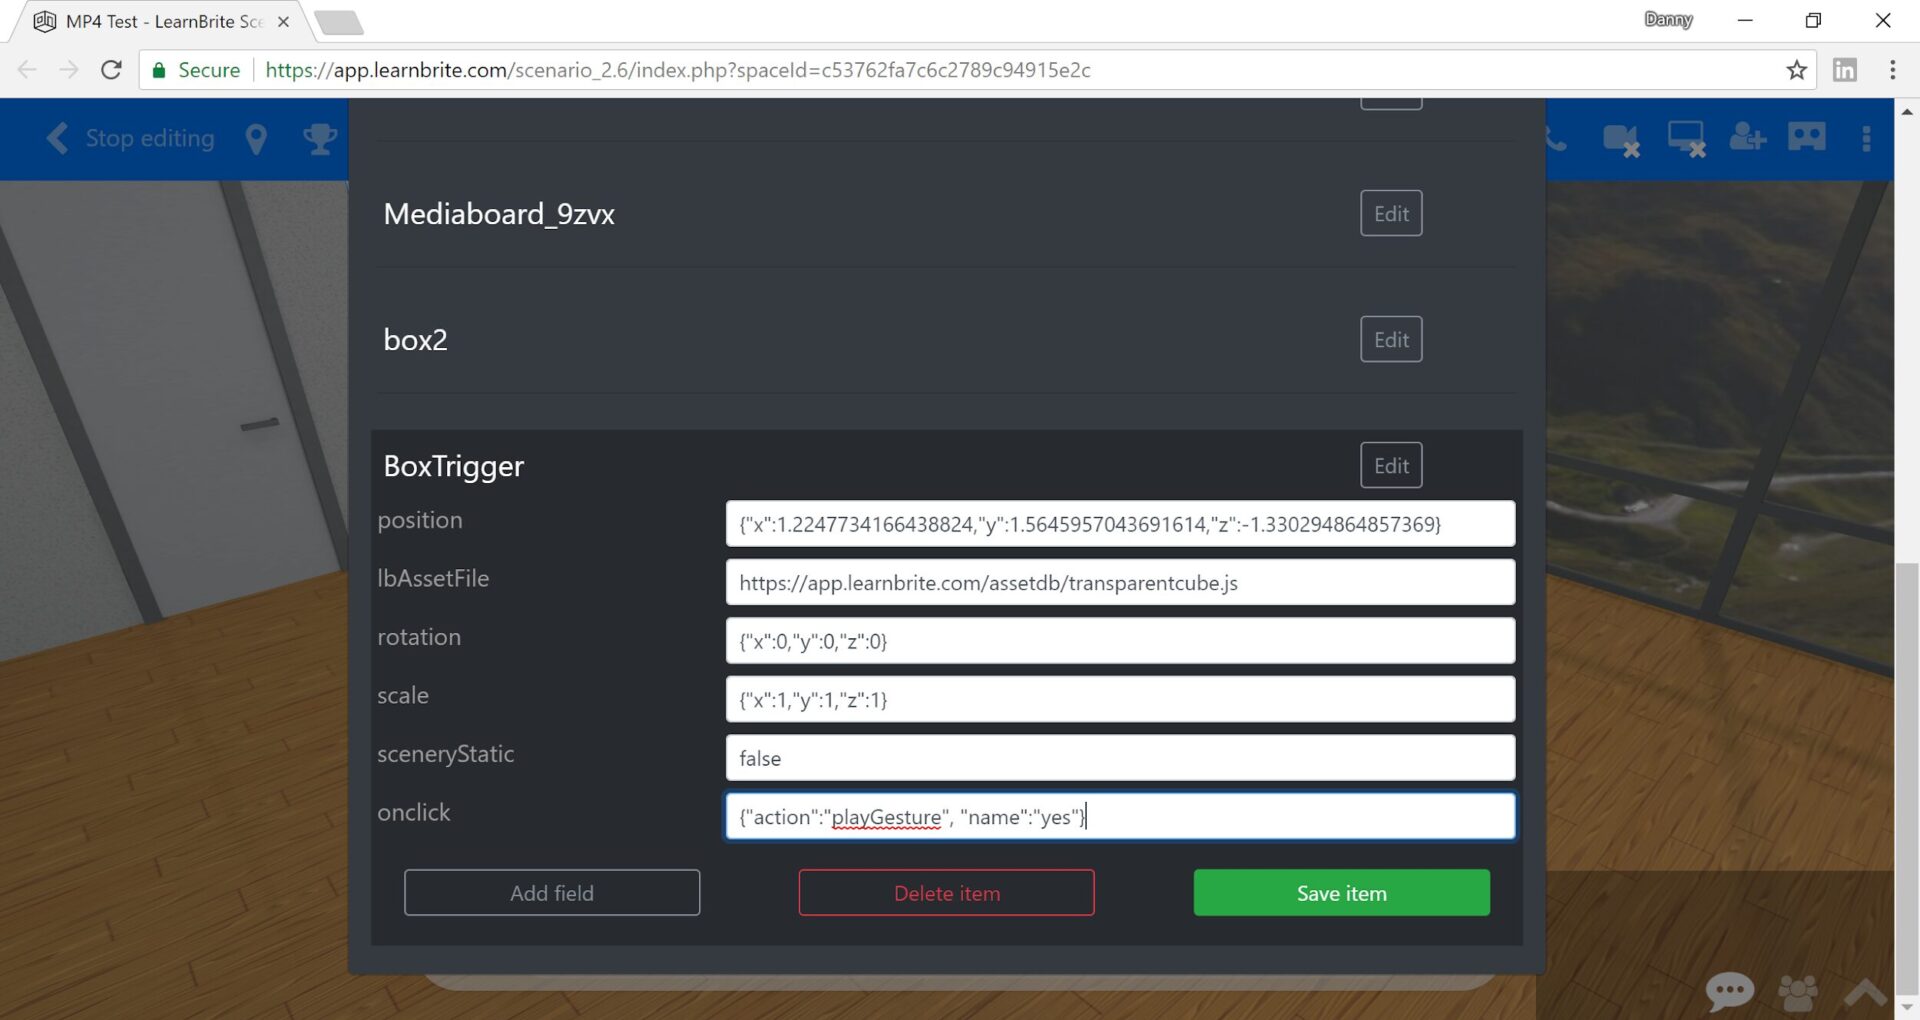
Click [Save item]
The box will be invisible in the scene, the mouse cursor will change when over the box. Clicking the box will trigger the action.
Stop Camera Position Changes after onclick action (2.9+)
Eg. I clicked an item and it did an action (play ambient) but it also changed my camera position in third person view.
To stop the camera position from being updated, set enterCMmode to false
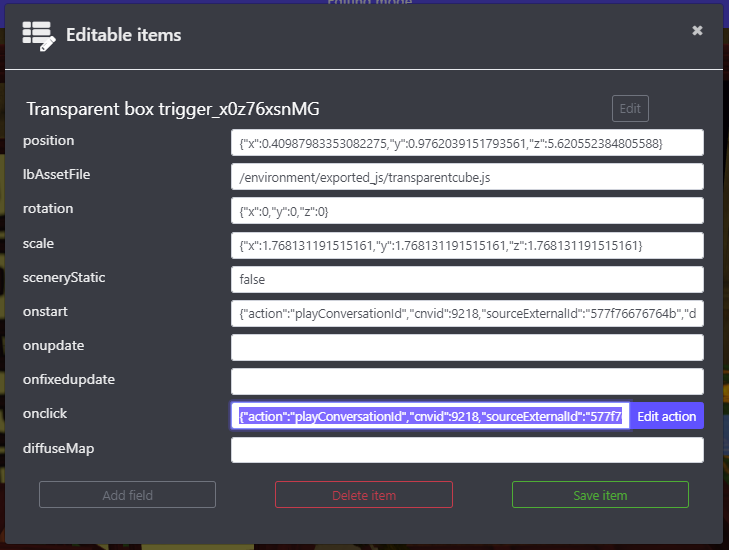
Eg. for your own onclick field change enterCMMode
{"action":"playConversationId","cnvid":9218,"sourceExternalId":"577f76676764b","delayMs":0,"executedFromEA":true,"getIntoCMMode":true} |
To
{"action":"playConversationId","cnvid":9218,"sourceExternalId":"577f76676764b","delayMs":0,"executedFromEA":true,"getIntoCMMode":false} |
And click the Save item button
How can I hide/show items?
Hide an item
LB.Utils.findItem("breathalizer").visible=false |
Show an item
LB.Utils.findItem("breathalizer").visible=true |
Fade out an avatar
LB.Utils.fadeObject(player().meshes,false); |
Fade out an item
LB.Utils.fadeObject(LB.Utils.findItem("breathalizer"),false); |
Fade in an item
LB.Utils.fadeObject(LB.Utils.findItem("breathalizer"),true); |
You can also set the duration of the fade and hook things for when it ends.
This is very advanced stuff but you are welcome to use it.
Note: We will be making Actions for these type of things in the future
Mediaboards
Which YouTube URL should I use?
There are three types of YouTube URLs:
- "Watch" URLs are the ones you get from the address bar in the browser: https://www.youtube.com/watch?v=m7atGkba-Z8
- "Youtu.be" URLs are the short URLs given by clicking on the "share" button: https://youtu.be/m7atGkba-Z8
- "Embed" URLs are obtained by clicking on the "share" button, and then on the "embed" one within the popup; there is a URL within the <iframe> code, which is the one we are referring to: https://www.youtube.com/embed/m7atGkba-Z8
Watch URLs play the video directly on the mediaboard since version 2.9, as if it were a screen. This also happens in VR.
Although YouTube is great for experimental and proof of concept productions, occasionally the API may not respond when playing video directly in the 3D environment. For commercial productions, we recommend using services such as Vimeo, uploading your videos to our included platform storage, or simply playing videos as popups with YouTube embed URLs |
Youtu.be and embed URLs before 2.11 created a popup that could not be customized, and didn’t show anything in VR. Since 2.11, those URLs create a popup that uses the displayVideo action, and can therefore be customized with the same parameters, and they work in VR as if they were watch URLs.
Multiuser / Conferencing
Roles
Information about roles and their capabilities can be found on our guide to User Roles.
Setting the maximum number of visible avatars in a meeting space
Hyperspace has capacity for more than 10000 participants in one space.
Visibility of avatars is optimized to avoid overcrowding and to respect performance of end user devices. Although more than 10000 participants may be in the same space the platform will be optimized to show a sub-set of visible avatars.
There are two variables you can change for a Space
maxUsers – the maximum number of users allowed in a space after which new visitors will be notified the space is full
LB.scenarioConfig.currentScene.maxUsers = 10000; |
If you need to restrict the number of maxUsers to a particular space or world less than that of your subscription contact support.
instanceMaxUsers – the maximum number of users in a space before a new instance is created
LB.scenarioConfig.currentScene.instanceMaxUsers = 150; |
See https://hyperspace.mv/academy/dashboard-parameters/#hqiyjrwfcz7jr
What is the Maximum number of users in a space?
Regarding the number of users accessing an environment, that is effectively unlimited; as more and more users access the environment, the Hyperspace Metaverse Platform creates "instances" in which they see a limited number of participant avatars (typically 150, see https://hyperspace.mv/academy/dashboard-parameters/#hqiyjrwfcz7jr ), plus presenters and editors which are always visible to 100% of the participants. This way even users on lower-end hardware, or older browsers, can have an enjoyable experience.
For multiuser, the number of supported users depends on your license:
- VR Scenario does not include multiuser
- VR Workplace supports max 25 concurrent participants per account
- VR Campus supports max 1000 concurrent participants per account
- Enterprise or one-off events support more than 10000 concurrent participants
In addition, conferencing has limits based on the features used:
- audio conferencing using the built-in solution supports up to 250 users per room (including those joining by phone)
- many-to-many video conferencing using the built-in solution supports up to 50 participants
- one-to-many video conferencing ("webinar mode") supports a variable number of users based on the number of streams published: up to 25 simultaneous presenter broadcasts and up to 15000 participant viewers
- an HLS video streamed into the platform supports many thousands of users
Integrations (e.g. the Zoom integration) can have different limits set by the provider. Higher amounts are also available on request.
iOS 12 Chrome does not support Audio and Video conferencing
We recommend using Safari.
ChatMapper
Treating Variables in ChatMapper as Text or Number
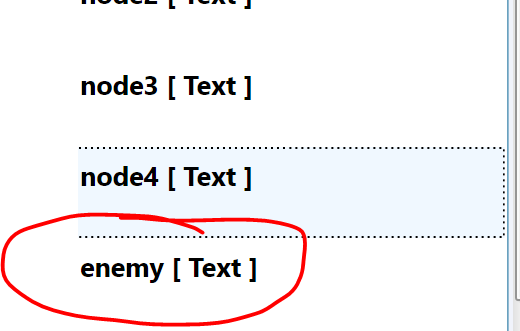
I'm watching a ChatMapper variable in the dialogue system and it’s increasing like a string rather than a number
enemy: "10" |
in the ChatMapper file an example script node shows
Variable["param4"] = Variable["param4"] + 100 |
So why would `enemy` be treated like a Text string rather than a Number?
Answer: Initial value for variables in ChatMapper
If you don’t supply an initial value the Variable will be treated as a Text variable
by setting initial value to 0 it now shows as
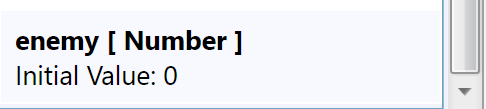
Scenario will now treat the Variable as a number
enemy: 4 |
Troubleshooting ChatMapper Exports
- Ensure you have only one conversation set to Autoplay (since version 2.7.5 in case an author mistakenly adds more than one conversation as Autoplay a popup list will appear allowing the user to choose one of the conversations marked as Autoplay)
- If you create a new conversation (rather than using the Explore, Actor2, Actor3, Actor4, Actor5) be sure to click the first node of the tree and select the location `Sample location`
- Leave the Player actor’s avatar_externalId blank so the user gets their own avatar look (you can use this however if you want to override the players actor for a roleplay scenario, eg. forcing them to appear as a male nurse)
- If you have added any files, make sure that each file is referenced only once. If the same file is referenced in more than one place (for instance an SFX mp3 referenced in two different nodes), exporting as ChatMapper package (CMPKG) will fail. To get around this, you can create a copy of the file for each different time you use it, and give it slightly different names. Some suggested schemes:
- Adding a digit to the end of the filename, e.g. correct_answer.mp3 and correct_answer2.mp3
- Creating a folder with the filename, and in it placing 1.mp3, 2.mp3, etc., so the final result are paths like correct_answer/1.mp3 and correct_answer/2.mp3
Why do some actions (e.g. displayImage) skip the node afterwards?
Some actions will progress the conversation to the next node before effectively “pausing” it, so when the conversation resumes it will seem like a node was skipped. We suggest adding an empty node after such actions to prevent this behaviour, if needed.
Known Issues
Action editor
How can I add a button to the Action editor? Do I need to use ChatMapper?
For branching conversations ChatMapper is required, however you can add a button if your conversation is linear, for example if you need a “Start” button. You can add the button like so:
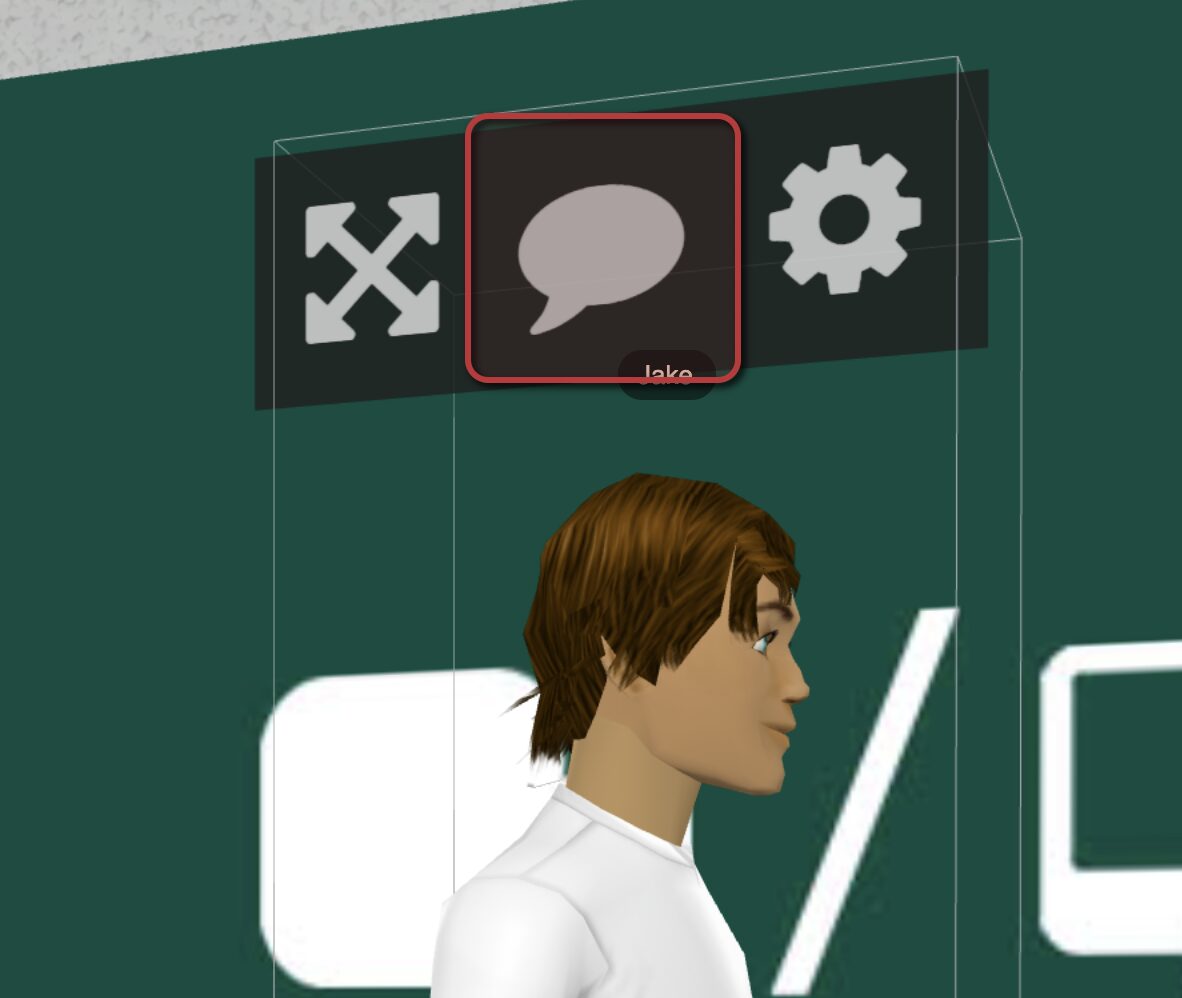
1. Open the Action editor (either by clicking on the speech bubble icon on a bot, or on the “Edit action” buttons in an object’s configuration popup)
2. Click on “More” at the bottom of the popup
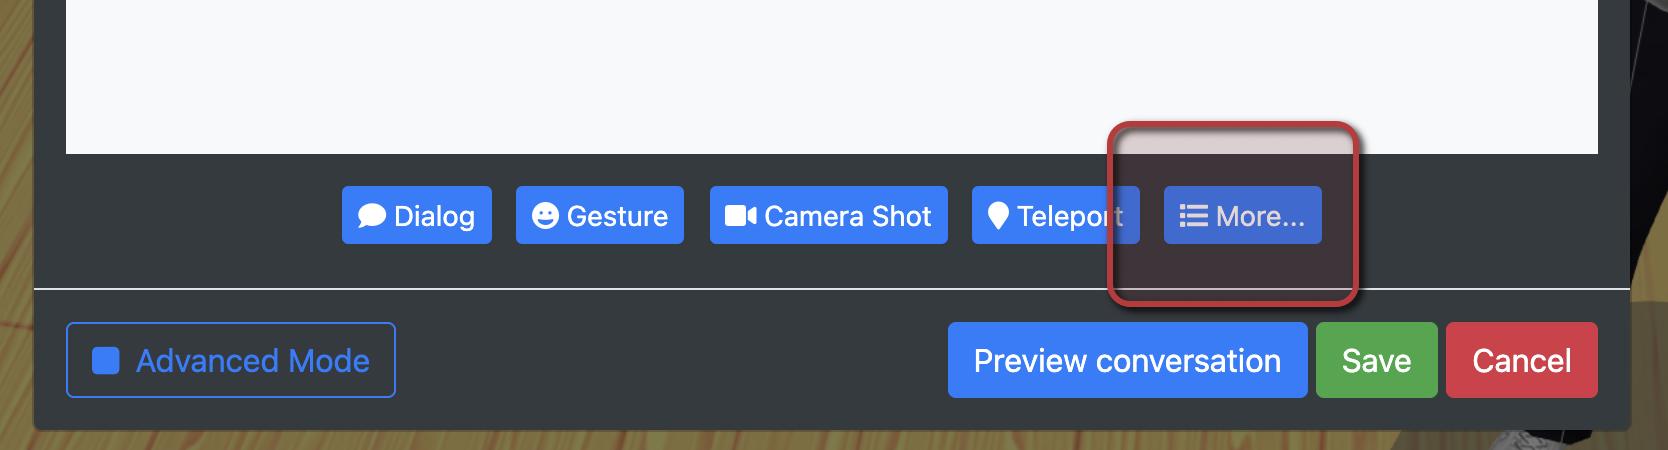
3. Select “Script”
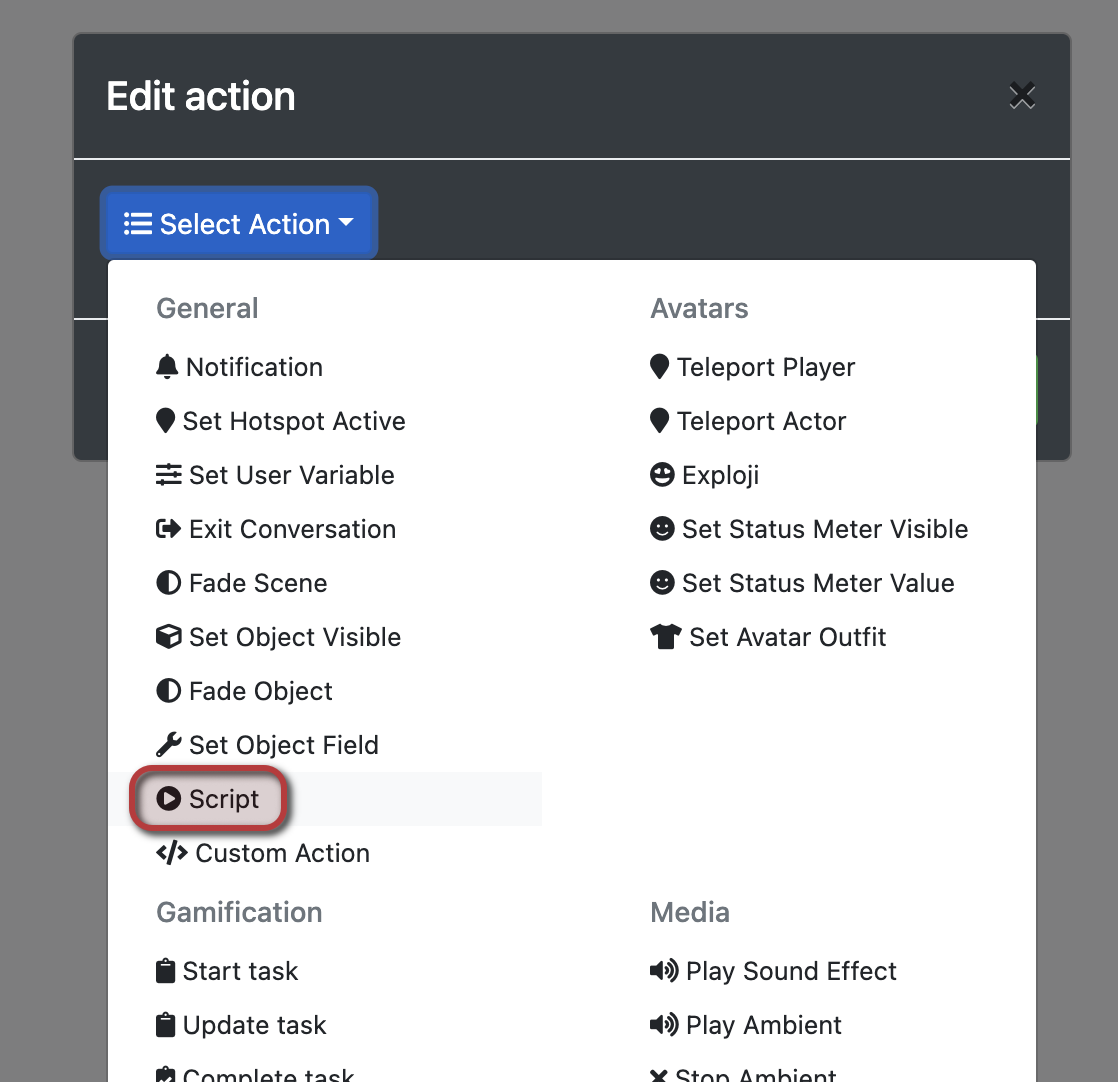
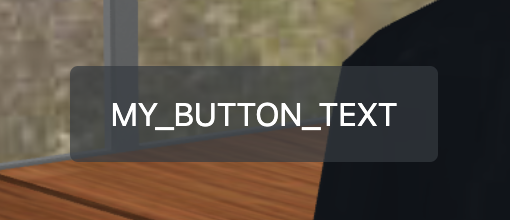
4a. Add the following script (you can of course modify the text in the first line)
var buttonText = "MY_BUTTON_TEXT"; |
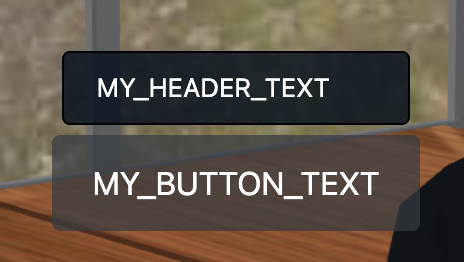
4b. If you want the button to have a header, use this script instead:
var buttonText = "MY_BUTTON_TEXT"; |
HLS streams
HLS streams do not appear on iOS 14
This is an issue on Apple’s side, and is fixed in iOS 14.2. Our recommendation is to make sure affected users have a quick way to access the stream directly, for example by having an additional mediaboard linking to the direct URL on top of the stream’s mediaboard (which can be set up by using the “openURLInNewWindow” action, see Scenario Actions) or ask them to load the experience on another device.
3D editing
I cannot remove 3D items from my space
- In version 2.7 or earlier you can not remove 3d items that are included in 3d templates
- In the Seminar room, Auditorium, and Boardroom, the furniture is baked into the template and cannot be moved/removed
Error messages
Component couldn't load
This error message appears when there was some issue loading one of the components required to run the platform. Normally this is a one-time network related error that will disappear by reloading. If the issue persists, please check the details below.
ResponsiveVoice
Some browser extensions might block the text-to-speech library used by the platform. You might need to review the browser settings and allow the library to load. When ResponsiveVoice fails to load, voice will be disabled in Scenario. Subtitles will be used as a fallback, but some advanced conversations might not work properly.
Browser/Device Compatibility
Safari: too many redirects
Safari has a feature called “Intelligent Tracking Protection” (ITP) whose objective is to block cross-site tracking, but at times it can conflict with standard login processes; it can be disabled by doing the following:
iOS
- Open the Settings app
- Scroll down to Safari and tap on it
- Scroll down to “Prevent Cross-Site Tracking”
- Toggle it off so that it is white
macOS
- Open Safari
- Click on “Safari” at the top left of your screen
- Click on “Preferences…”
- Click on the “Privacy” tab
- Uncheck “Prevent cross-site tracking”
Android Firefox
In Android Firefox, avatars do not display. This is a known issue and has no fix at this time.
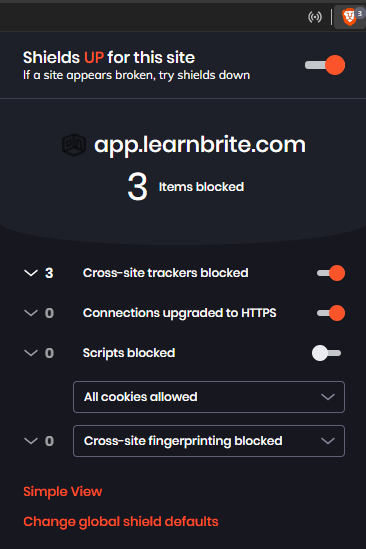
Brave Browser
Default settings in Brave browser cause a looping reload of any experience.
Compatibility with Brave browser can be achieved by choosing the Brave shield in the URL bar changing the default "Cross-site cookies blocked" to "Allow all cookies".
Complex environments on iOS
iOS imposes fairly strict limitations on browser memory, which can be triggered during load and can end up showing a white screen. If your users are experiencing this, see “My space loads slowly!” in the Optimization section, especially the part about “loadPriority”.
