World Landing Pages are used as a simple registration system for managing or automating participant access. Registration supports two identifiers Name and optionally Email.
Jump to:
Force guest accounts to provide an email
Self-registration/waiting list
Restrict who can access the world
Restrict when the world can be accessed
Enabling the landing page
This feature is only available on worlds, from version 2.15 |
To enable the feature, turn on “Landing page” in the Experimental section of a world’s settings.
- For instructions on how to change the version of a world, see “How do I… → Change the version of a space/world?”
- For instructions on how to access a world’s settings, see “How do I… → Change the settings of a space/world?”

Accessing the landing page
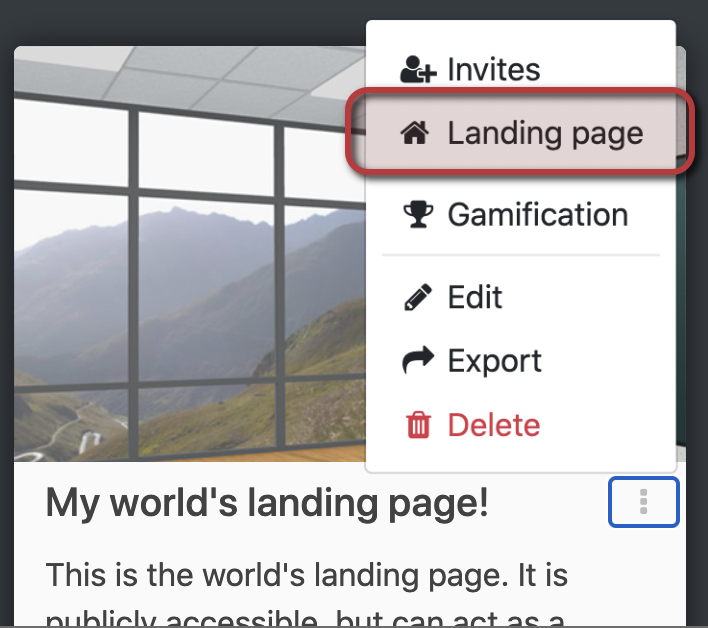
Once the feature has been enabled, a new option will appear in the world’s triple-dot menu. Clicking on it will bring you to the landing page.
Customizing the landing page
What appears on the landing page can be customized.
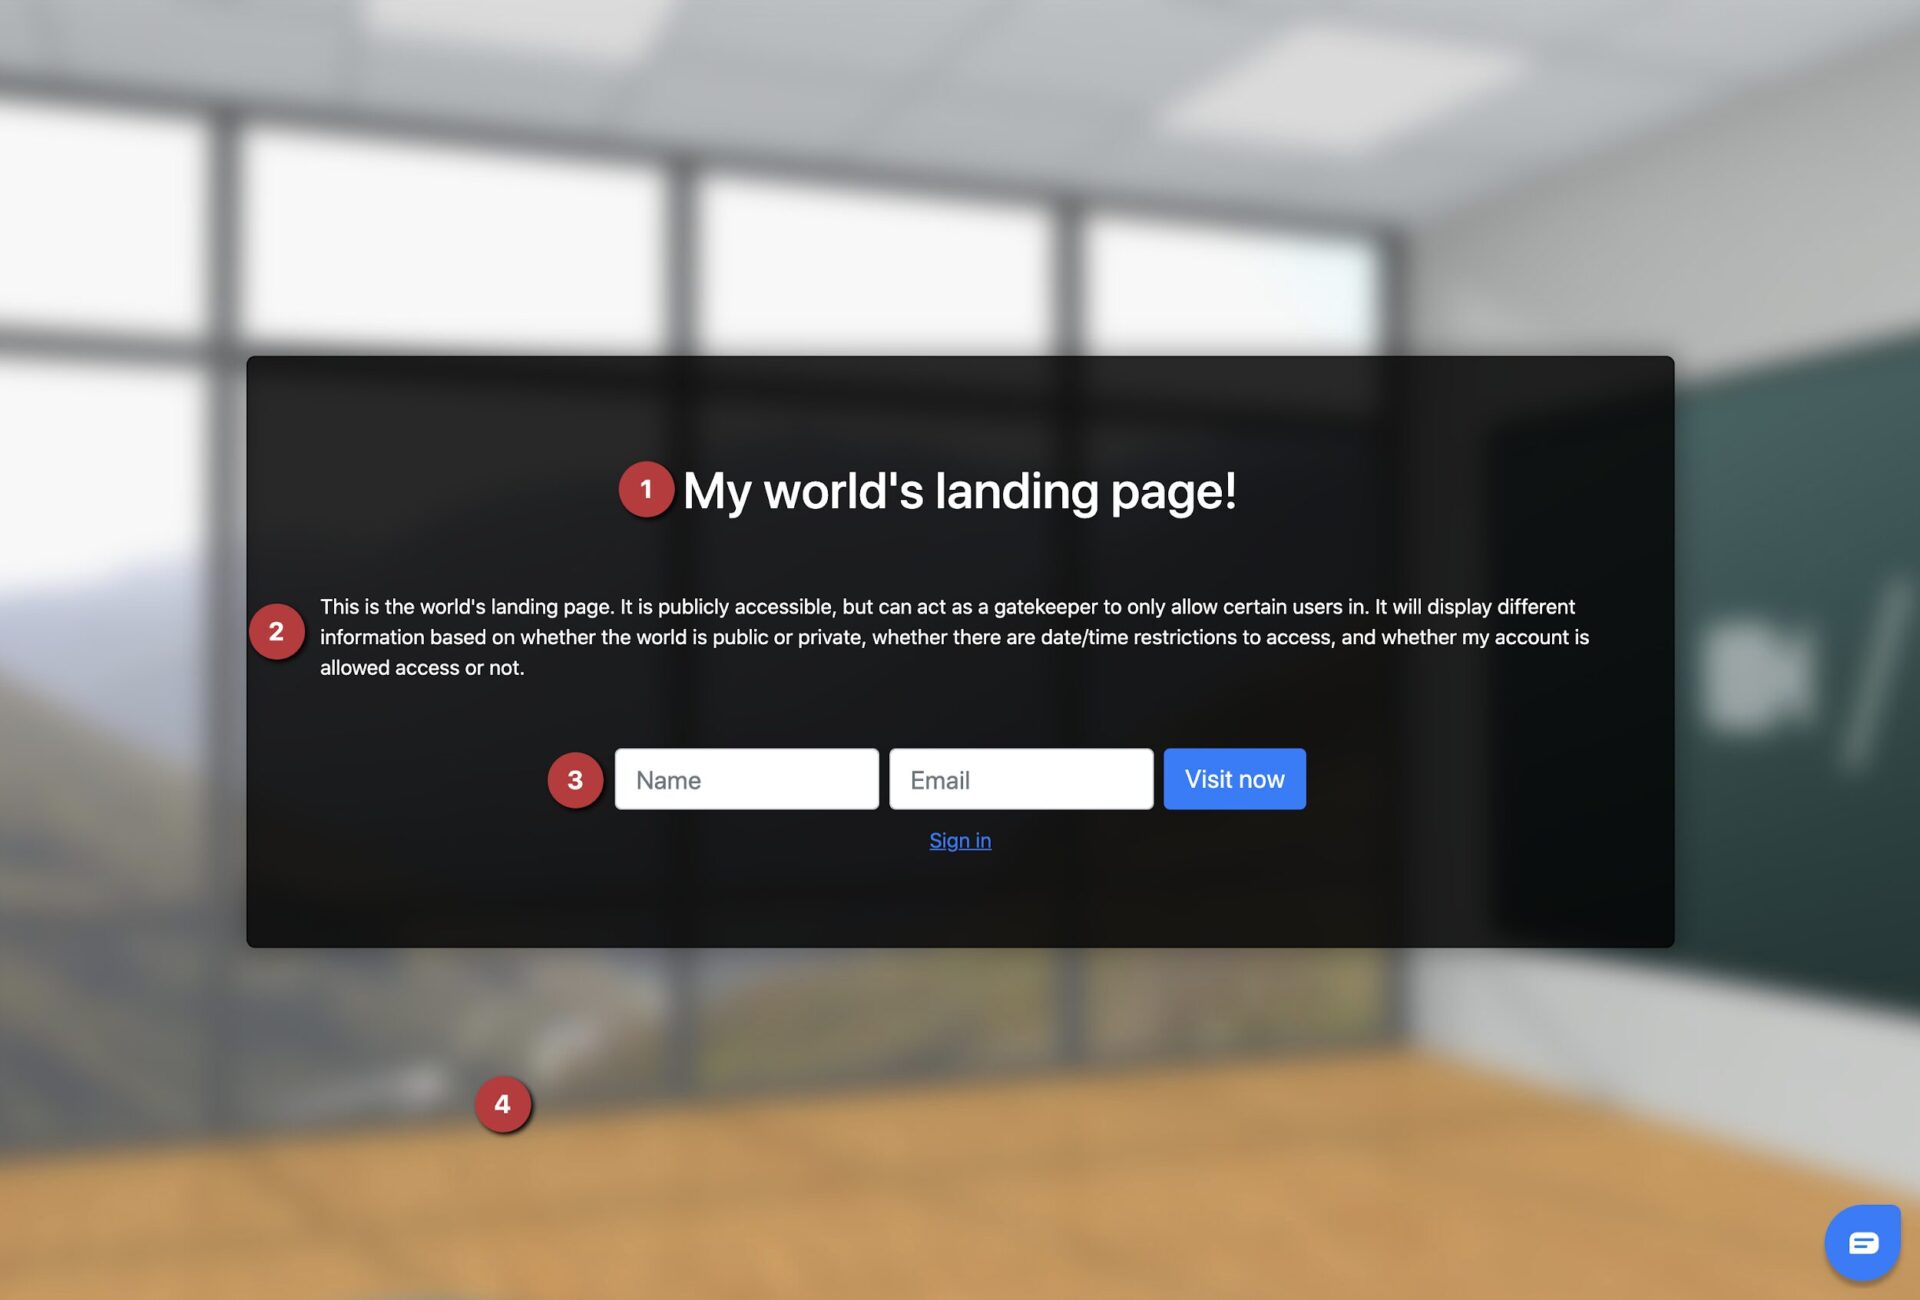
- The title of the page is the world’s name
- The description of the page is the world’s description
- The amount of information requested of guests can be customized (see “Additional options” section)
- The background will be selected based on settings, with a certain order of precedence:
- Custom splashscreen set for the world itself
- Custom splashscreen set for the landing space
- Custom splashscreen provided with the landing space’s scenario
- Default splashscreen associated with a certain space
- A subtle pattern over a dark background
The title and description can be customized in the world’s “Edit” page. The splashscreen can be customized in the same page, in the “Basic settings” section. See “How do I… → Change the settings of a space/world?”
Unauthenticated Guest Access
Guest access provides the most frictionless entry to an experience. Access to the world is instant. There is no need to switch context, open email inboxes or redeem account access.
A World with Access Type set to Public and have Landing Page enabled allows a user with the landing page link to enter a Name (and optionally Email) in the registration fields.
Clicking the Visit now button will create a guest avatar and take the participant directly into the World. There is no authentication required, no email is sent. Therefore public worlds with guest access rely on trust, there is no confirmation that the email entered is owned by the participant.
Additionally guest avatars are less suitable for tracking analytics or achievements over multiple sessions.
Force guest accounts to provide an email
If the world Access Type is Public, it’s possible for anybody with the link to enter the 3D environment without being logged in. In these cases, a temporary user account is generated, with its associated username and avatar.
By using the landing page, a user is required to enter a name before they are given access, and that name will be bound to that account and will appear to other users in the same space/world (as well as in analytics).
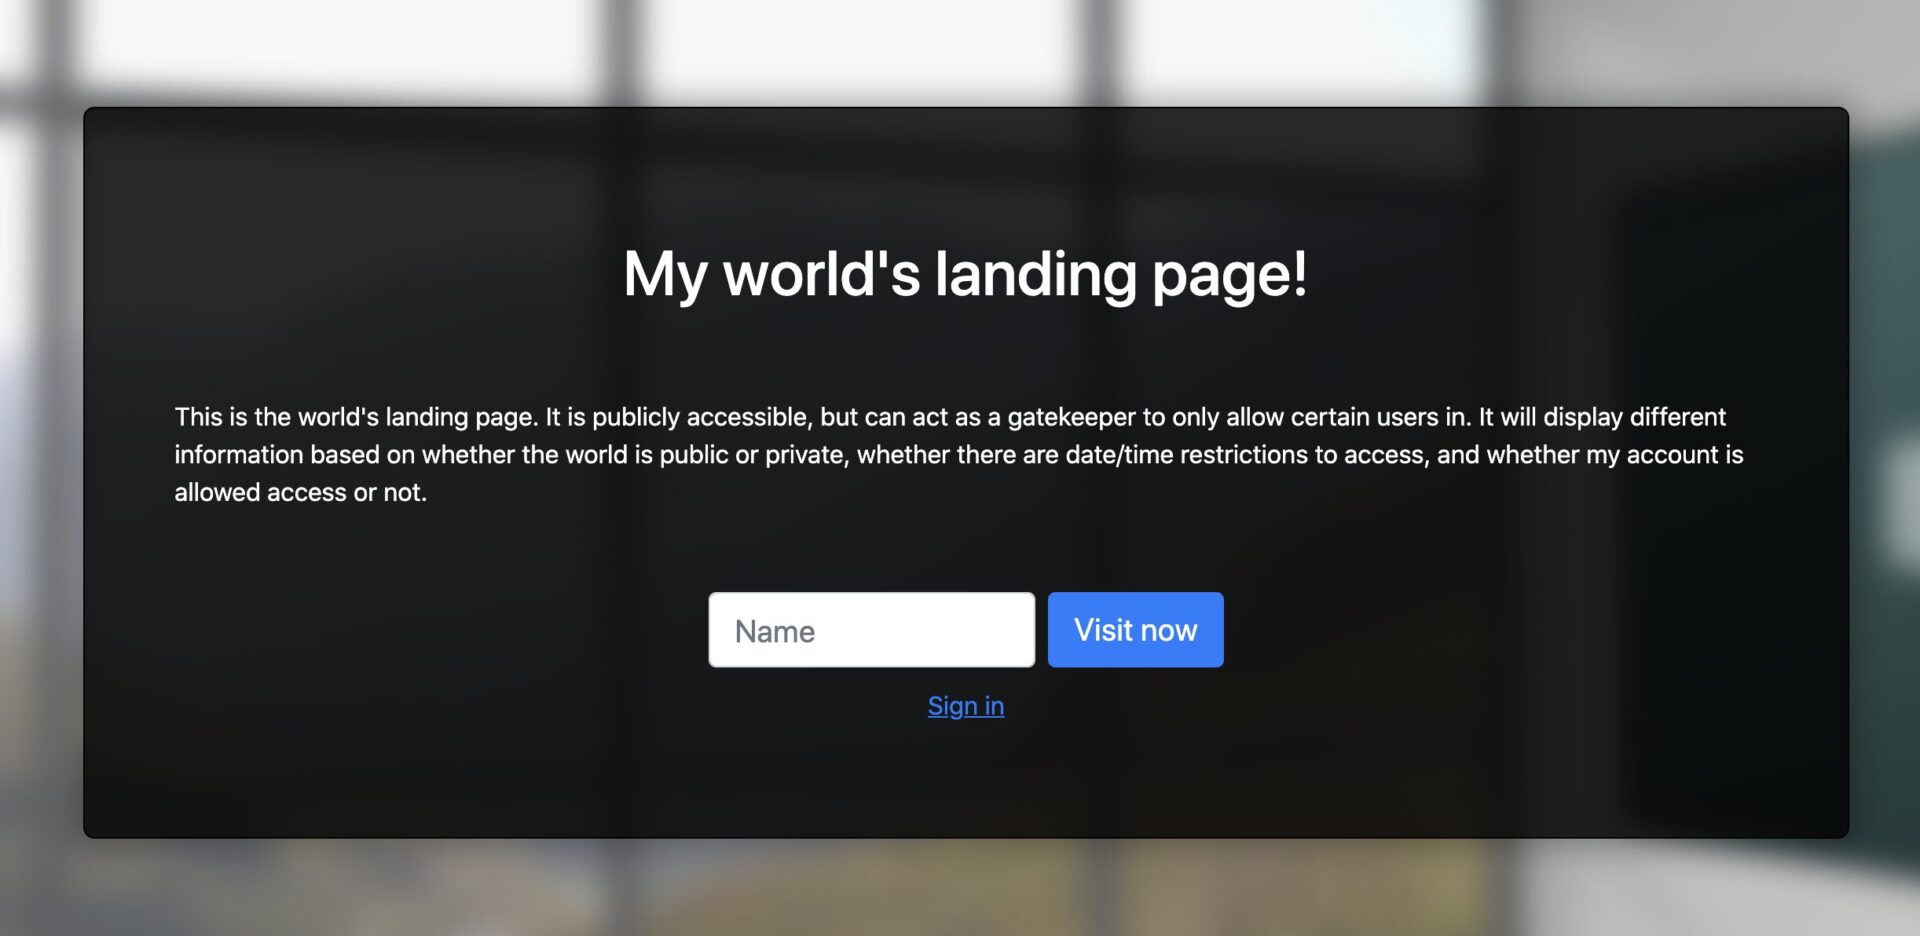
It is additionally possible to require users to provide an email address by enabling the “Require email” setting in the Experimental section.

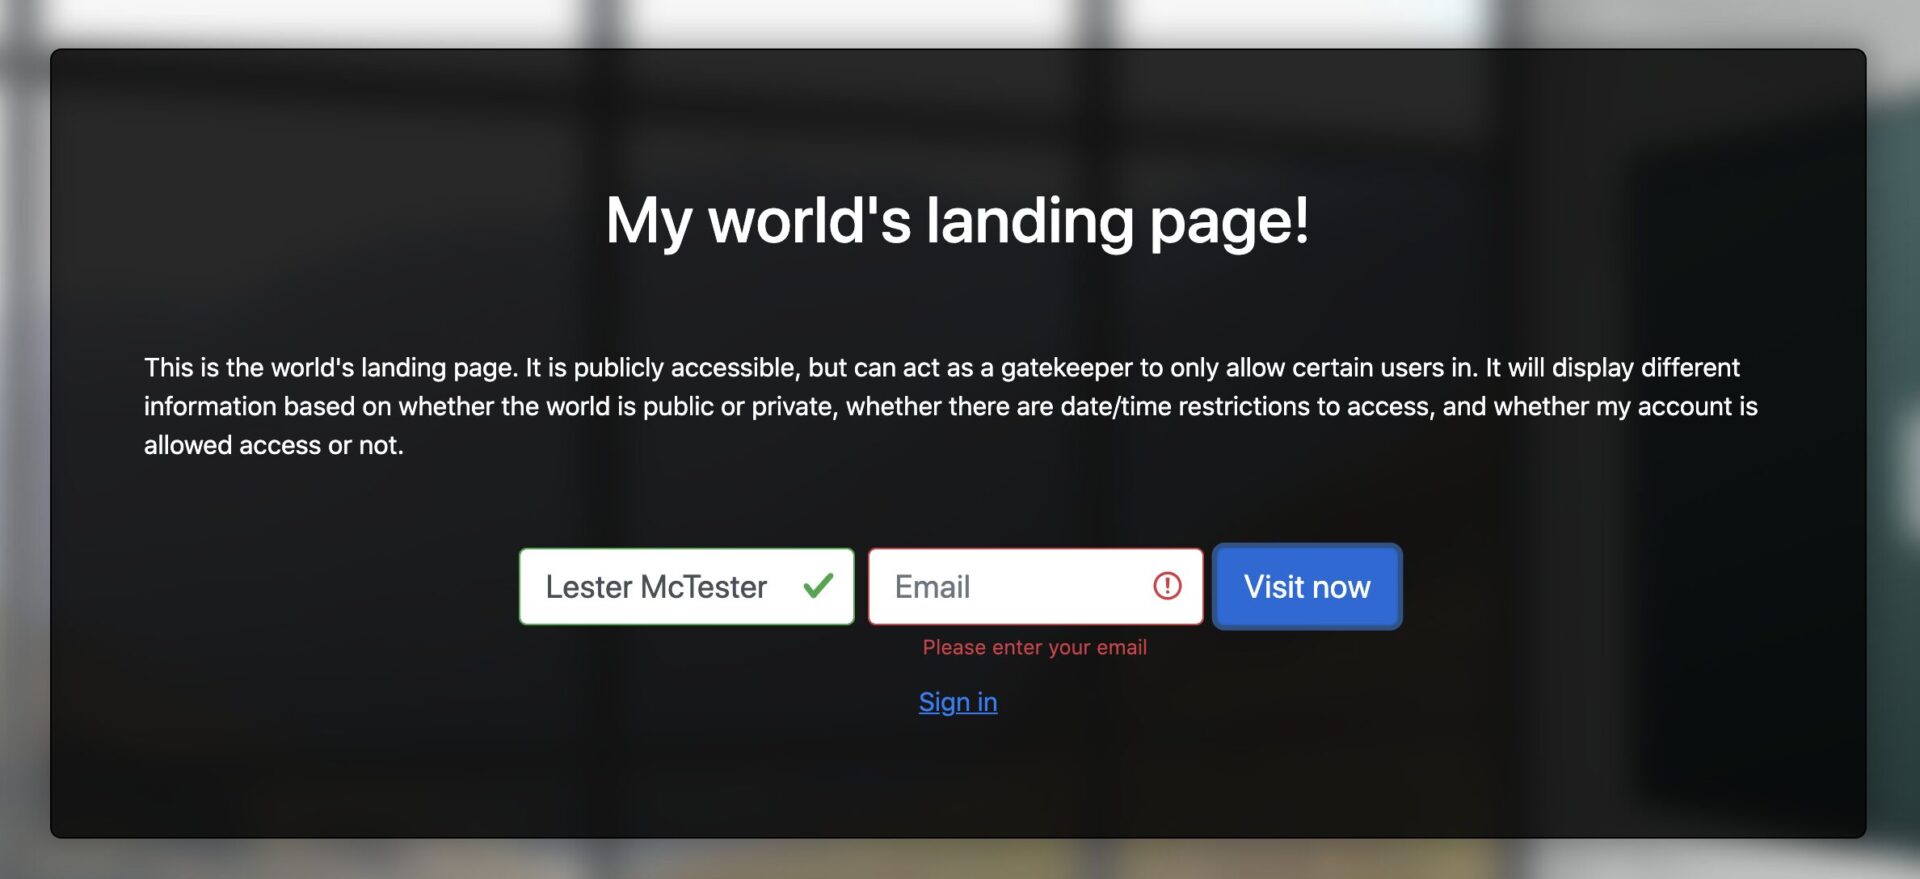
Please note that this only applies to public worlds, as guest accounts are not allowed in private ones.
Self-registration/waiting list
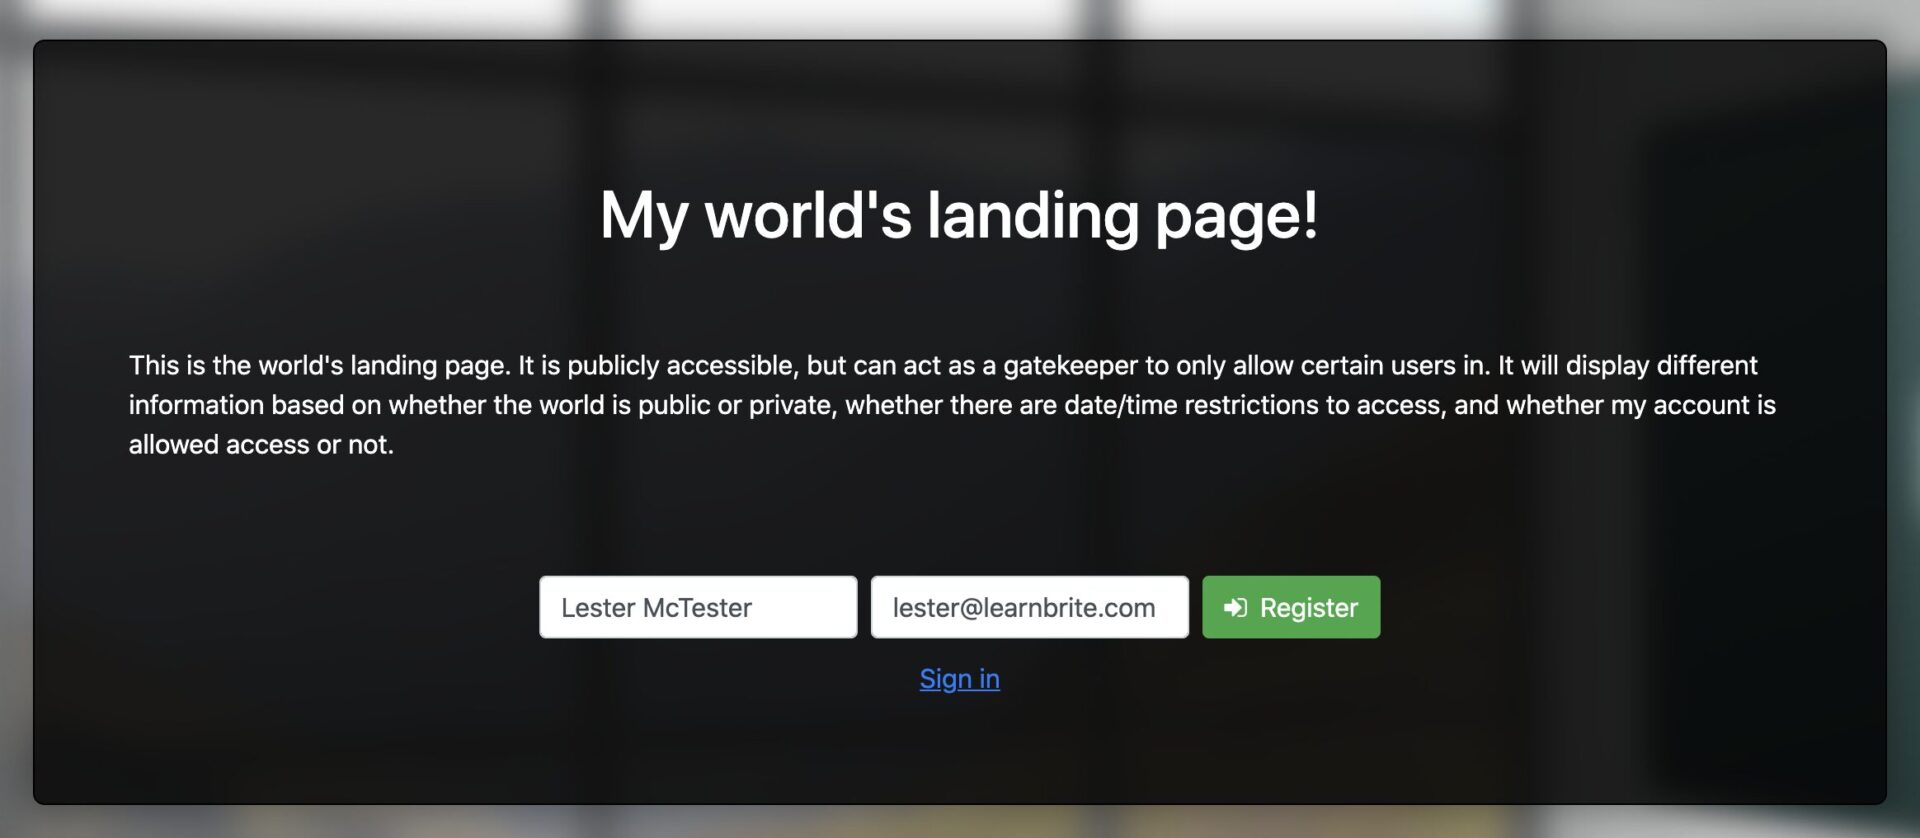
Worlds for which Private or Specific Hosts Access type has been enabled (in the “Basic” section of a world’s settings, see “How do I… → Change the settings of a space/world?”) can allow users to self-register and authenticate via email with a personal email link. To turn this feature on, you should enable the Landing page self-registration setting within the Experimental settings panel

When a user accesses a landing page with this setup, they will be presented with the option to register, and will be able to see the state of their registration after submitting it.

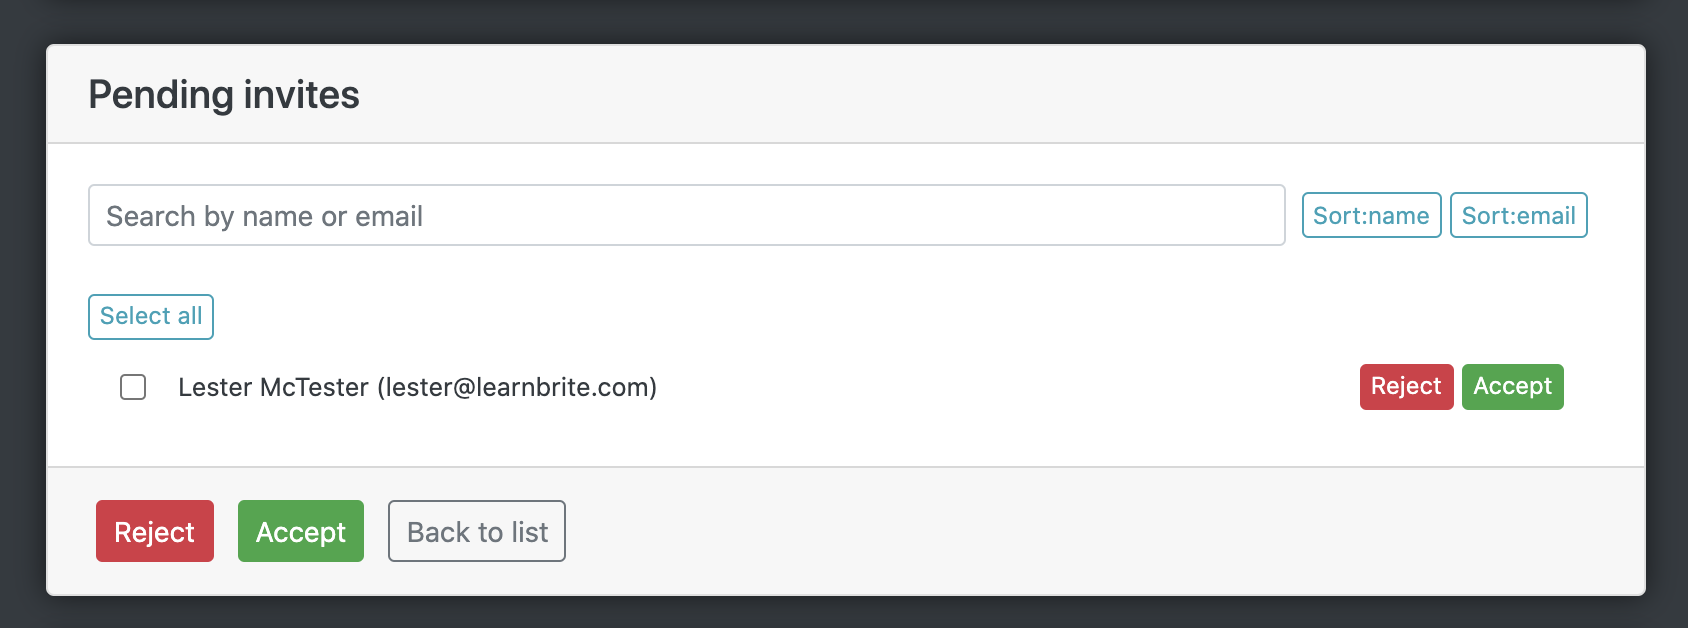
On the organizer’s side, the registration will appear in the list of invites, and can be accepted or rejected.
Automatic approval
It is optionally possible to automatically accept self-registration by enabling another setting, just below the self-registration one:

Email authentication
Once approved or automatically approved an email is sent to the participant with a personal link. Clicking the link will present them with a form to choose a password. After setting a password for their avatar account they are taken into the World.
The participant can reuse the link in the email to return to the world at any time.
Additional options
Restrict who can access the world
It is possible to only allow certain users to access the world. This is done by choosing the Access Type Private or Specific Hosts setting for the world (not the landing space or any other space, it must be the world itself!). For information on how to do this, see “How do I… → Change the settings of a space/world?”.
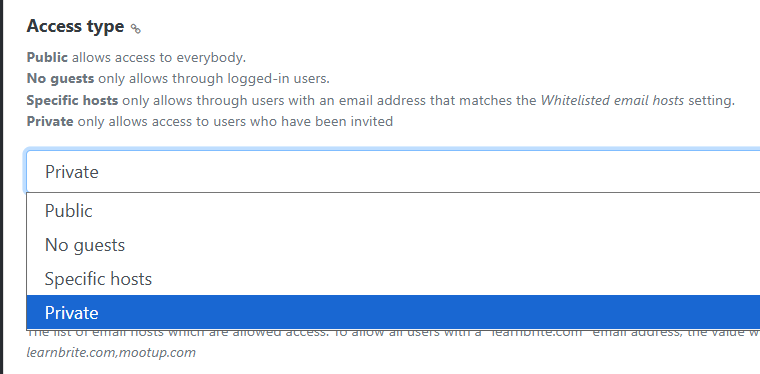
Once this is done, only users who have been invited to the world will have access to it. Detailed instructions on how to invite users are available here:
- How do I… → Invite other users to a space/world from the 3D environment?
- How do I… → Invite other users to a space/world from Dashboard?
Restrict when the world can be accessed
*** Experimental ***
It is possible to set start and end date/times for your event, which will prevent all users (besides Editors) from accessing the world outside of those dates.
These are available in the “Experimental” settings (see “How do I… → Change the settings of a space/world?” for instructions).
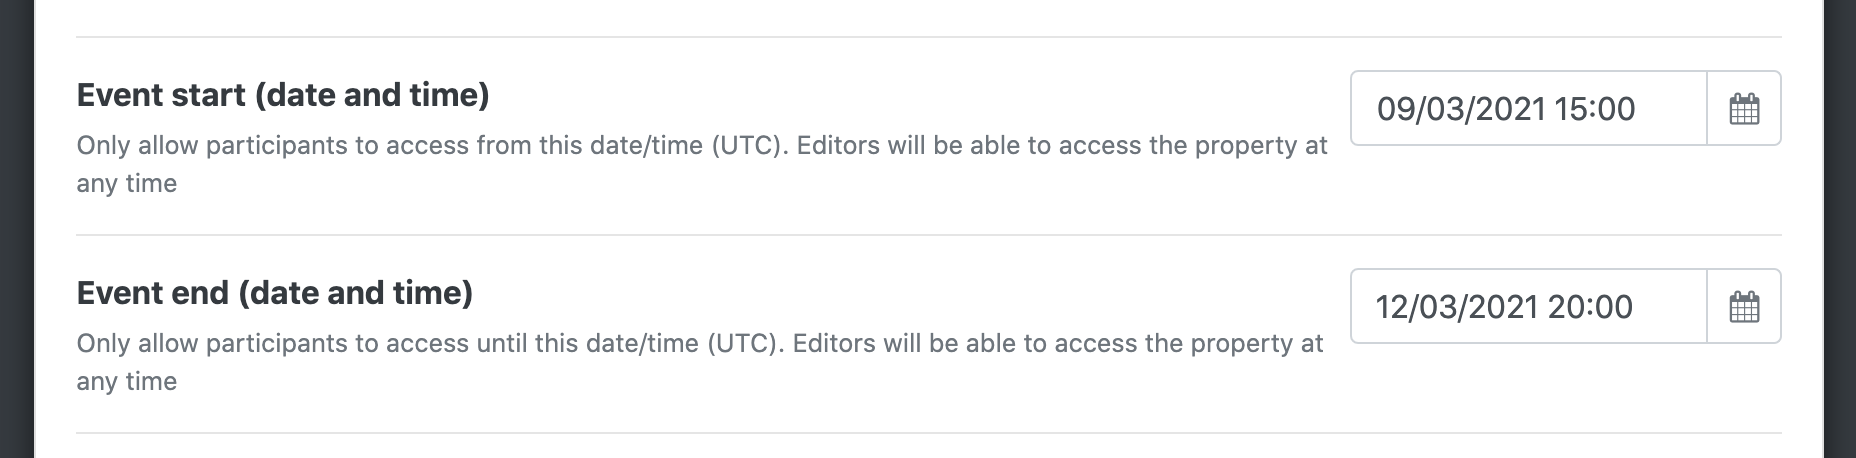
Note: start and end date/times are in UTC! |
The start and/or end dates and times will then be shown on the landing page.