Jump to:
The Conversation/Action Editor
Accessing the Conversation/Action Editor
Using the Conversation/Action Editor
Assigning actions to a bot or 3D object
Deleting an action within the Conversation/Action Editor
Deleting an action within the Event section of the main editing window
The Conversation/Action Editor
Accessing the Conversation/Action Editor
The Conversation/Action Editor can be accessed in several ways while editing a space.
Clicking on the quote bubble while highlighting a bot will access the editor directly:

Click on the gear while highlighting a 3D object, or a bot, to bring up the general item edit menu:


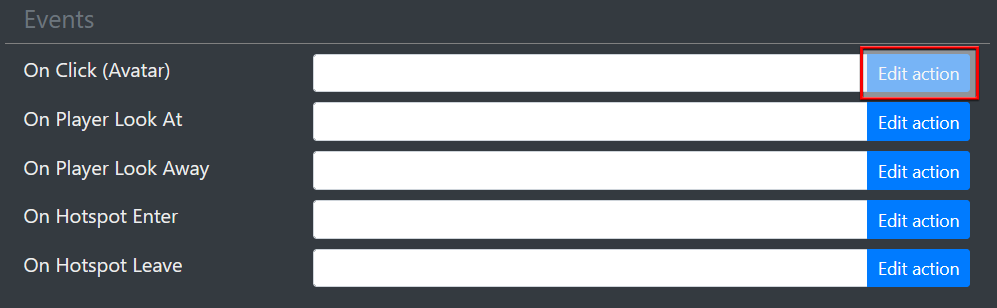
Within the “Events” section, click the “Edit action” button for the Event to script.
For 3D objects:

For bots:
The Conversation/Action editor appears:

Using the Conversation/Action Editor
Adding dialog to a bot
Type the words you want the bot to speak into the dialog area of the editor.

Text can be separated by a pipe symbol | to split closed captions in smaller chunks. Try using a pipe | symbol after each full stop for example.
Clicking “Add Camera Shot” or “Add Gesture” will allow the dialog to be further customized by providing a dropdown list of choices.

To add an additional dialog area, click the “Dialog” button at the bottom of the editor.

To add a dialog area with a gesture or camera shot included, click “Gesture” or “Camera Shot.”


The default gesture or camera shot can be changed by clicking on their name above the dialog box, as shown above.
Assigning actions to a bot or 3D object
Teleport player to hotspot
Click the “Teleport” button within the editor.

1. Choose the Avatar (in this instance “Player”) and Hotspot Tag.
For common purposes, leave “Propagate through multiuser” unchecked. Checking this option will make space attempt to execute the action on every active player. |
2. Click the “Save action” button.

The “More” button

The “More” button allows quick access to a variety of useful Actions.

1. Common actions
The actions available in these groups are some of the commonly used within a space, and are placed here for convenience. These actions, and their associated parameters, are explained in more detail here: https://hyperspace.mv/academy/scenario-actions/.
2. Script
Script is a highly customizable field in which a developer can include any actions within the Actions API document (https://hyperspace.mv/academy/scenario-actions/,) as well as adding custom JavaScript.
Example:
Adding the following will cause a player to sit:
player().switchPose(“floor_sit”); |

Exercise caution using the 'Script' setting if you are unfamiliar with JavaScript, or scripting in general. |
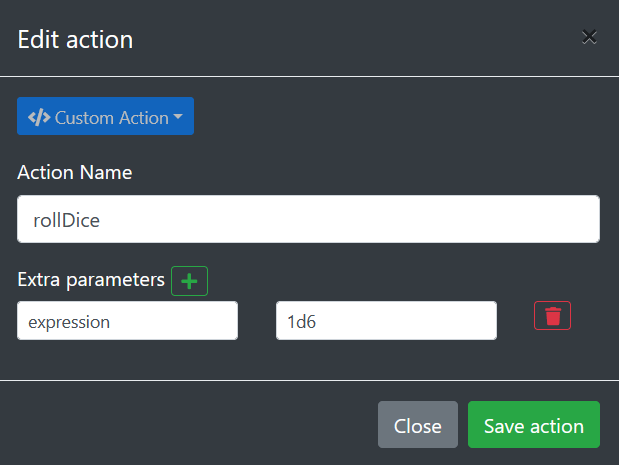
3. Custom Action
Custom Action allows for the use of any action within the Actions API document (https://hyperspace.mv/academy/scenario-actions/,) including the setting of the parameters associated with that action. Useful for including actions not included in the preset lists.
Example:
Player rolls a single, six-sided die, displaying the result in chat.
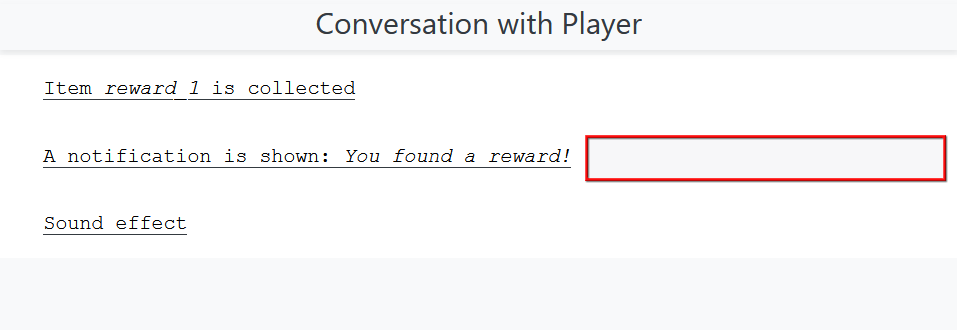
Combining actions
Multiple actions can be assigned to the same Event within the editor, making it a powerful tool when customizing a space.
Example:
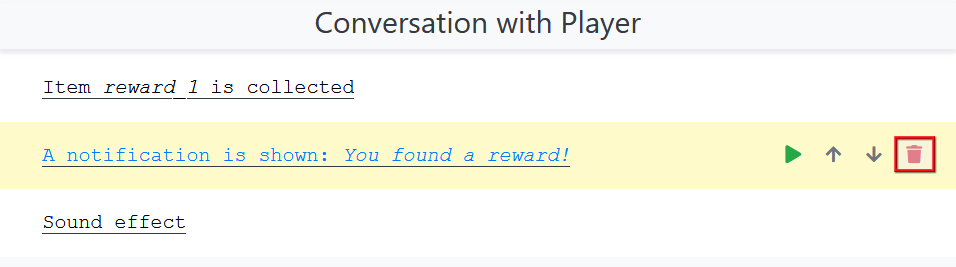
Adding “Collect Item” from Gamification, “Notification” from General, and “Play Sound Effect” from Media to a 3D object’s On Click Event.


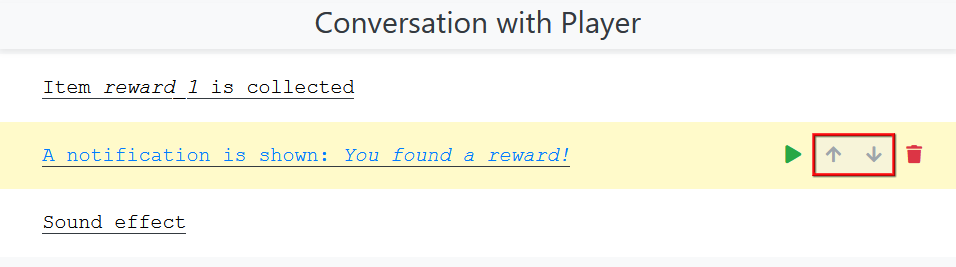
Reordering actions
The actions added to an Event will execute in order of their placement. So the top action executes first, then the second, etc.. Should the order of execution need changed, click in the white space next to the action to select it (do not click on the action link itself, as that will bring up the editor for that action.)
Once an action is selected, use the up and down arrows to adjust its position.
Deleting actions
There are 2 methods of deleting actions.
Deleting an action within the Conversation/Action Editor
As shown above, click in the white space next to the action to select it (do not click on the action link itself, as that will bring up the editor for that action.)

Once an action is selected, use the garbage can icon to delete it.
Deleting an action within the Event section of the main editing window
Highlight the action code within the selected Event.
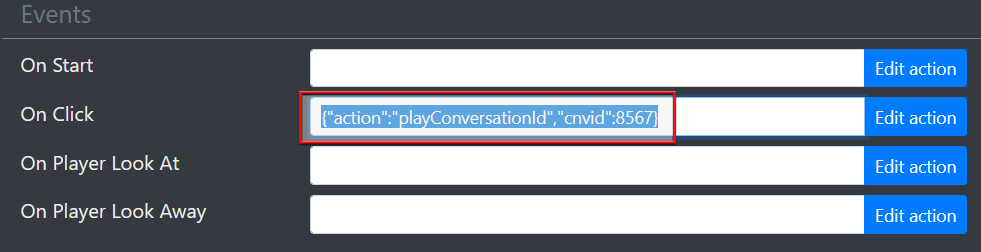
Delete the action code.

Click “Save Item”

Caution: This method will remove all actions added to the event for the item (bot). If more than one action is associated with the Event, delete using the Conversation/Action Editor as described above. |
