Google Dialogflow is a natural language understanding platform that makes it easy to design and integrate a conversational AI bots and avatars for the Metaverse. Using Google Dialogflow, you can provide new and engaging ways for users to interact with your virtual world.
Google Dialogflow can analyze text or voice input from your participants. It can respond to your participants through text or with synthetic speech. Responses can include markup to add gestures and expressions to your AI bots or avatars.
50+ spoken languages are supported.
Create conversational experiences with characters, bots and avatars in VR / AR / 3D / 360 across devices and platforms.
Natural Language Conversations (NLP) with AI Avatars in the Metaverse
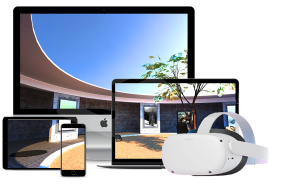
When combined with the Hyperspace Metaverse Platform, Google Dialogflow is an end-to-end, build-once deploy-everywhere development suite for creating conversational interfaces for VR / AR / 3D / 360 accessible on mobile, tablet, desktop and VR/AR headsets. You can use it to build interfaces (such as chatbots and conversational VR) that enable natural and rich interactions between your users and your business.
Docs
https://dialogflow.com/docs/getting-started
Cafe Barista Example
Agents designed by https://glasir.ai
https://learnbrite.com/dialogflow
Third Party Dialogflow Gateway
The Hyperspace Metaverse Platform uses a third party gateway to integrate with Google Dialogflow.
https://dialogflow.cloud.ushakov.co/
Follow the rest of the documentation here https://github.com/mishushakov/dialogflow-gateway-docs/blob/master/hosted/installation.md
Dialogflow Gateway by Ushakov (Hosted) Installation
This guide assumes that you already created a DialogFlow Agent. If not, please follow the following steps first:
- Go to the Dialogflow ES Console.
- If requested, sign in to the Dialogflow Console. See Dialogflow console overview for more information.
- Click Create Agent in the left sidebar menu. (If you already have other agents, click the agent name, scroll to the bottom and click Create new agent.)
- Enter your agent's name, default language, and default time zone.
- If you have already created a project, enter that project. If you want to allow the Dialogflow Console to create the project, select Create a new Google project.
- Click the Create button.
Step 1: Get a Service Account
Service Accounts represent identities of a Service (much like user accounts represent identity of a user). Dialogflow Gateway requires a Service Account to authenticate the requests as they were triggered from your service. In this step, we will generate such Service Account for your Google Cloud project that is connected to your Agent
Visit Google Cloud IAM
Make sure you are on the "Service Accounts" page and youhave selected the project, which your Dialogflow Agent is associated with. On the previous screenshot, that is marked with 2. If you created a New Google Project, the name should be the same as your DialogFlow Agent name.
Then, press on "Create Service Account" button
Enter the name of your Service Account and press on "Create"
Step 2: Grant permissions to the Service Account
You have now successfully generated a service account! You just need to give it some permissions, so it can access certain resources of your Google Cloud project
We will need following permissions: "Dialogflow API Client" and "Dialogflow API Reader"
It’s important, that you set these permissions, otherwise your integration may not work as expected
Set the Roles and press on "Continue"
Step 3: Get the keys of the Service Account
In the this step we will generate the keys of our Service Account, which we will later give Dialogflow Gateway access to
Press on "Create Key Button" and in the "Create Key" window set the "Key type" to "JSON". Then, press on "Create"
The keys should be downloaded to your default Downloads folder. Make sure to check that as well
Now, when you have the keys with the correct permissions, you are ready to setup Dialogflow Gateway
Final Step: Upload your keys to Dialogflow Gateway
Go to the Dialogflow Gateway Console
Sign in with your Google Account
And you will see the console
In the "Agents" section press on the "Upload Keys" button and select your keys
Your agent should now appear on the "Agents" list. To find your connection information and settings, press on the "Manage" button
If you have any questions or need help to complete these steps, please contact Google Cloud Support
Google Dialogflow
Login
Create your agent
Hyperspace Dashboard
Create a Space
Enable Speech
Add Bot to Space
Click the cog/settings icon above the bots head
Copy the bot id from the avatar_externalId field
- Paste the following code in the avatar_onclick field (adjusting to match your avatar_externalId and Dialogflow handle (eg. job-interview-mfttja) as highlighted below)
{"action":"executeScript","script":"setTimeout(function(){LB.uiController.choices.create([{id:0,text:'Cancel'}],'Speak now', function(){LB.uiController.choices.remove();}); LB.cmPlayer.speechRecognition.srStart_listenForCommand(function(data){LB.uiController.choices.remove();startDialogFlow(data.results[0][0].transcript, 'bot0ad15ca9aba66352f4b5679d9', 'job-interview-mfttja');});},100);"} |
- Click the Save button
Contact the Hyperspace Support team providing them with the URL to your space requesting for Google Dialogflow Gateway to be added to your space. They will add the following scripts to your space.
https://cache.learnbrite.com/_assets_/partners/dialogflow-gateway/bundle.js,https://cache.learnbrite.com/_assets_/partners/dialogflow-gateway/dialogflowgateway.js |
Now you can click the bot to start a Dialogflow conversation

