Session Recording (2.16-18)
This document applies to versions 2.16 to 2.18
System Audio and Conference Audio
Version 2.16+ local recording is available to participants with Presenter, Editor or Owner roles. To upgrade a space see the guide here https://hyperspace.mv/academy/how-do-i/#hrclltiloz02c
Important: Recording is a space feature, if you are traversing a world you must stop recording in the space you started recording, save the recording, move to another space and start recording again.
If you’d like to record your journey across a world of spaces consider using a traditional third-party screen recording software. This will allow uninterrupted recording when moving between spaces.
Recording is only available on Google Chrome for desktop.
Recording is not available on mobile devices or other browsers at this time.
Recording will capture the
- 3D scene,
- video in the 3D scene
- audio
Popup or HTML elements are not captured, such as
- notifications,
- avatar name tags,
- chat history,
- UI elements,
- popup windows,
- subtitles and
- interactive scenario menus
Recording may impact 3D or computer performance when in progress. This depends heavily on the resources of your computer.
How to Record
Start Recording
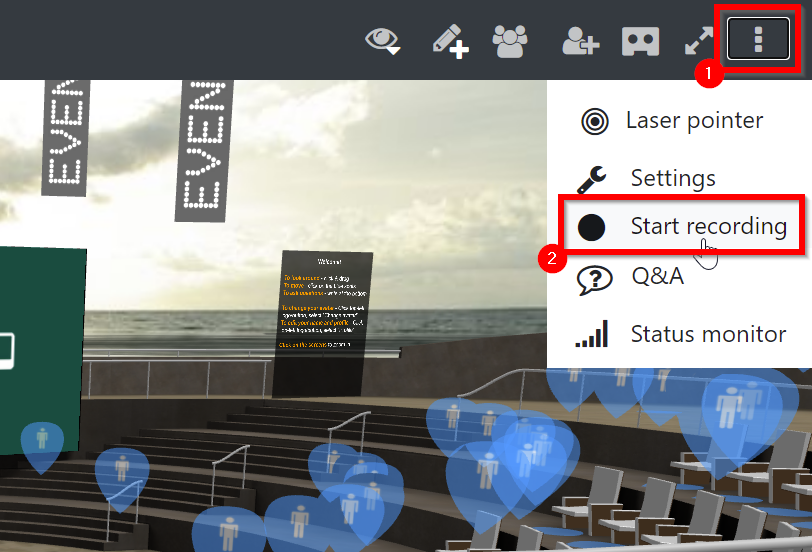
- Click the triple dot menu in the top right corner of the toolbar
- Click Start recording
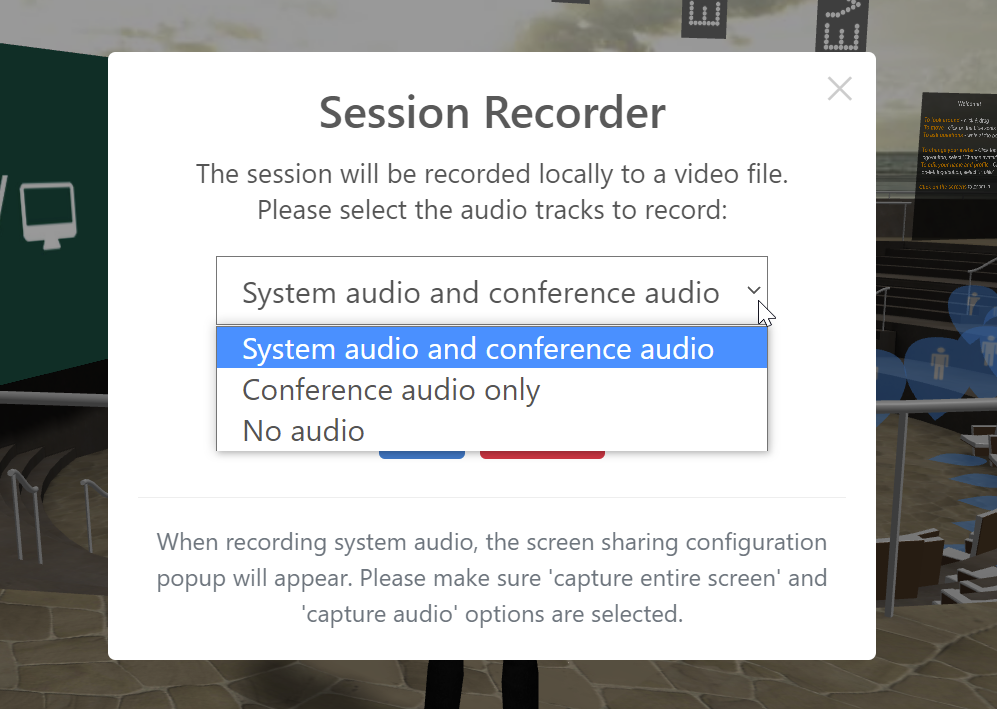
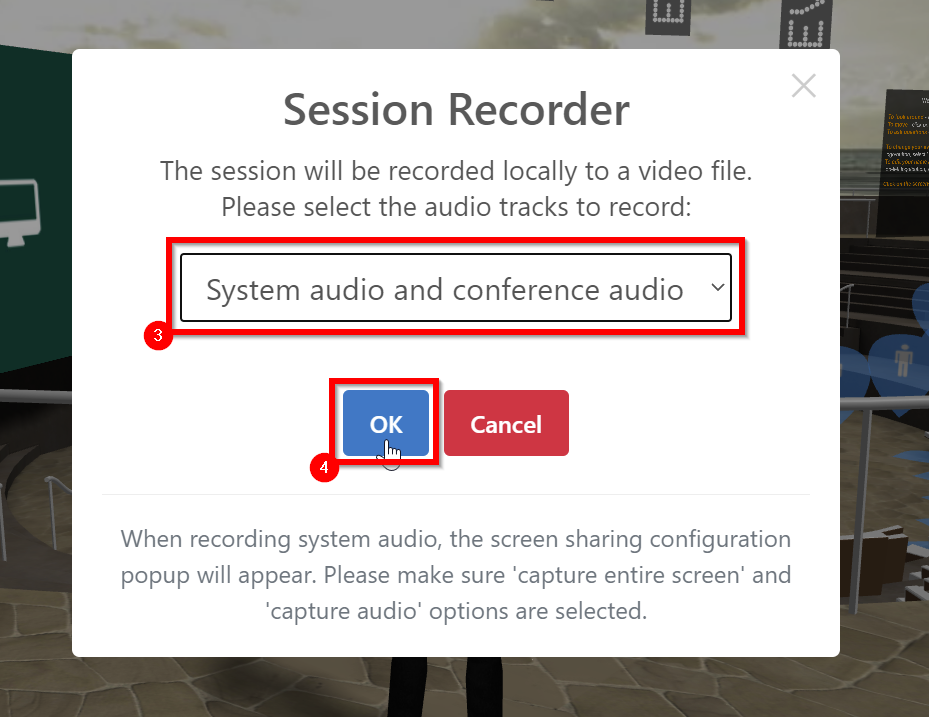
- Configure the audio tracks you want included in the recording
- Click the Ok button
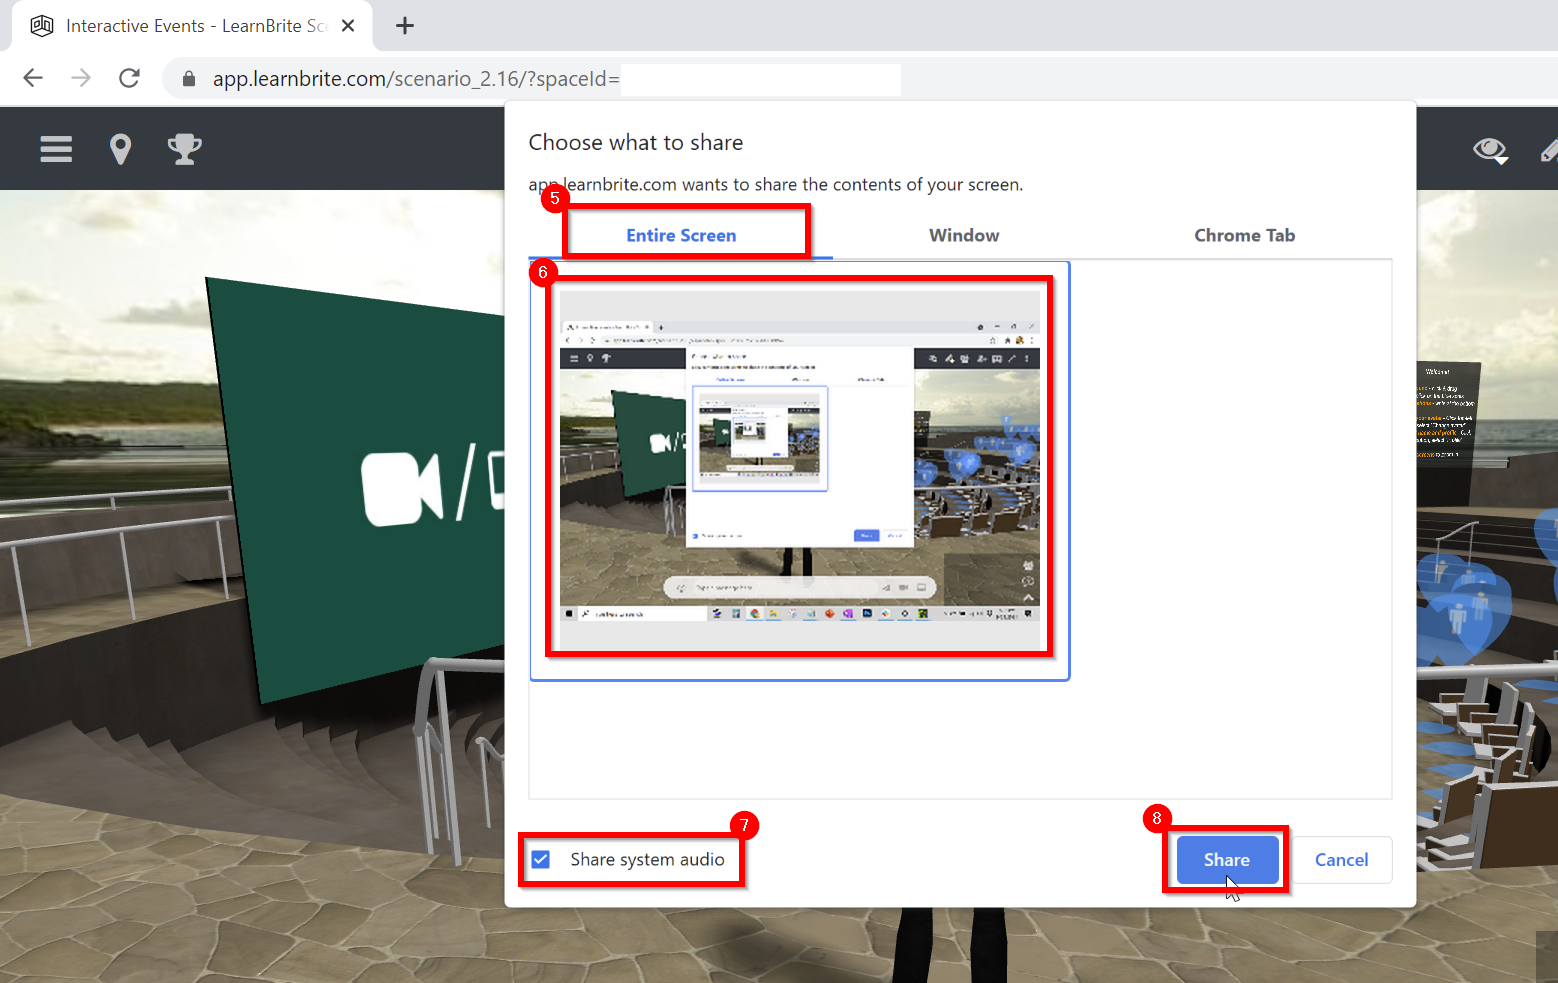
- Choose Entire Screen tab
- Click the image of the screen
- Click Share system audio
- Click the Share button
Recording in Progress
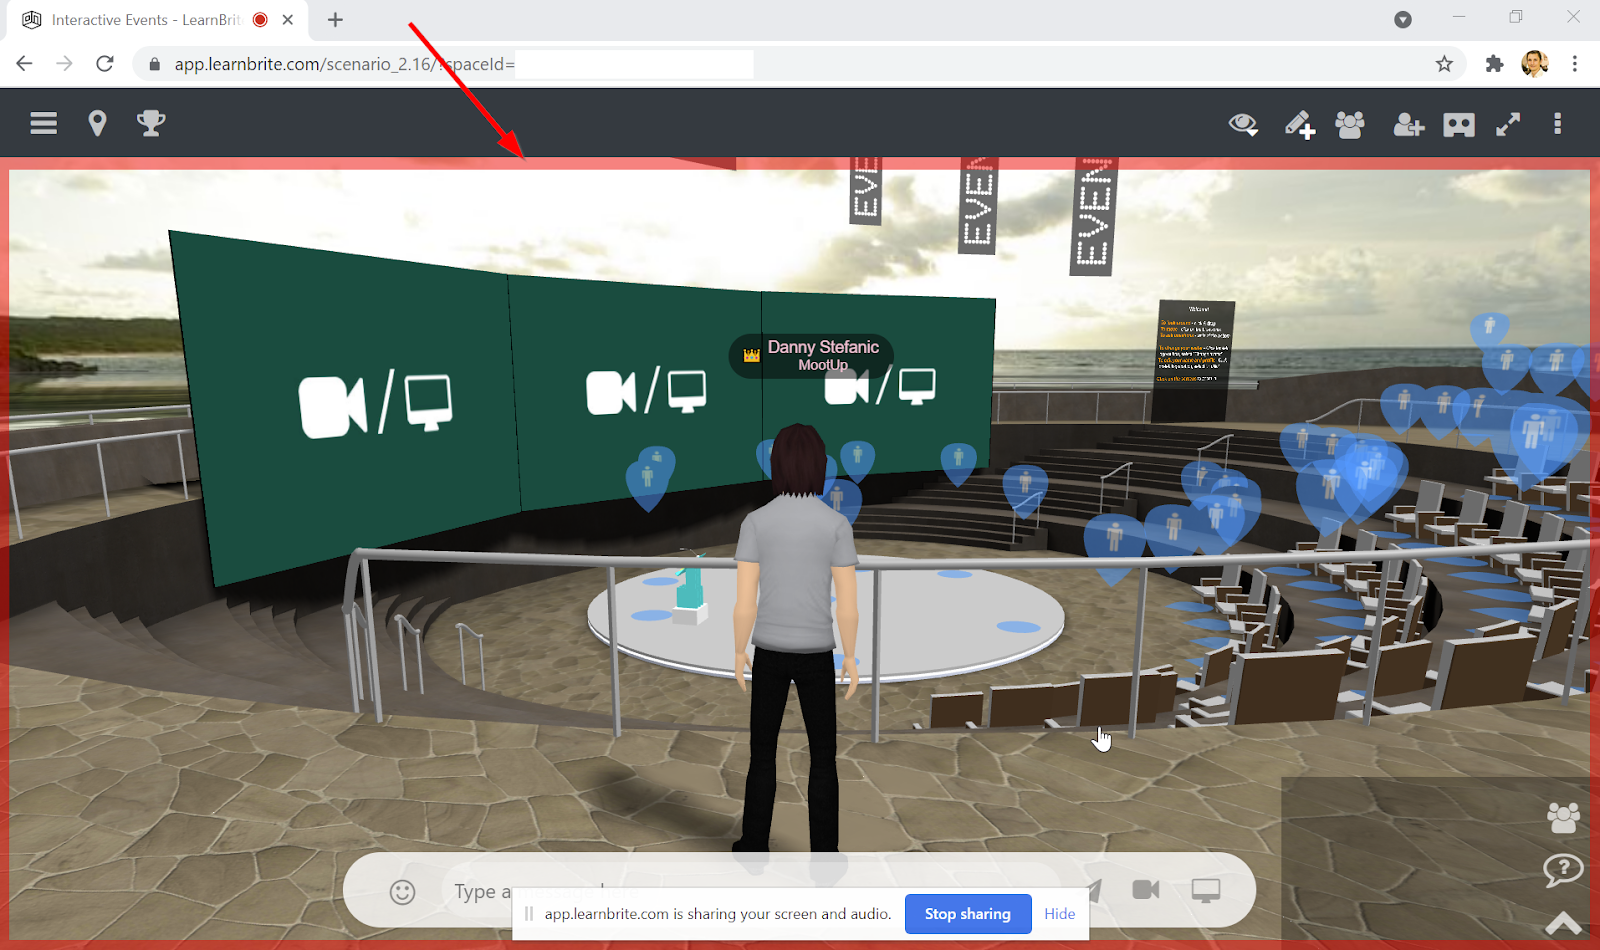
When recording is in progress a red border will appear around the 3D scene. This only appears for the person doing the capture, other users will not see it.
Stop Recording and Save
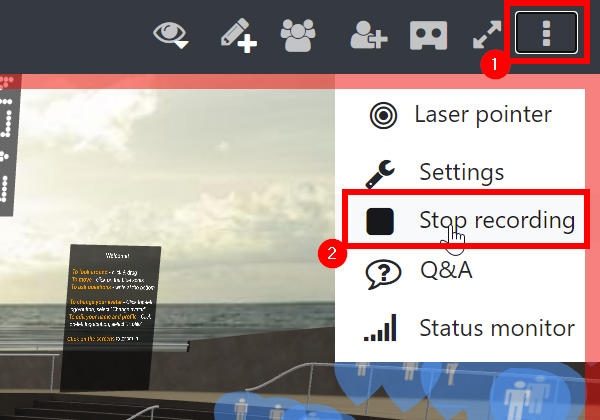
- Click the triple dot menu
- Choose Stop recording
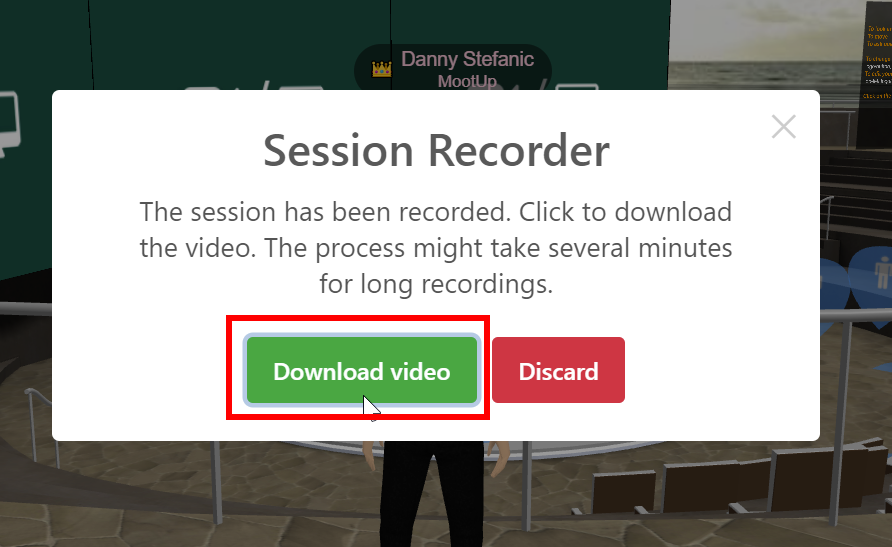
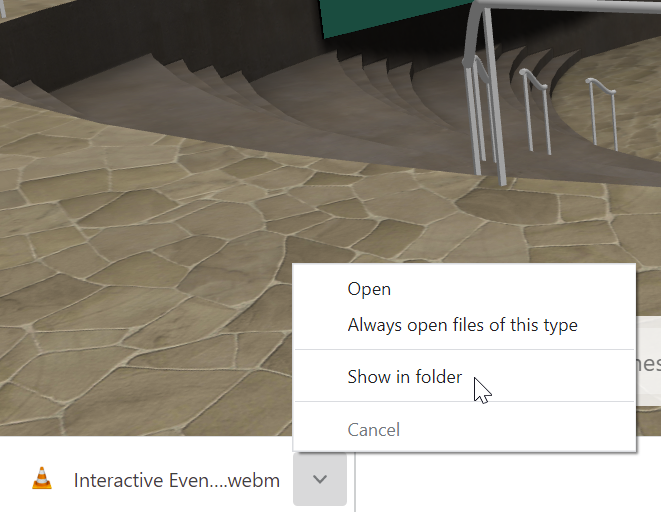
- Click the Download video button
- Choose where to save your .webm video file
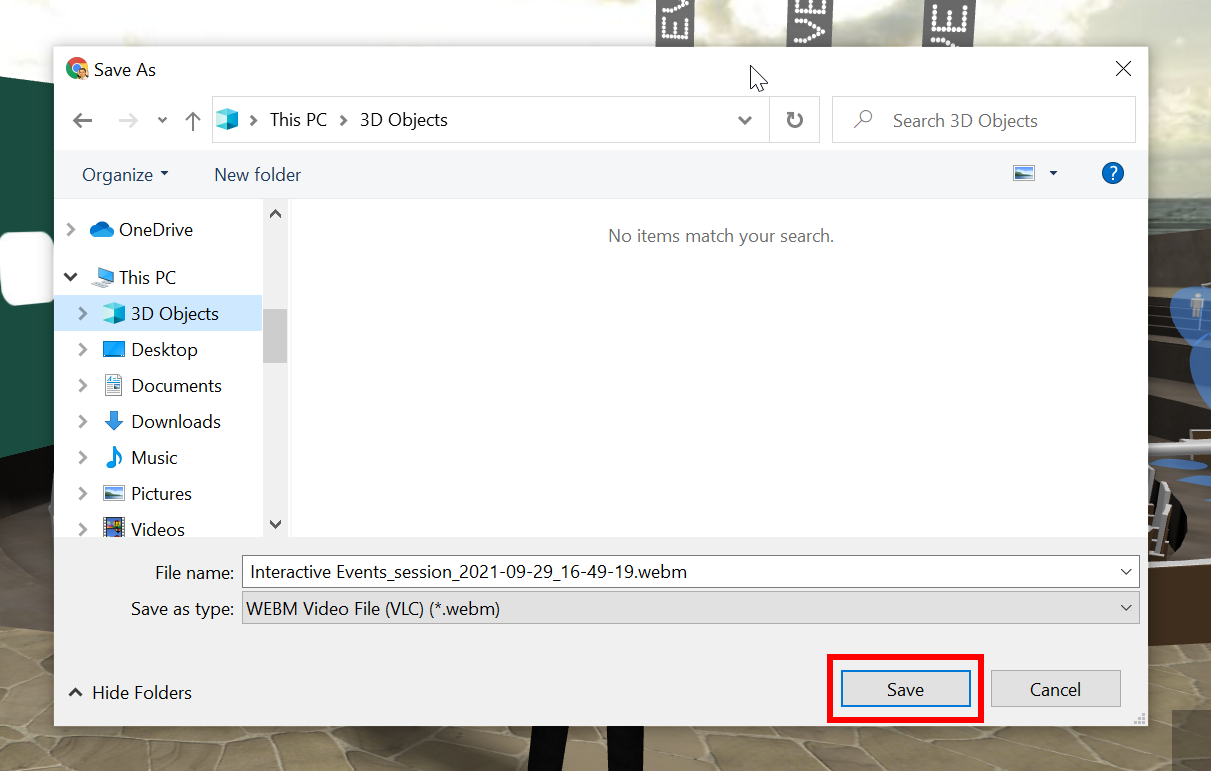
Chrome may display the downloaded file in a toolbar at the bottom of the browser, click the file to play it in your default video player or click the arrow next to it to open the folder on your computer.
Audio Options
Different options are available for the recording as they will impact performance as well as privacy for other users.
System Audio and Conference Audio
No Audio | Conference Audio only | System and Conference Audio | |
AI Speech, Music and Sound effects in the 3d environment | ✖ | ✖ | ✔ |
Conference calls and audio from video or screen sharing | ✖ | ✔ | ✔ |
Audio from other tabs or apps | ✖ | ✖ | ✔ |
Note:
When using the System and Conference Audio option, the screen share tool from the browser will be launched. The user can select to share the whole desktop (including audio from other tabs or apps) or just the active tab (including audio only for the actual tab). It’s worth noting that capturing system audio will have a bigger impact on performance.
Video Output
When the recording is finished, a video file will be ready for the user to download.
Video resolution: Video resolution matches the size of the captured window
Video container: webm
Video codec: VP9
Audio codec: Opus Audio @ 48000 Hz
