Trigger an action when the last item is collected
Change the branding of the coin
World Scavenger Hunt
A collection of items spread across many spaces in a world. Displayed in the Achievements (Trophy) popup in every space in the world.
This guide describes a step-by-step process of configuring a puzzle hunt experience with puzzle pieces spread between spaces in the same world.
Add 3D items to each scene
- Enter the first space in the world
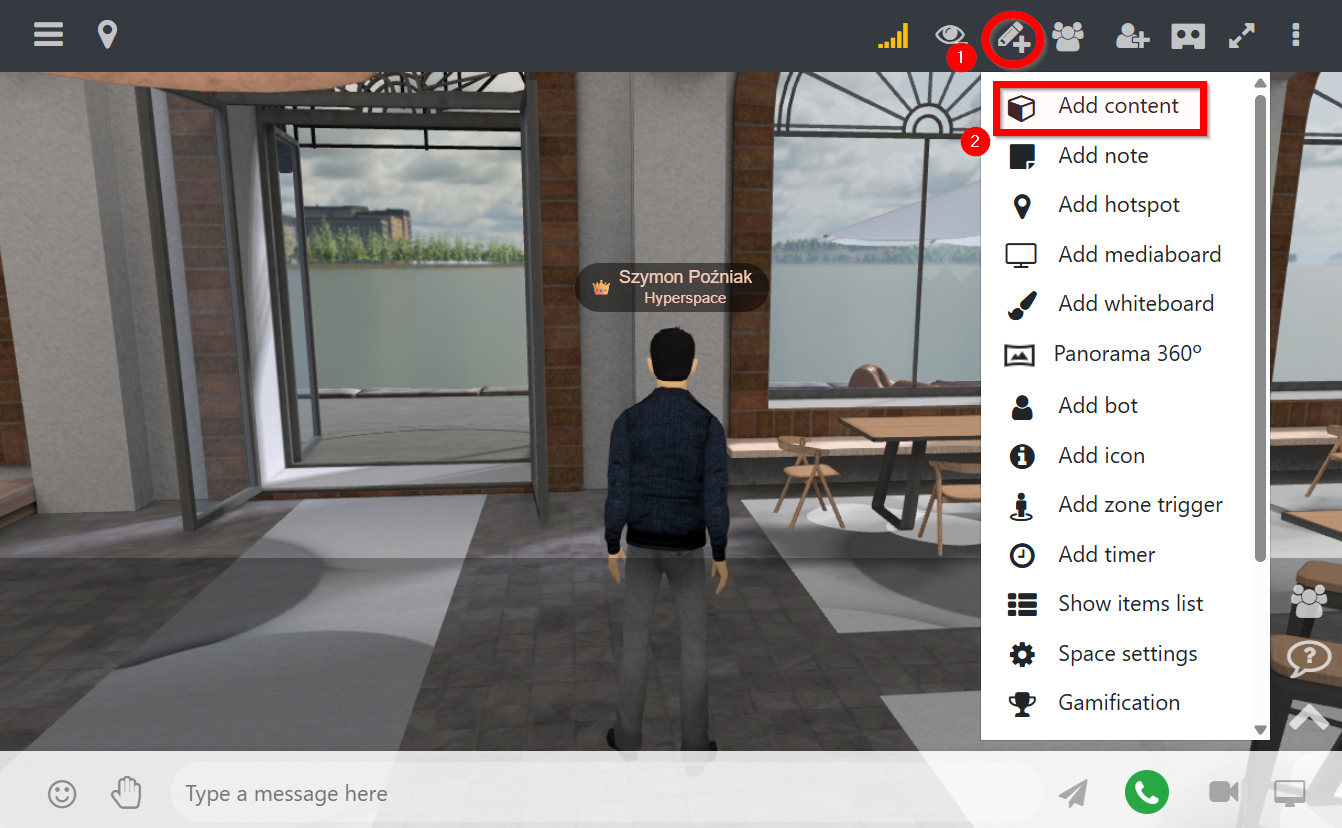
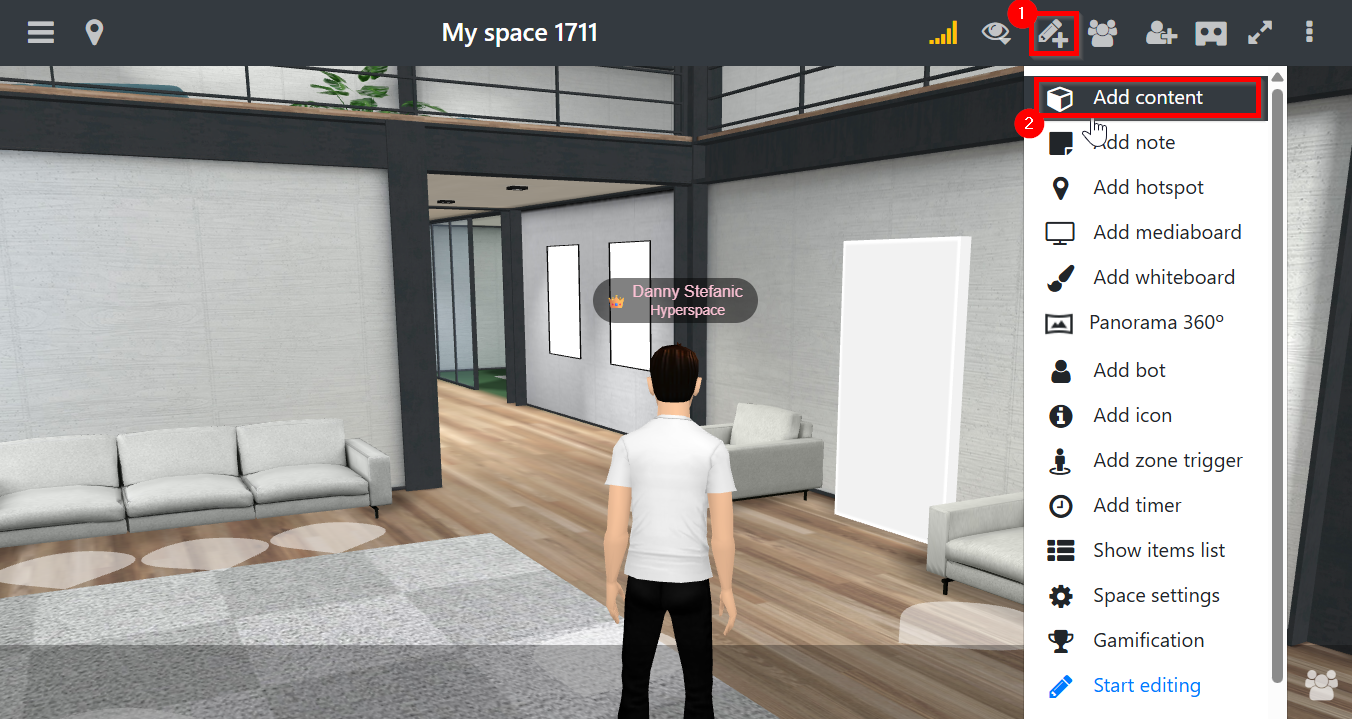
- Click the Pencil+ icon in the toolbar
- Select Add content
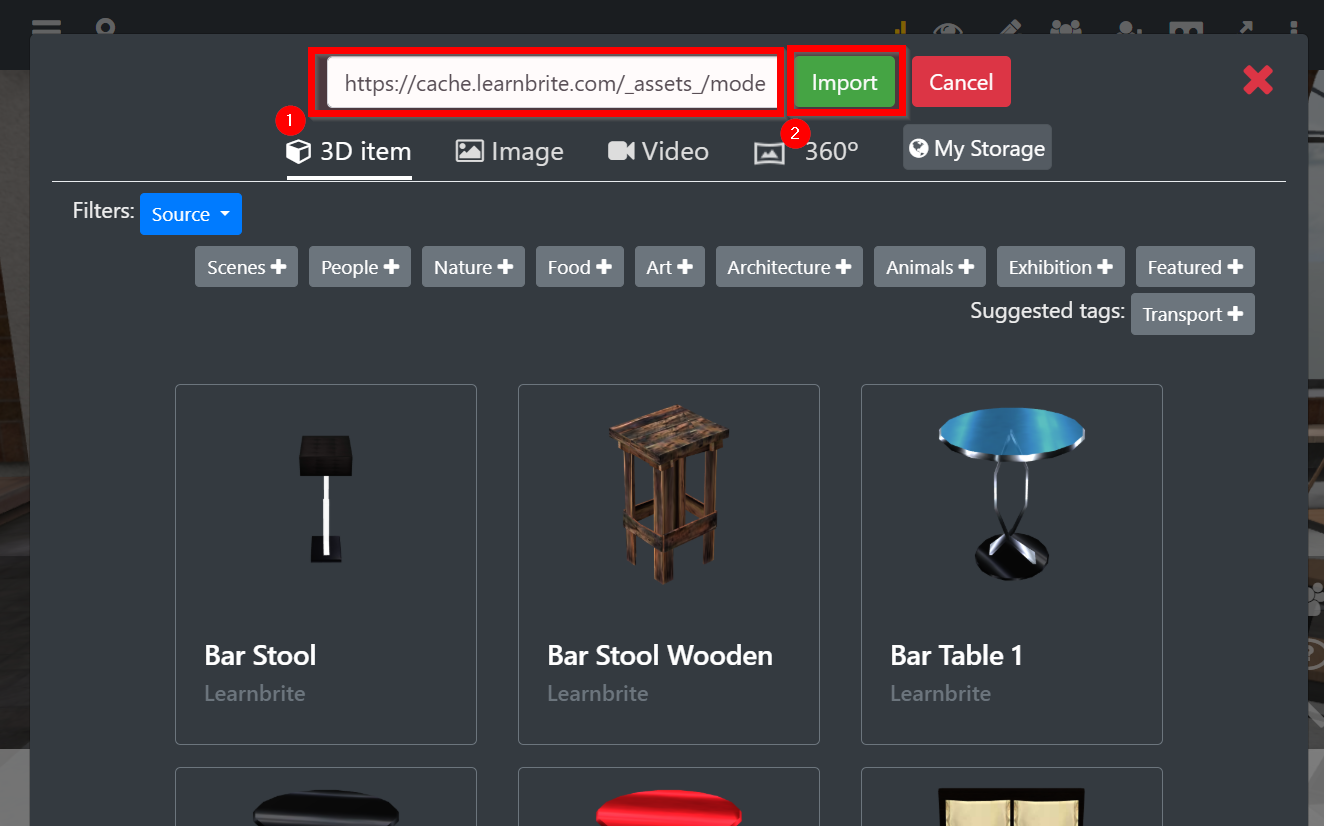
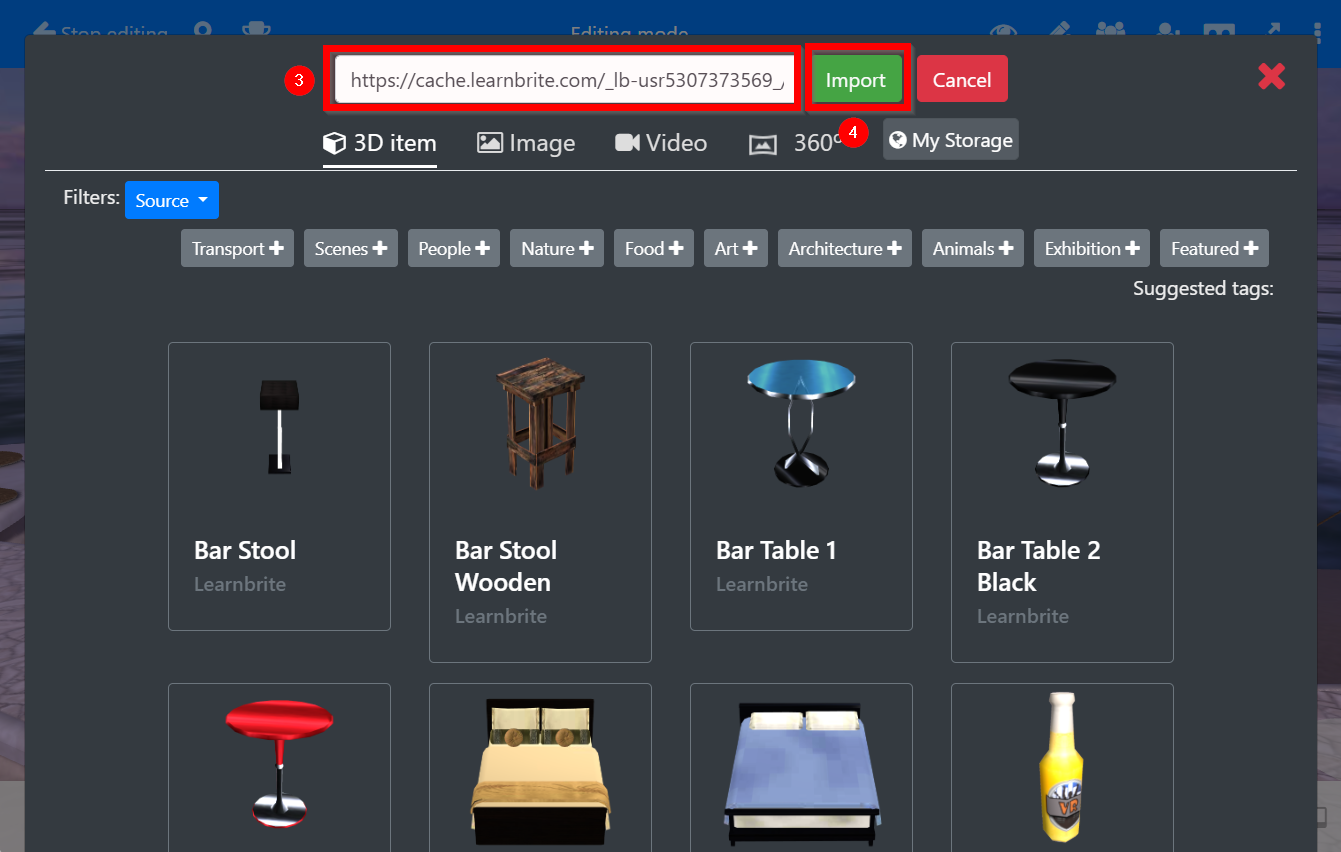
- Paste the following URL into the text bar in the top part of the window:
https://cache.learnbrite.com/_assets_/models/puzzle/1.gltf |
- Click the “Import” button
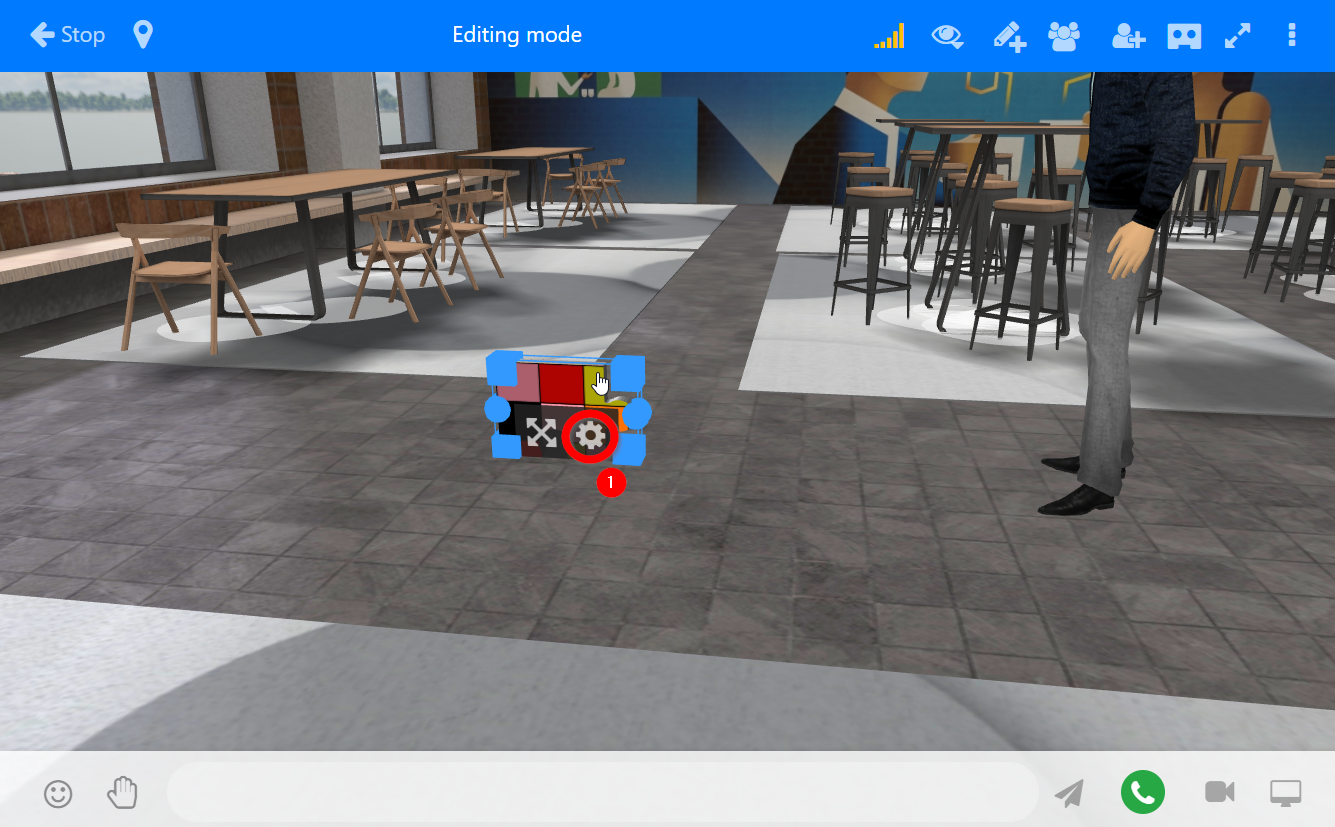
- Click the cog icon next to the new puzzle object
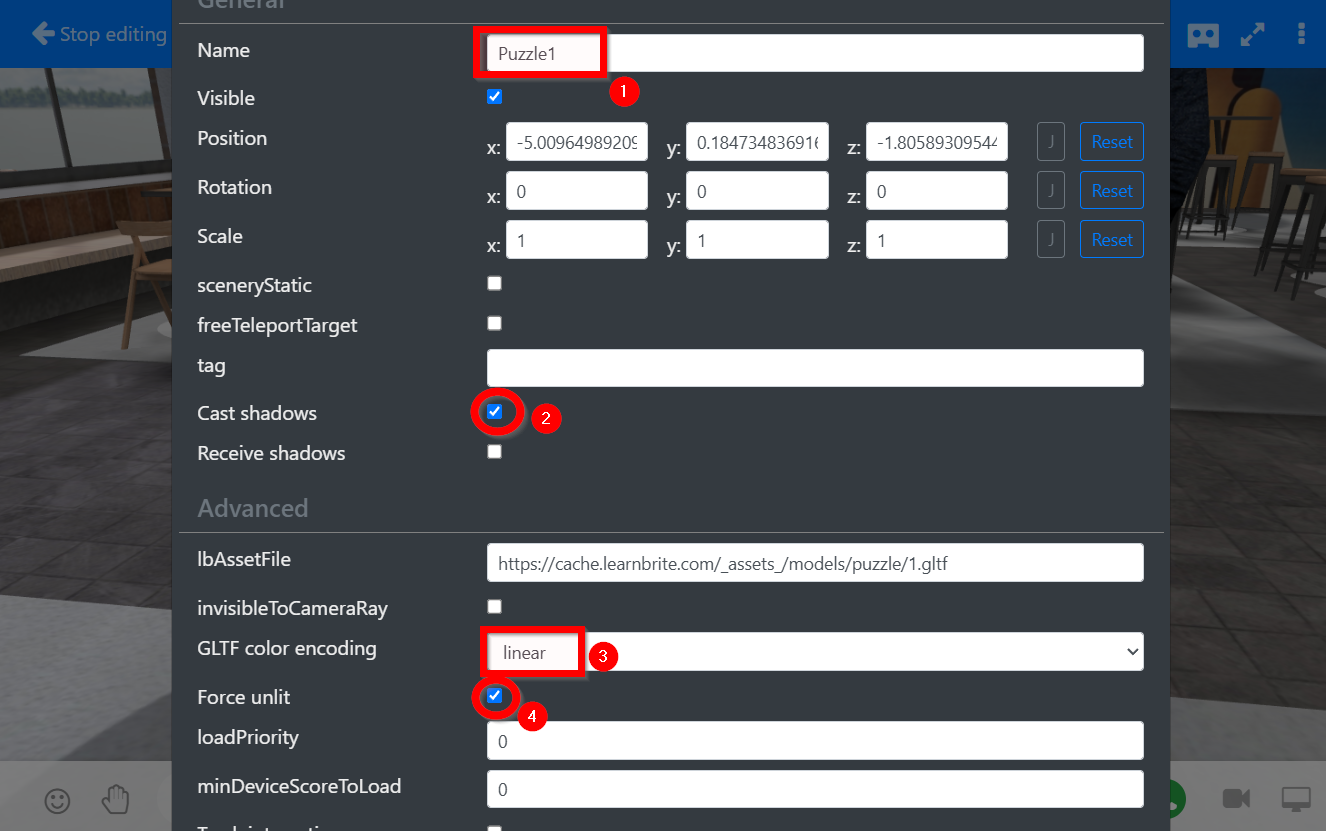
- Change the Name to Puzzle1
- Enable Cast shadows
- Change GLTF color encoding to linear
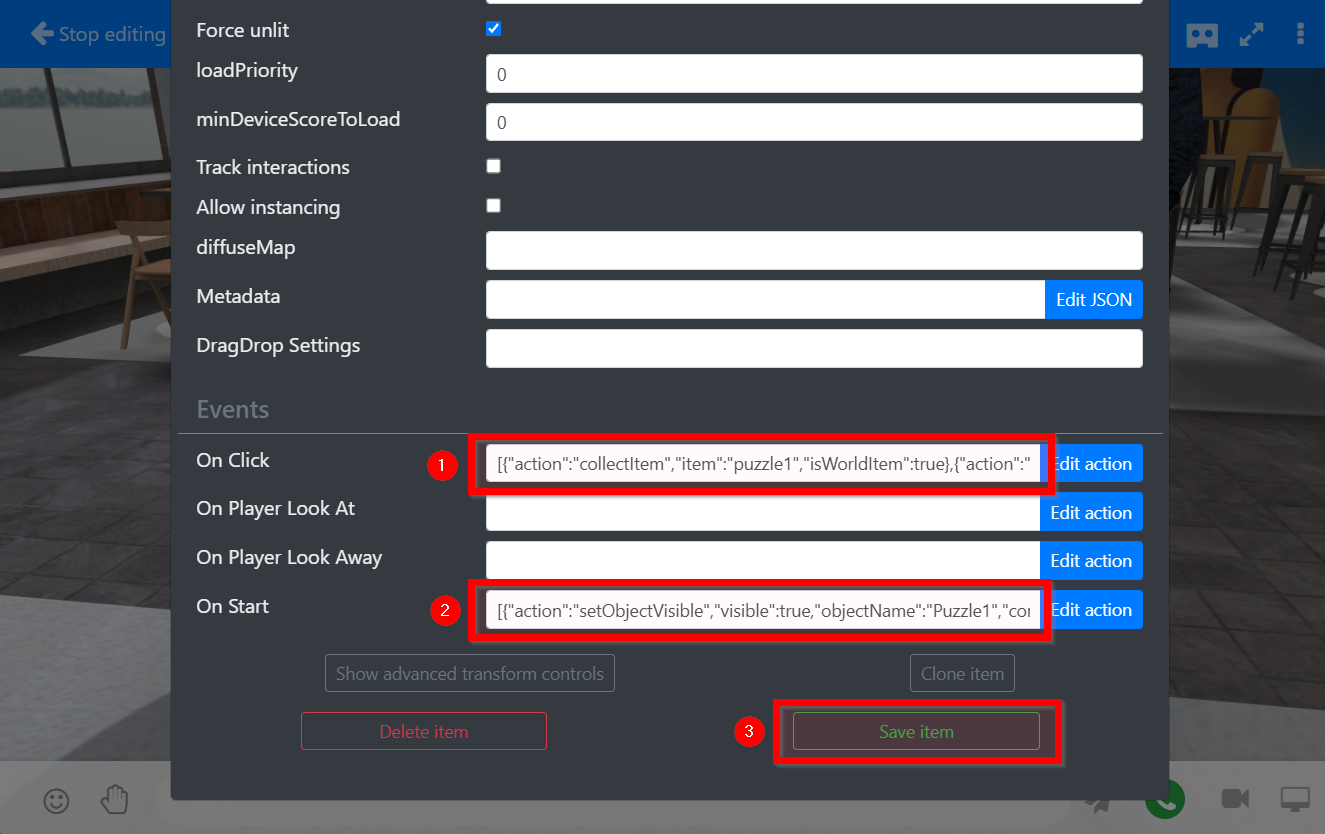
- Enable Force unlit
- Paste the following action array into the On Click field:
[{"action":"collectItem","item":"puzzle1","isWorldItem":true},{"action":"playSFX","url":"https://cache.learnbrite.com/_assets_/audio/success_digital1.mp3"},{"action":"displayNotification","message":"You've found a puzzle piece!"},{"action":"fadeObject","direction":"out","objectName":"Puzzle1"}] |
- Paste the following action array into the On Start field:
[{"action":"setObjectVisible","visible":true,"objectName":"Puzzle1","condition":"!item.puzzle1.collected"},{"action":"setObjectVisible","visible":false,"objectName":"Puzzle1","condition":"item.puzzle1.collected"}] |
This will ensure that puzzle pieces that have already been collected won’t appear after entering this space again.
- Click the Save item button
More puzzle pieces can be added by following these steps while updating the names of objects, collected Gamification items, and the 3D object URL (https://cache.learnbrite.com/_assets_/models/puzzle/2.gltf, …puzzle/3.gltf and so on)
Extra customization option:
The texture of puzzle pieces can be customized. This is often used to show company logos.
- Download the default texture for all puzzle pieces: https://cache.learnbrite.com/_assets_/models/puzzle/Branding.jpg
- Edit the texture while keeping its dimensions and save as a .jpg file
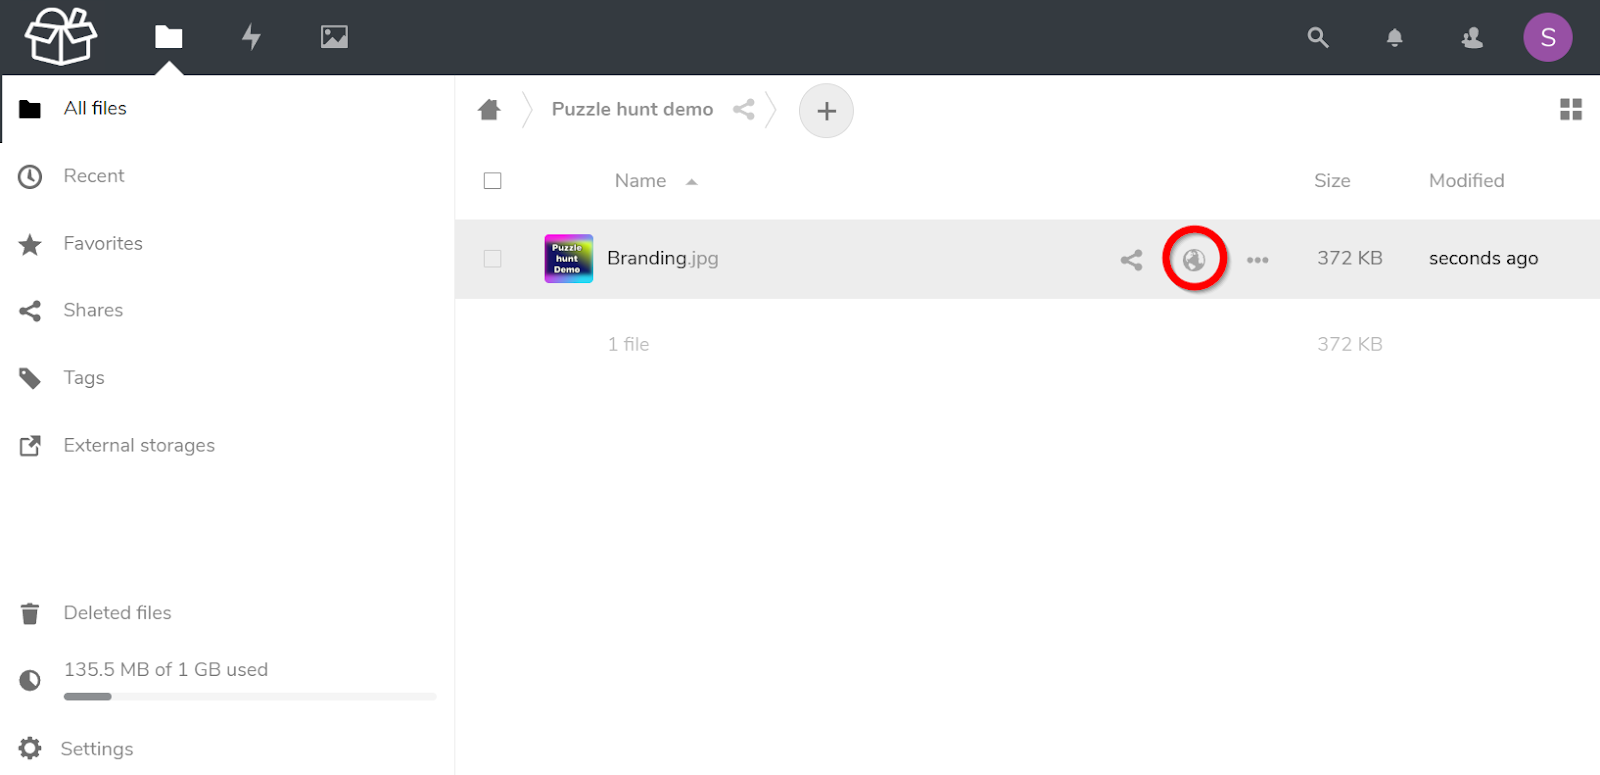
- Go to https://storage.learnbrite.com/apps/files
- Upload the new puzzle texture
- Click the globe icon to copy the URL
- Go back to the space with puzzles
- Click the cog icon next to the puzzle object in editing mode
- Paste the following code into the Metadata field
{"materialPropertiesOverrides":[{"materialNames":["Branding"],"overrides":{"map":"https://cache.learnbrite.com/_lb-usr5307373569_/Puzzle_hunt_demo/Branding.jpg"}}]} |
Make sure to replace the URL marked in pink with the one copied in step 2.
- Click the Save button
Step 3 is the same for all subsequent puzzle pieces, even though they have different 3D models. Different pieces will use different parts of the same texture. |

Add a Gamification task
- Go to the Worlds dashboard https://app.learnbrite.com/dashboard/worlds
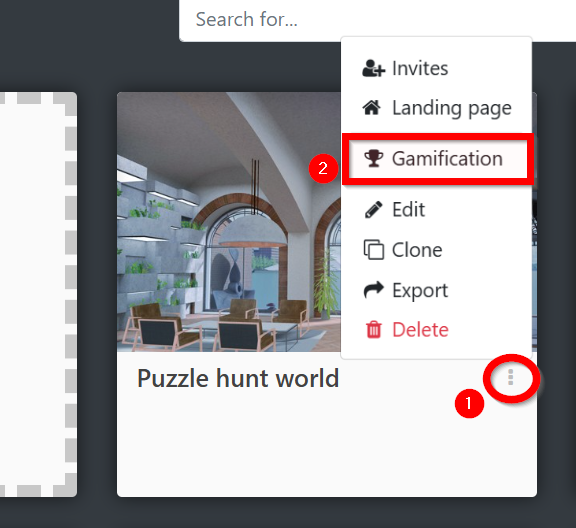
- Click the 3 dots in a tile representing your world
- Select the Gamification option
- Click the Add task button

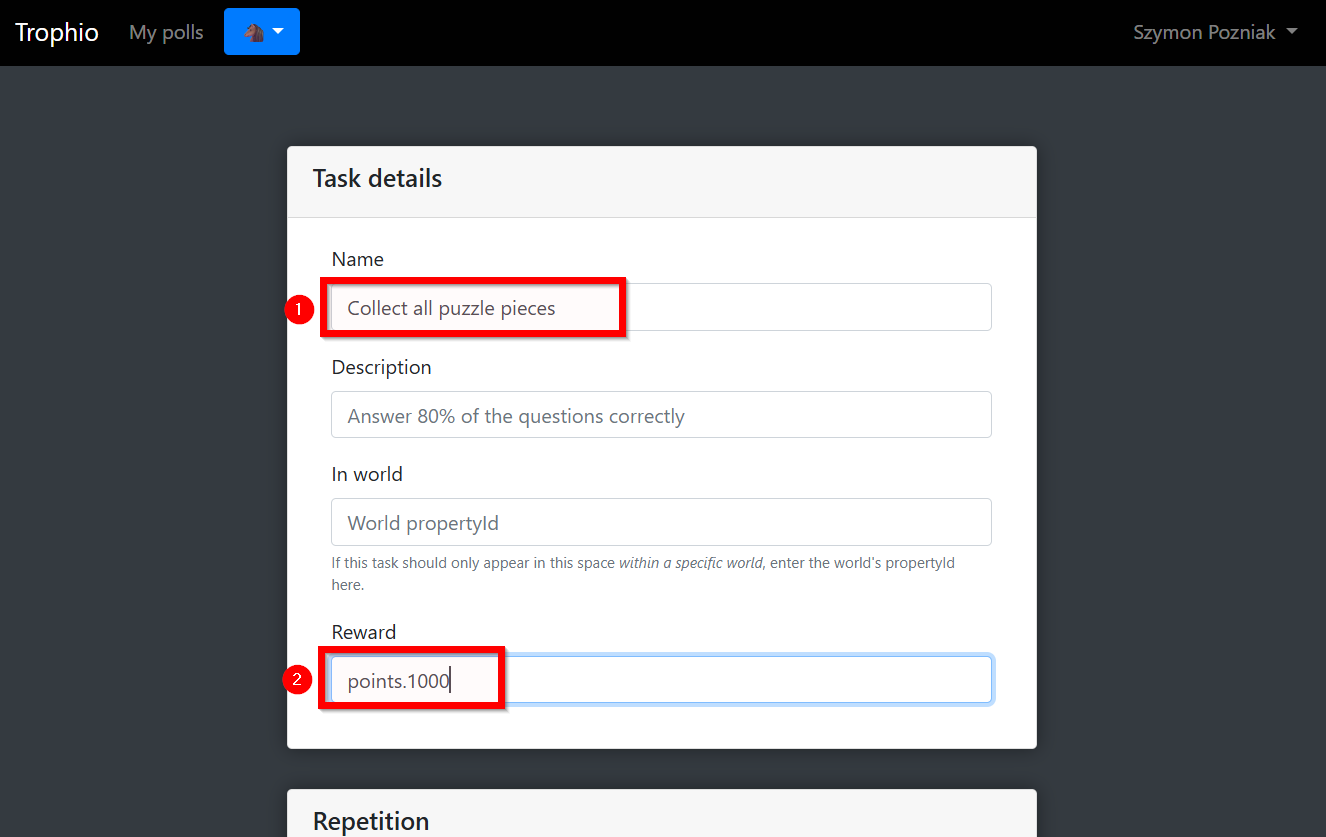
- Add a name
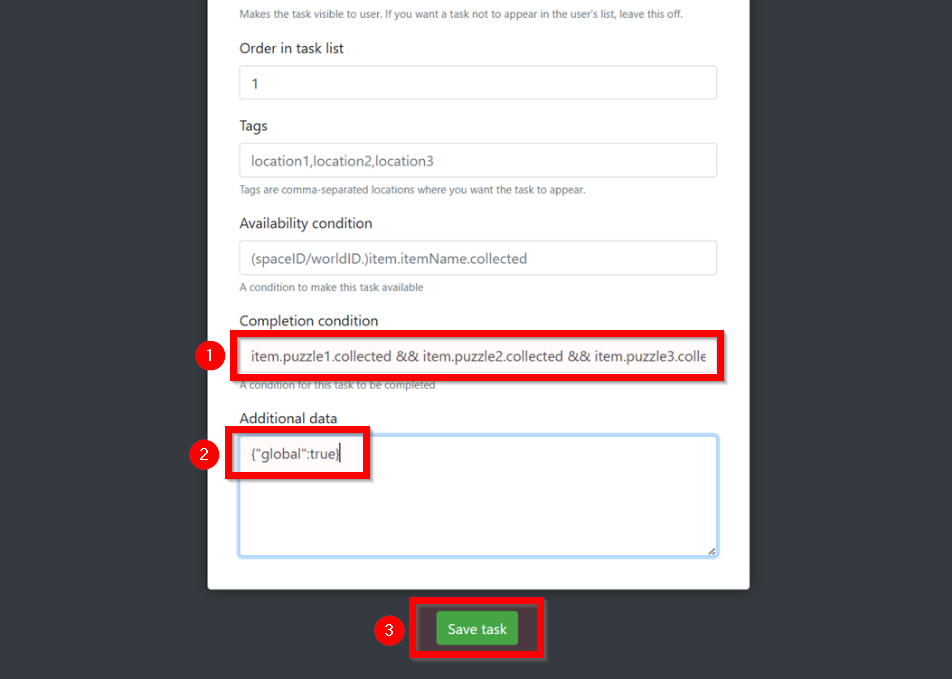
- Specify the number of points awarded for completing the task
- Add the following conditions to the Completion condition field
item.puzzle1.collected && item.puzzle2.collected && item.puzzle3.collected && item.puzzle4.collected && item.puzzle5.collected |
This condition should be modified to include all puzzle items available in your world
- Add the following text to the Additional data field
{"global":true} |
This ensures that the task will be visible in all spaces in your world
- Click the Save task button
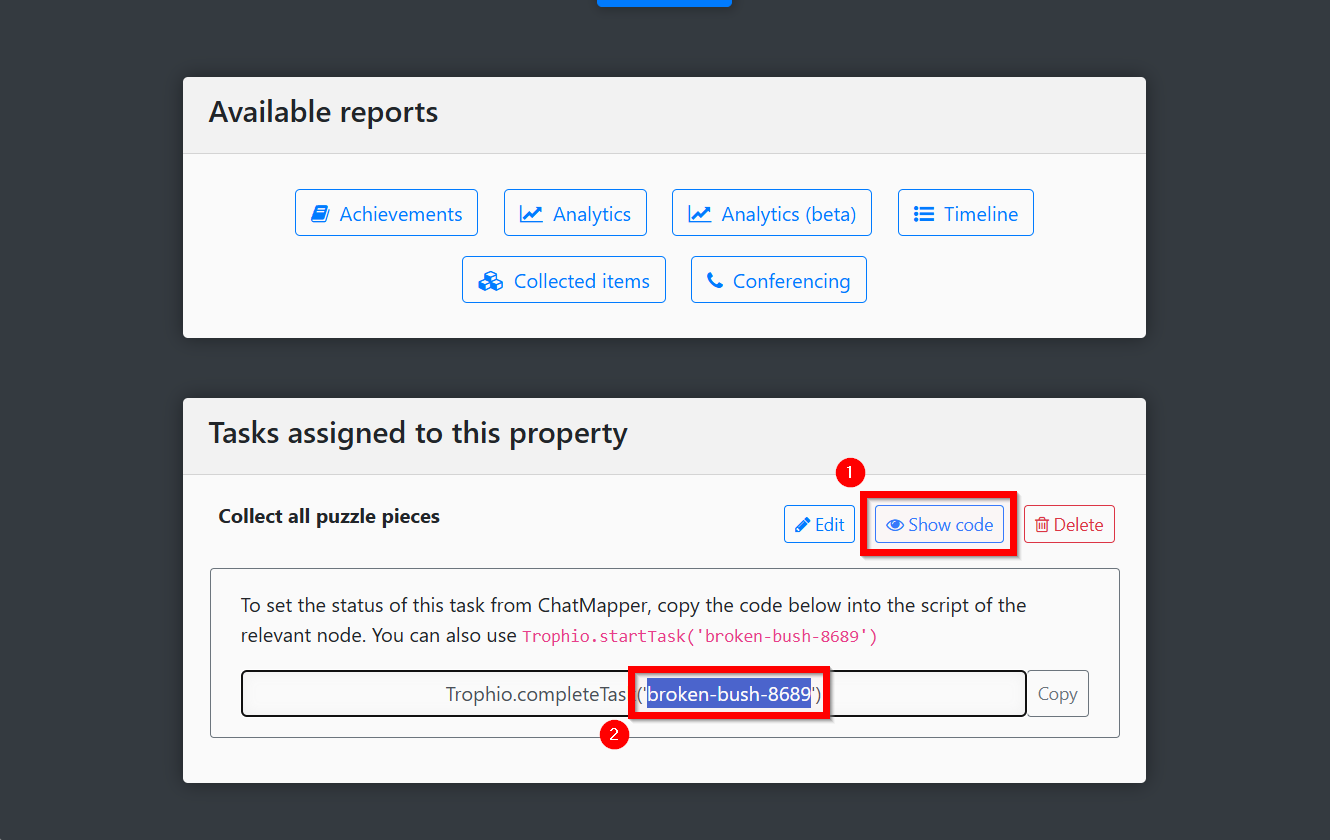
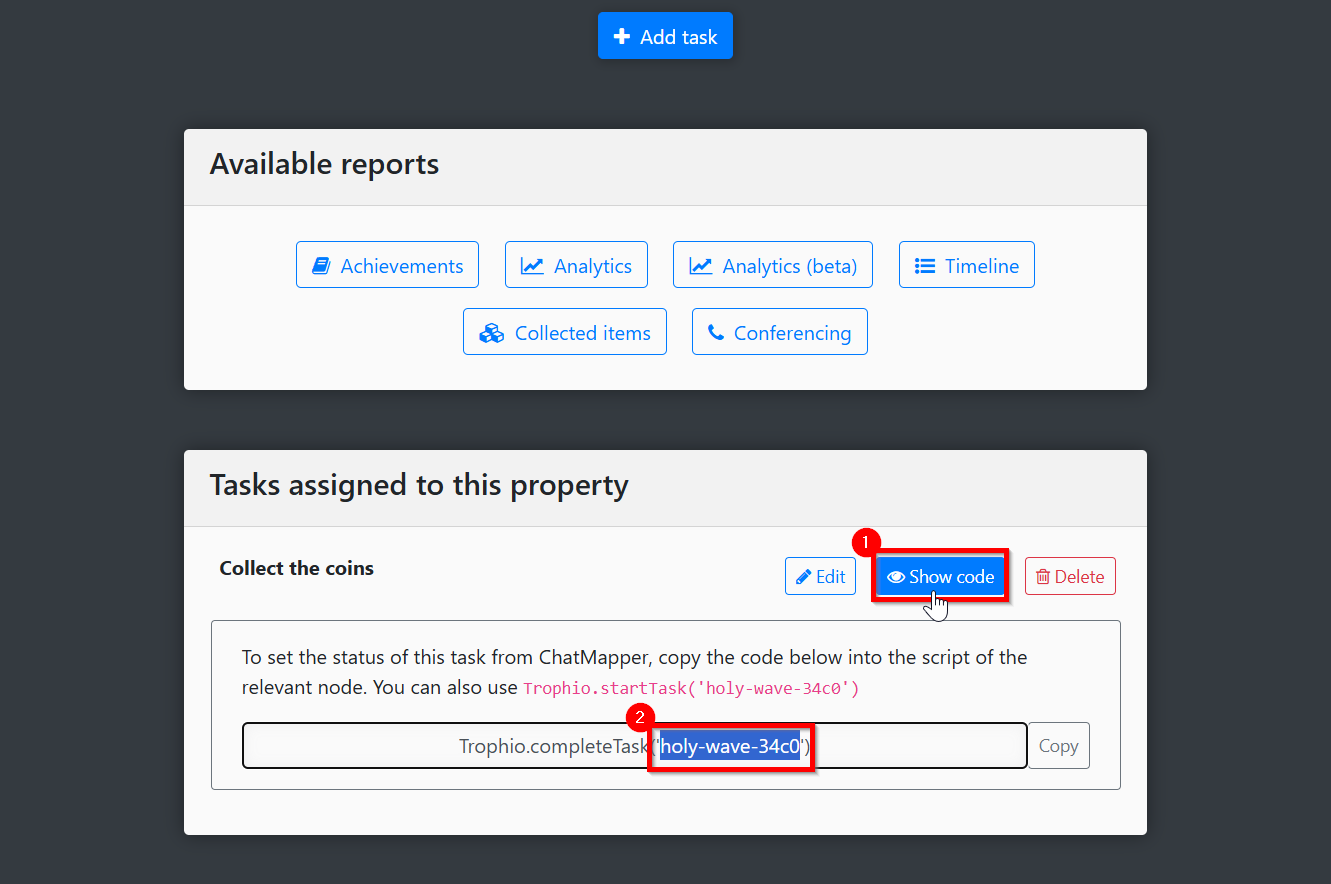
- I click the Show code button
- I copy the shortcode and save it for later steps
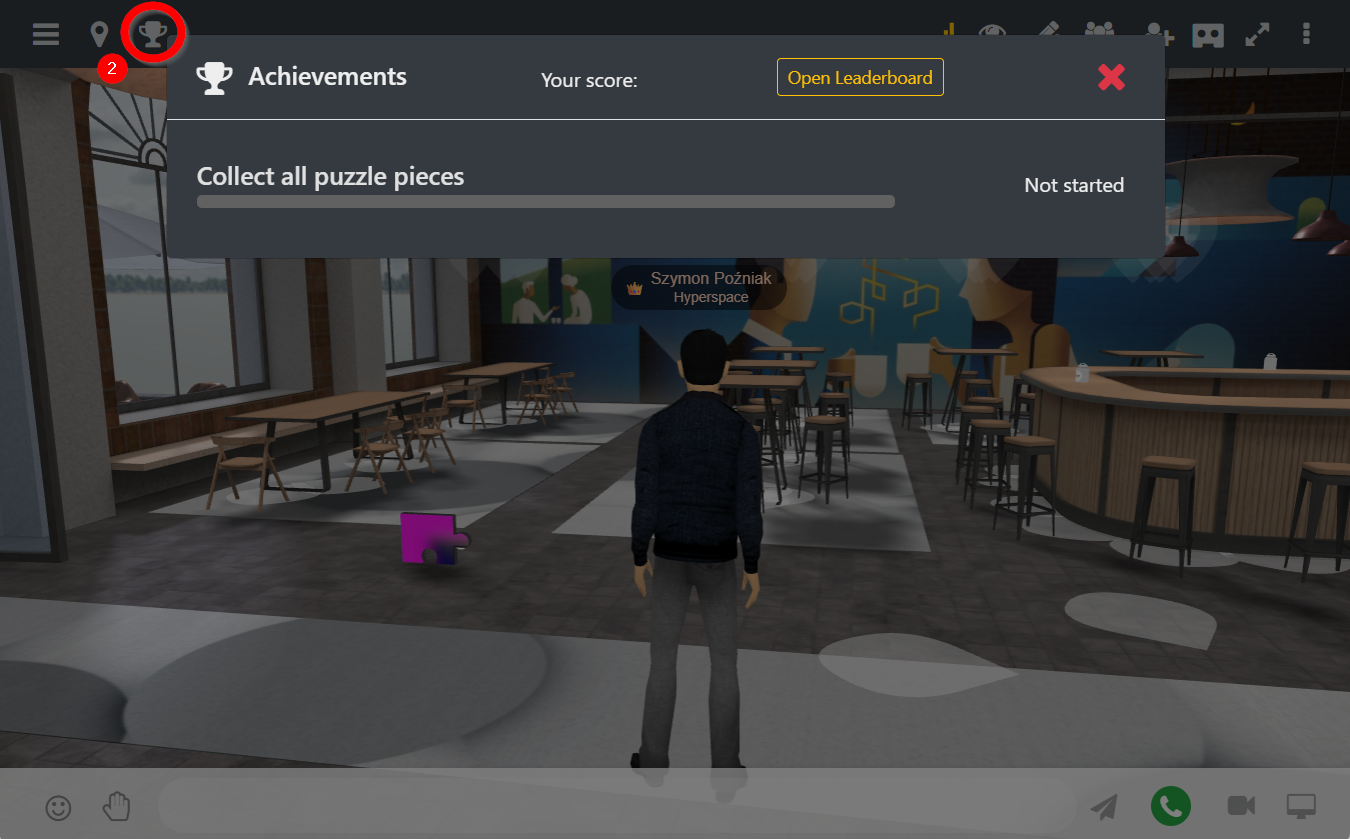
- Reload the page with a space
- Click the trophy icon in the top bar
- Your task should now be visible and show how many puzzle pieces have been collected
Add the final puzzle objects
- In the top bar area, click the location pin icon (hereinafter: Locations menu)
- In the Locations menu, click the location where you want to add the last puzzle piece

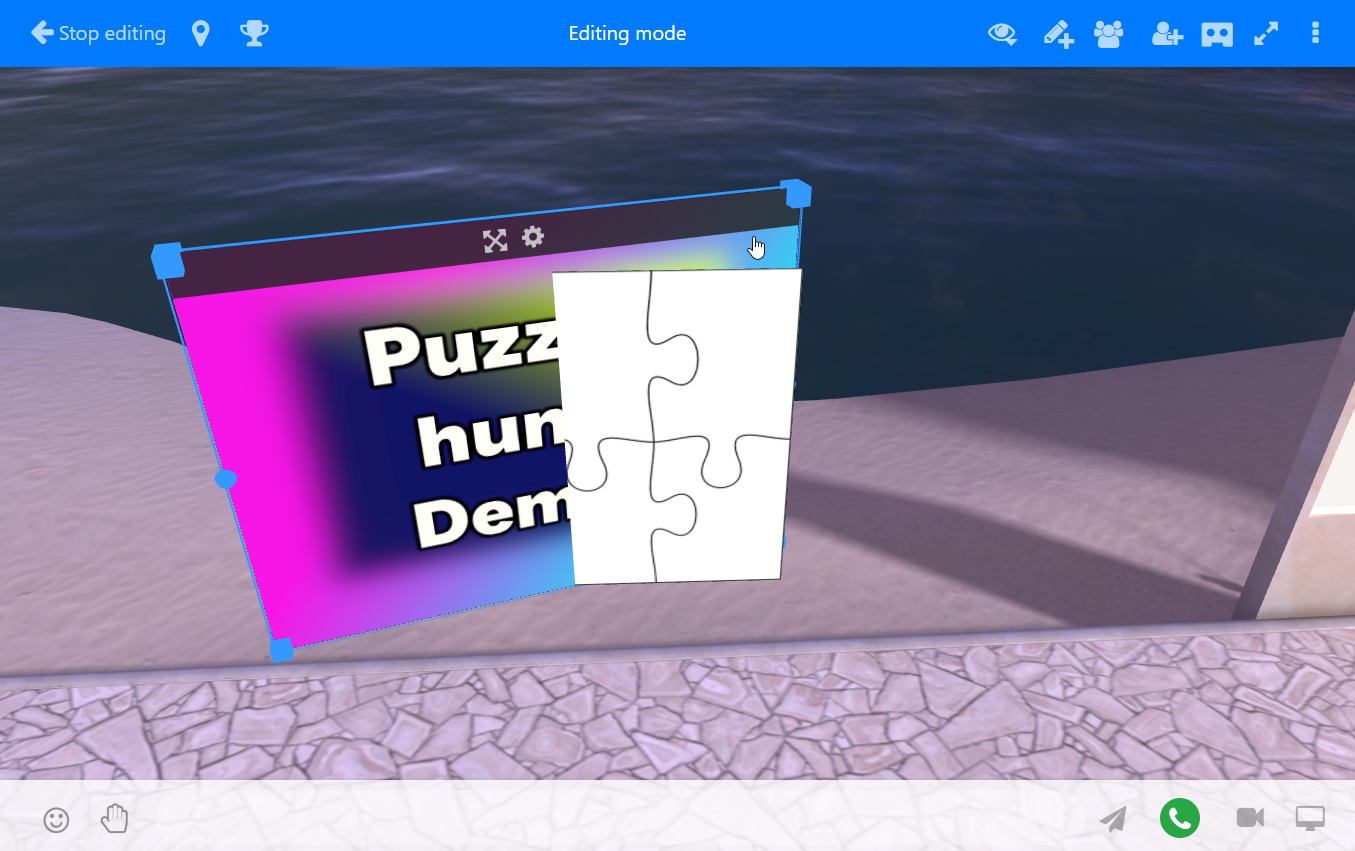
Add the empty puzzle mediaboard
- Click the Pencil+ icon in the toolbar
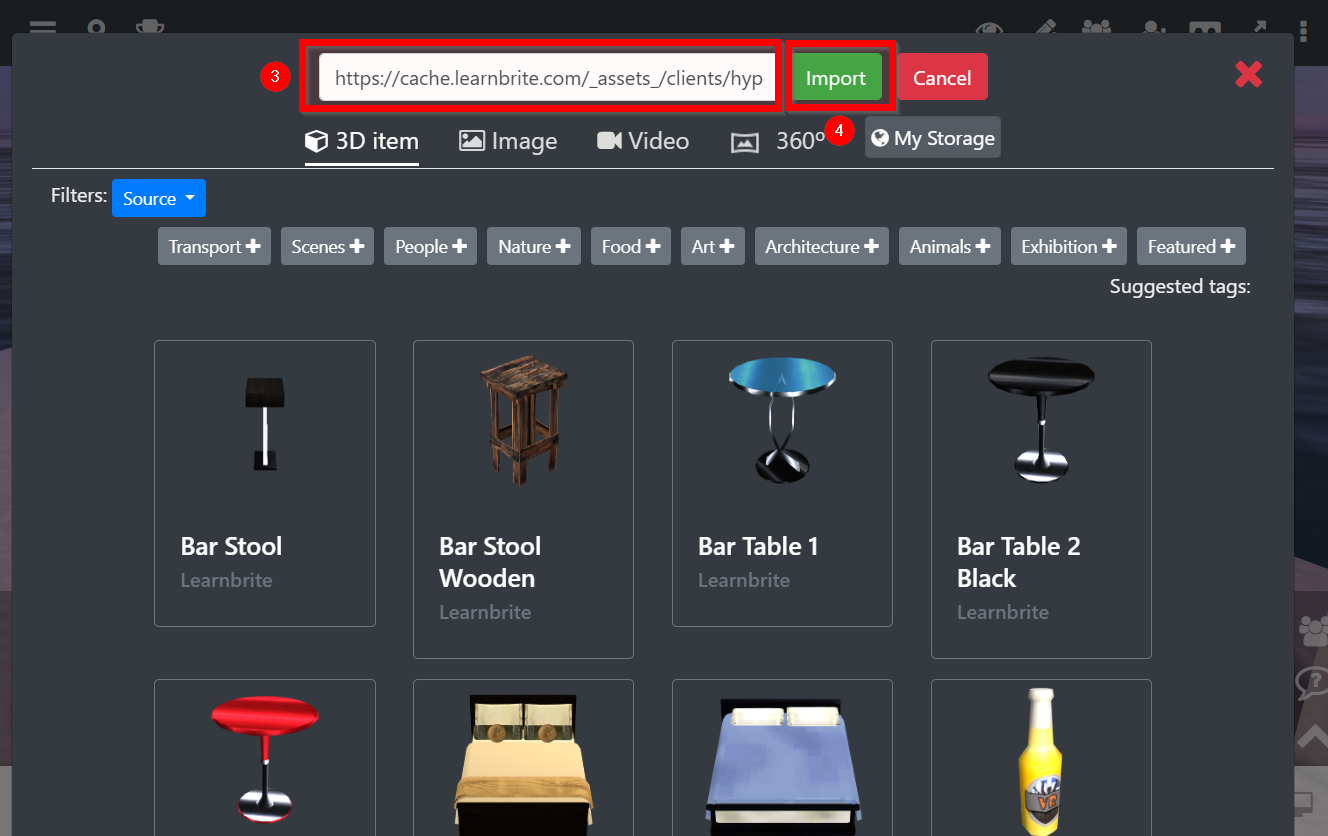
- Select Add content
- Paste the following URL in the text box
https://cache.learnbrite.com/_assets_/clients/hyperspace/images/Puzzle_Pieces_empty.jpg |
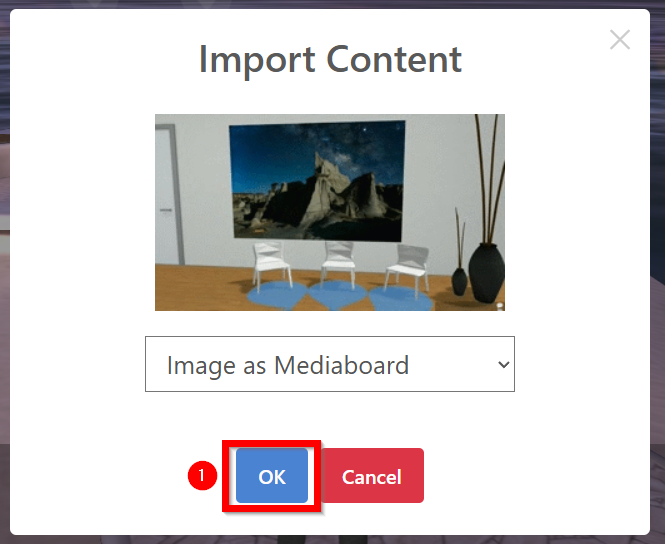
- Click the Import button
- In the Import content, click the ok button
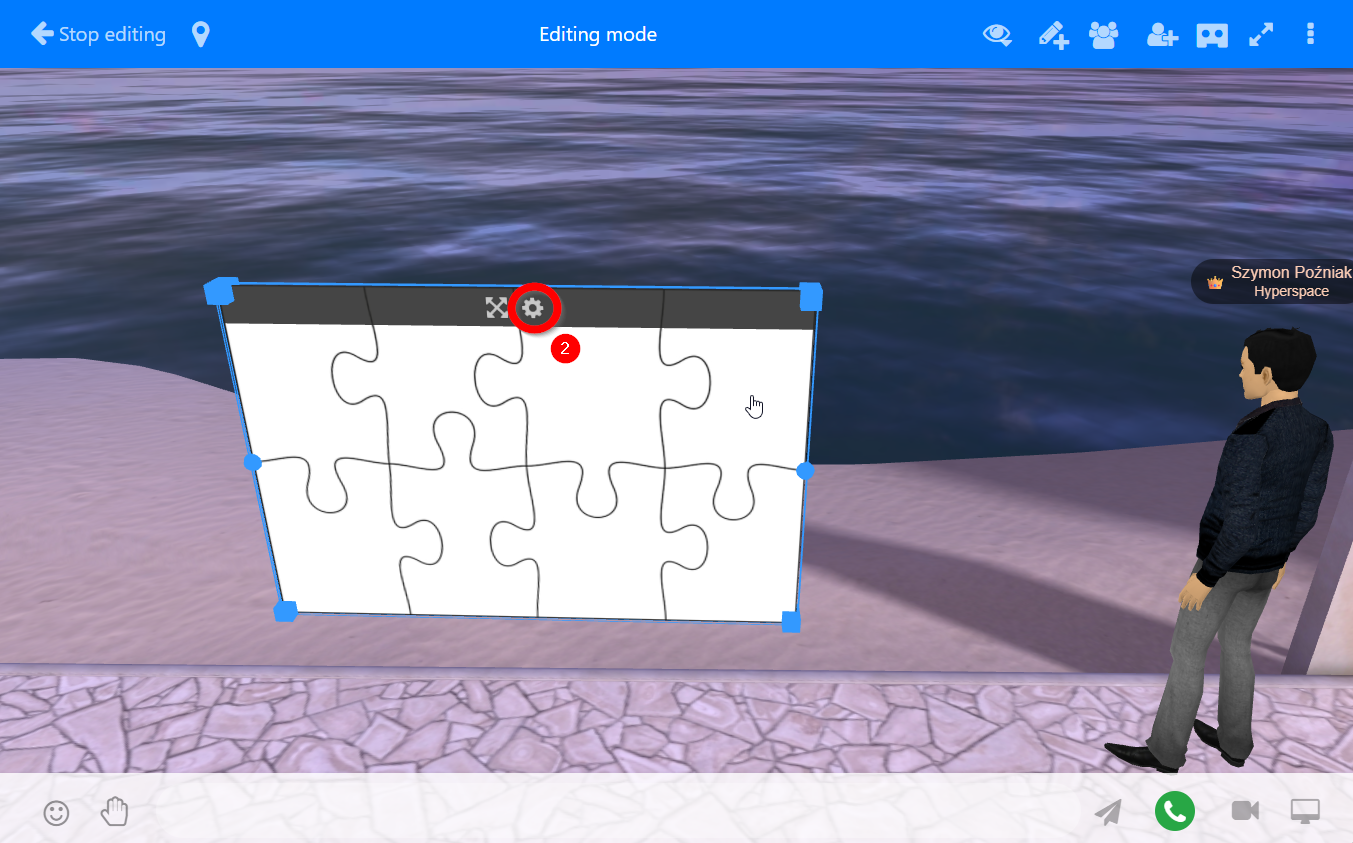
- Reposition the empty puzzle piece board in the space if needed
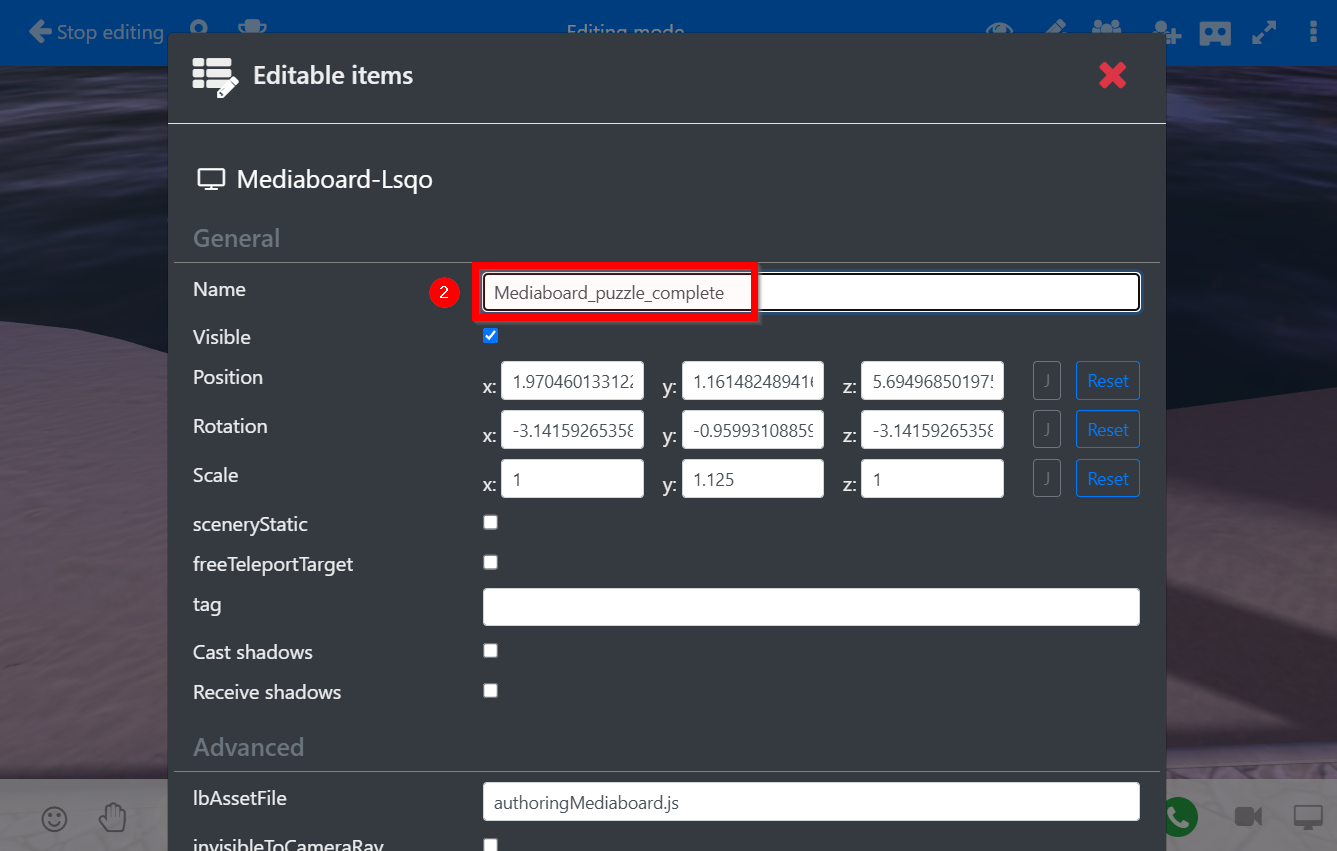
- Click the cog icon to open the object settings
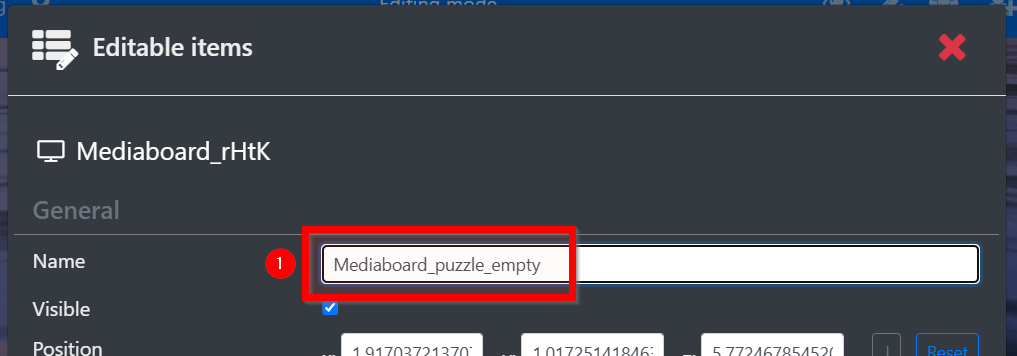
- Change the name
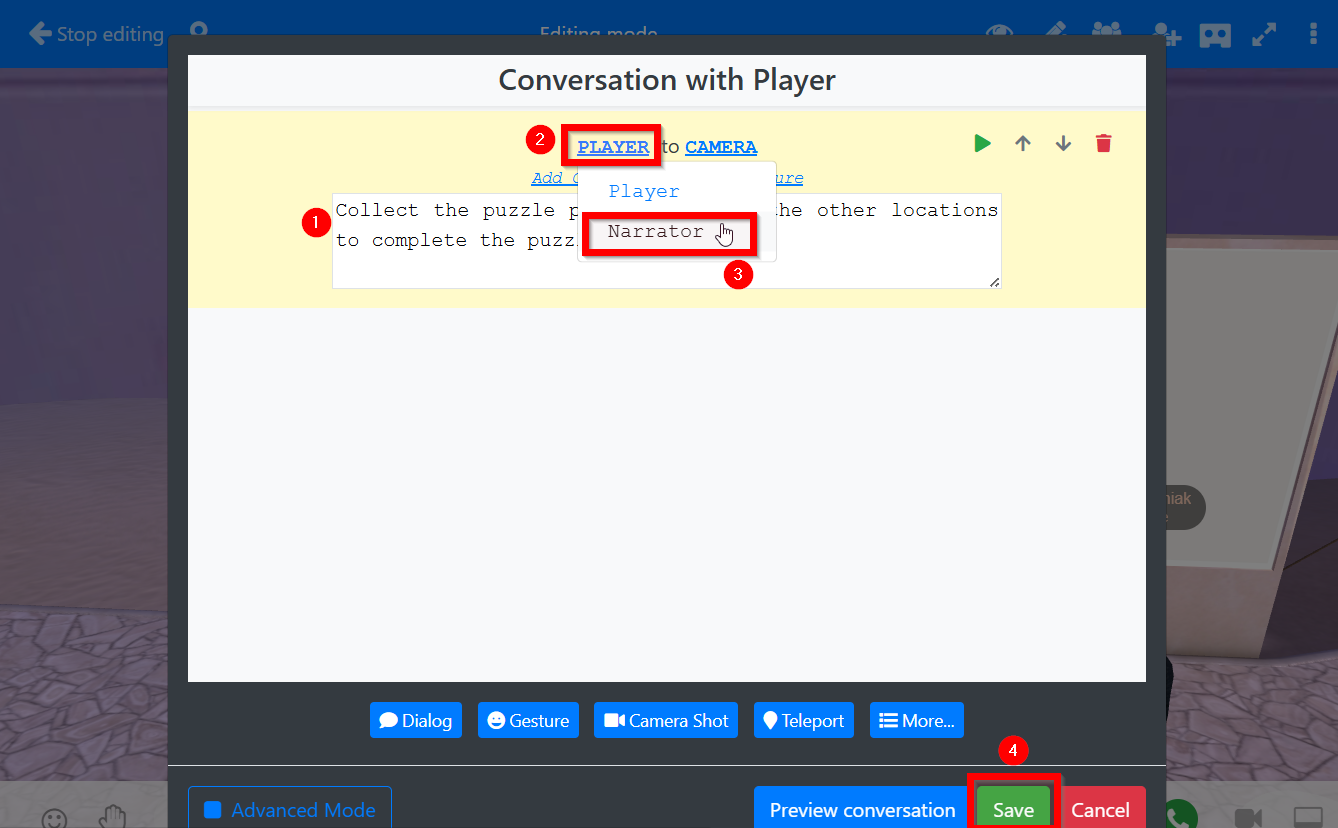
- Click the Edit action button next to the On Click field
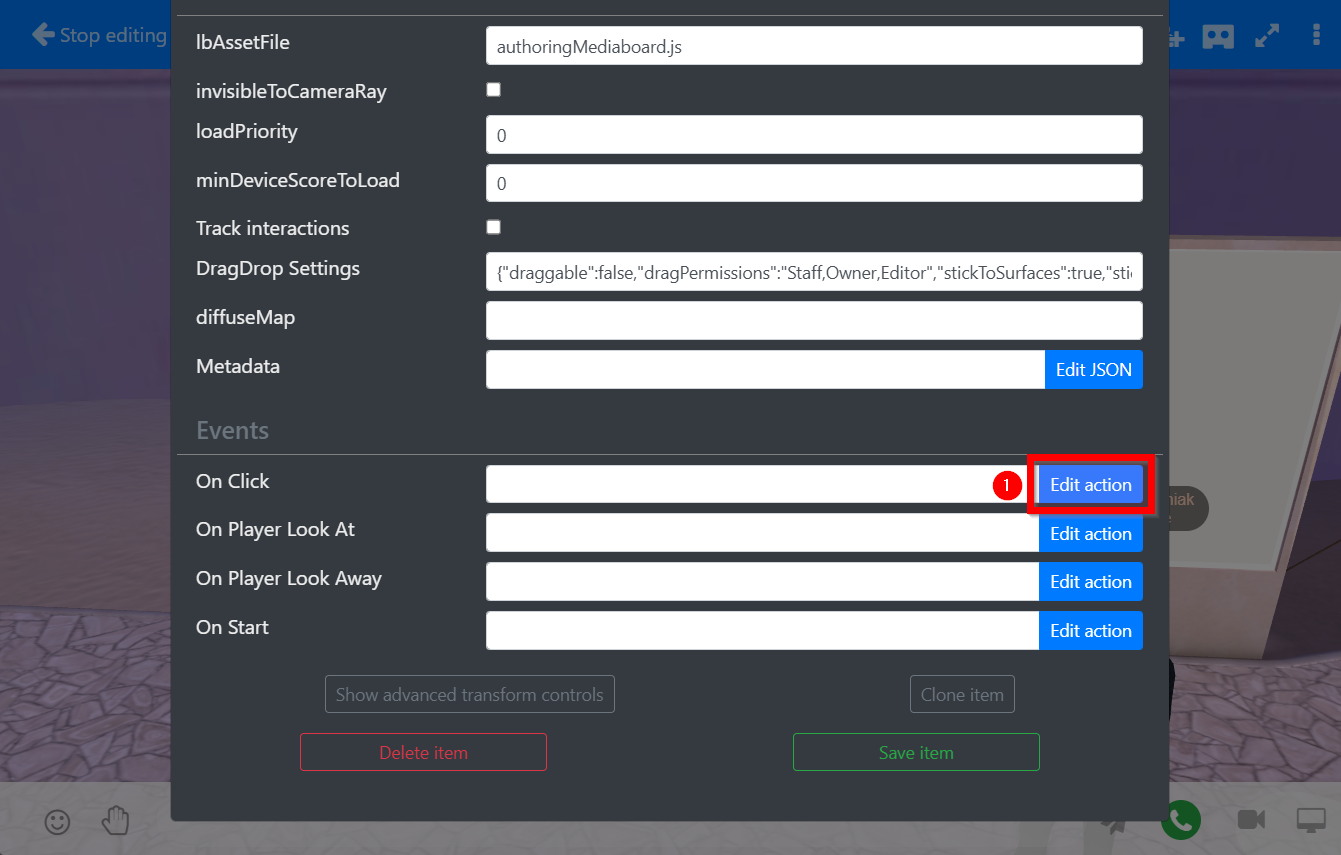
- Paste the following text into the existing conversation node:
Collect the puzzle pieces found in the other locations to complete the puzzle. |
- Click the Player button
- Select the Narrator option
- Click the Save button
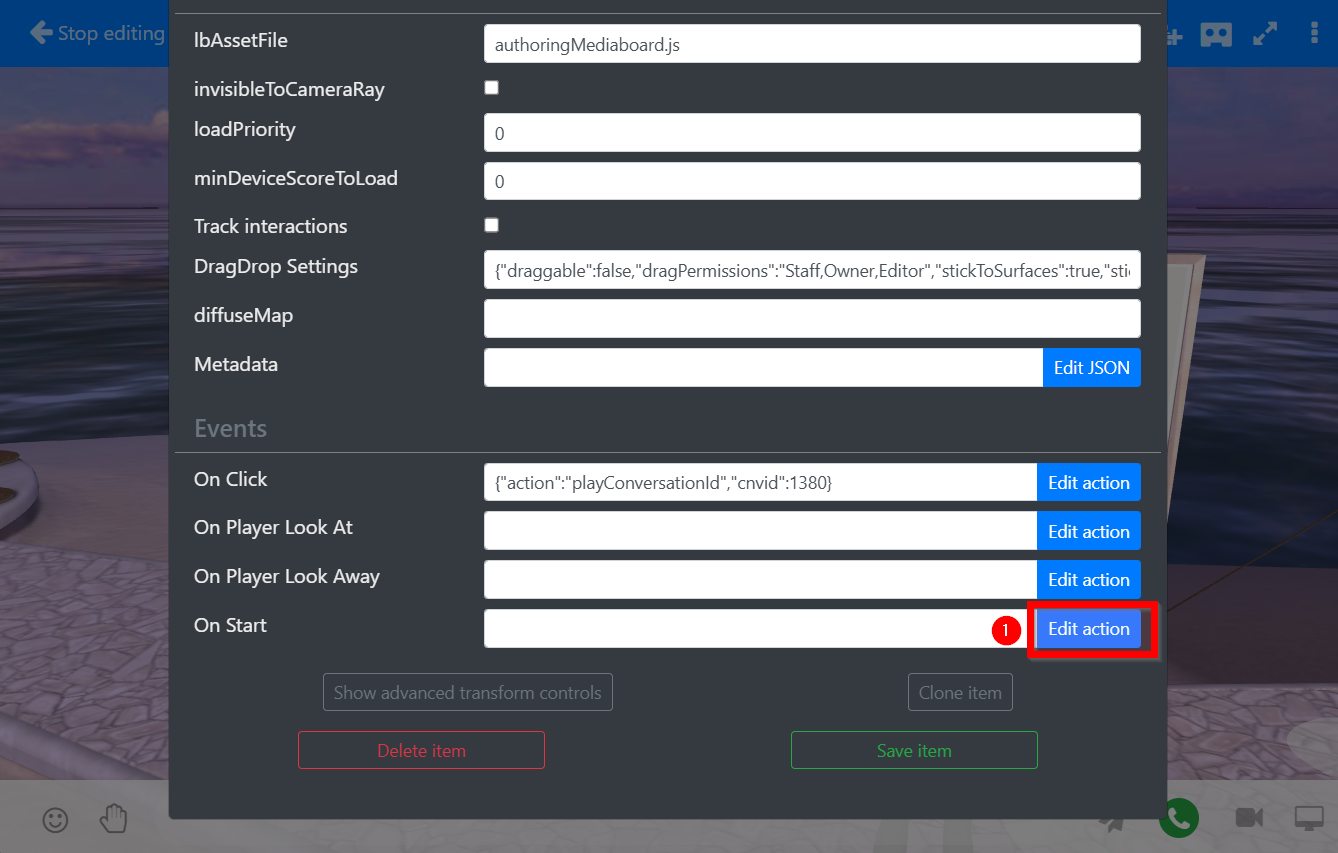
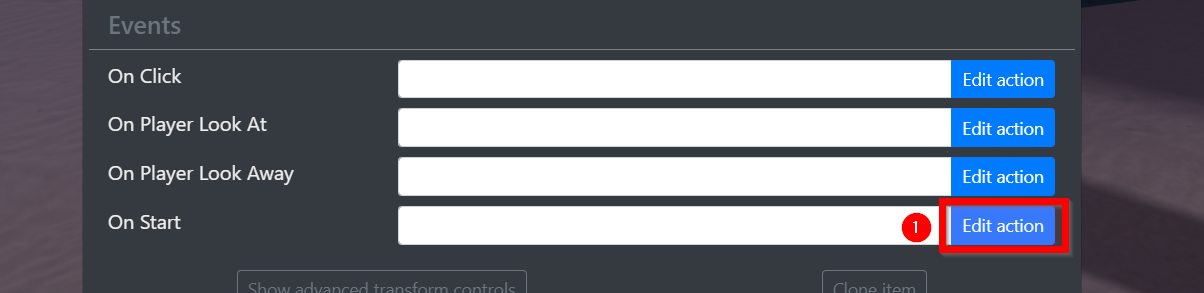
- Click the Edit action button next to the On Start field
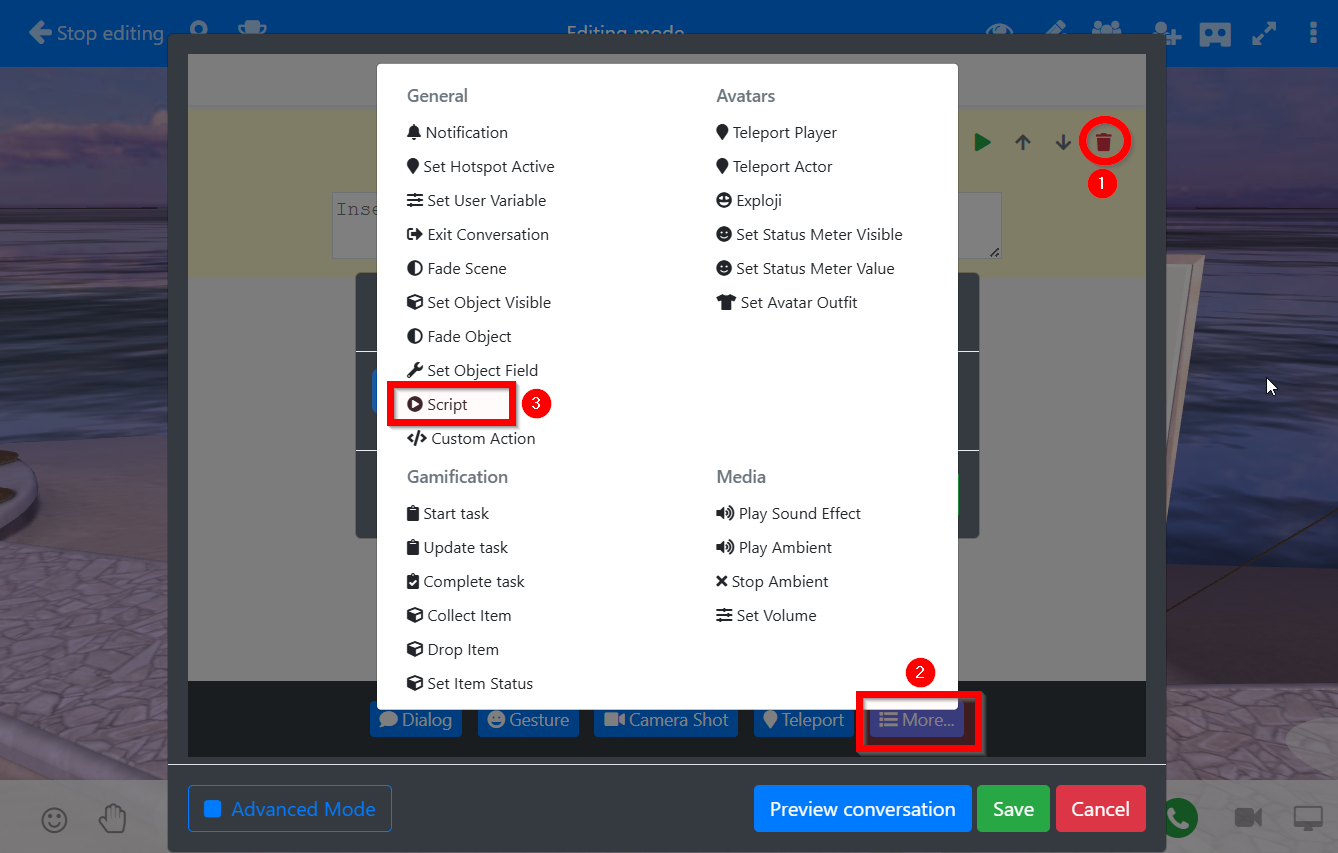
- Delete the existing conversation node
- Click the More… button
- Select the Script option
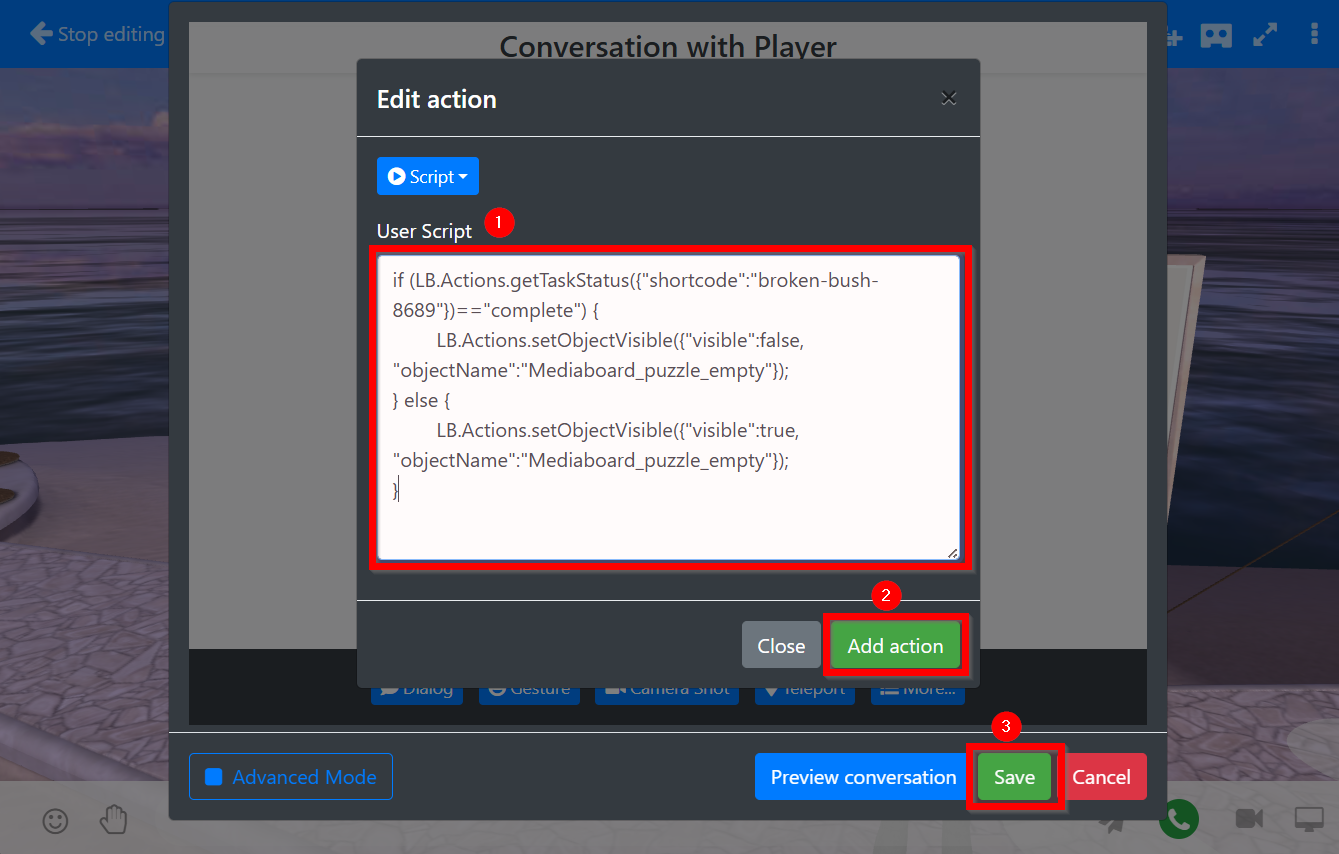
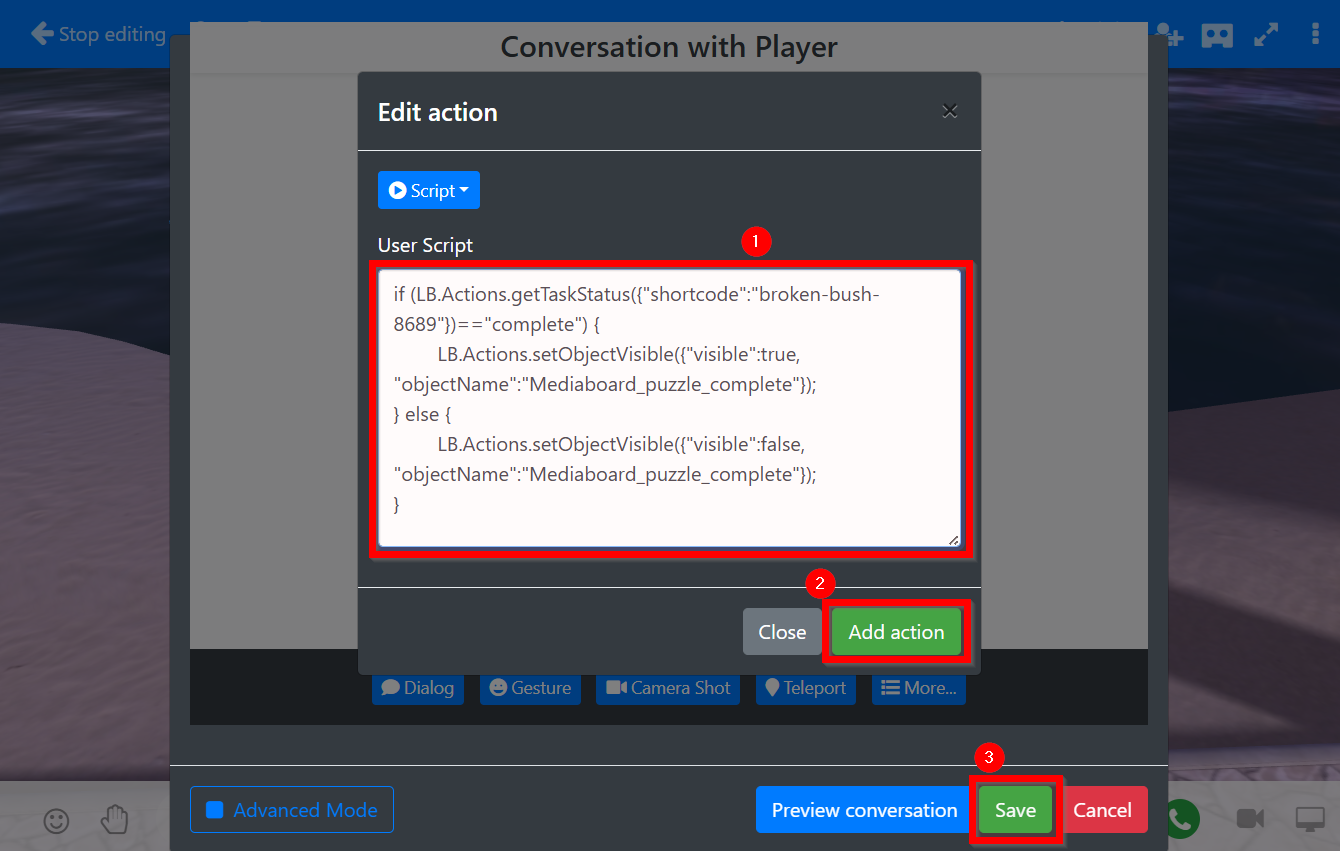
- Paste the following code into the User Script field:
if (LB.Actions.getTaskStatus({"shortcode":"broken-bush-8689"})=="complete") { |
This will hide the empty mediaboard after entering the space with the Puzzle collection task completed
- Click the Add action button
- Click the Save button
Add the complete puzzle mediaboard
- Click the Pencil+ icon
- Click the Add content button
- Paste the URL of a complete puzzle texture into the text bar
- Click the Import button
- Reposition the complete puzzle board to fit the empty board
- Click the cog icon next to the complete puzzle board
- Change the name
- Click the Edit action button next to the On Start field
- Delete the existing conversation node
- Click the More… button
- Select the Script option
- Paste the following code into the User Script field:
if (LB.Actions.getTaskStatus({"shortcode":"broken-bush-8689"})=="complete") { |
This will hide the complete mediaboard after entering the space with the Puzzle collection task still in progress, and show it when the task is completed
- Click the Add action button
- Click the Save button
Add the last puzzle piece
- Click the Pencil+ icon
- Click the Add content button
- Paste the URL of the last puzzle piece object into the text bar; in this case it’s
https://cache.learnbrite.com/_assets_/models/puzzle/5.gltf |
- Click the Import button
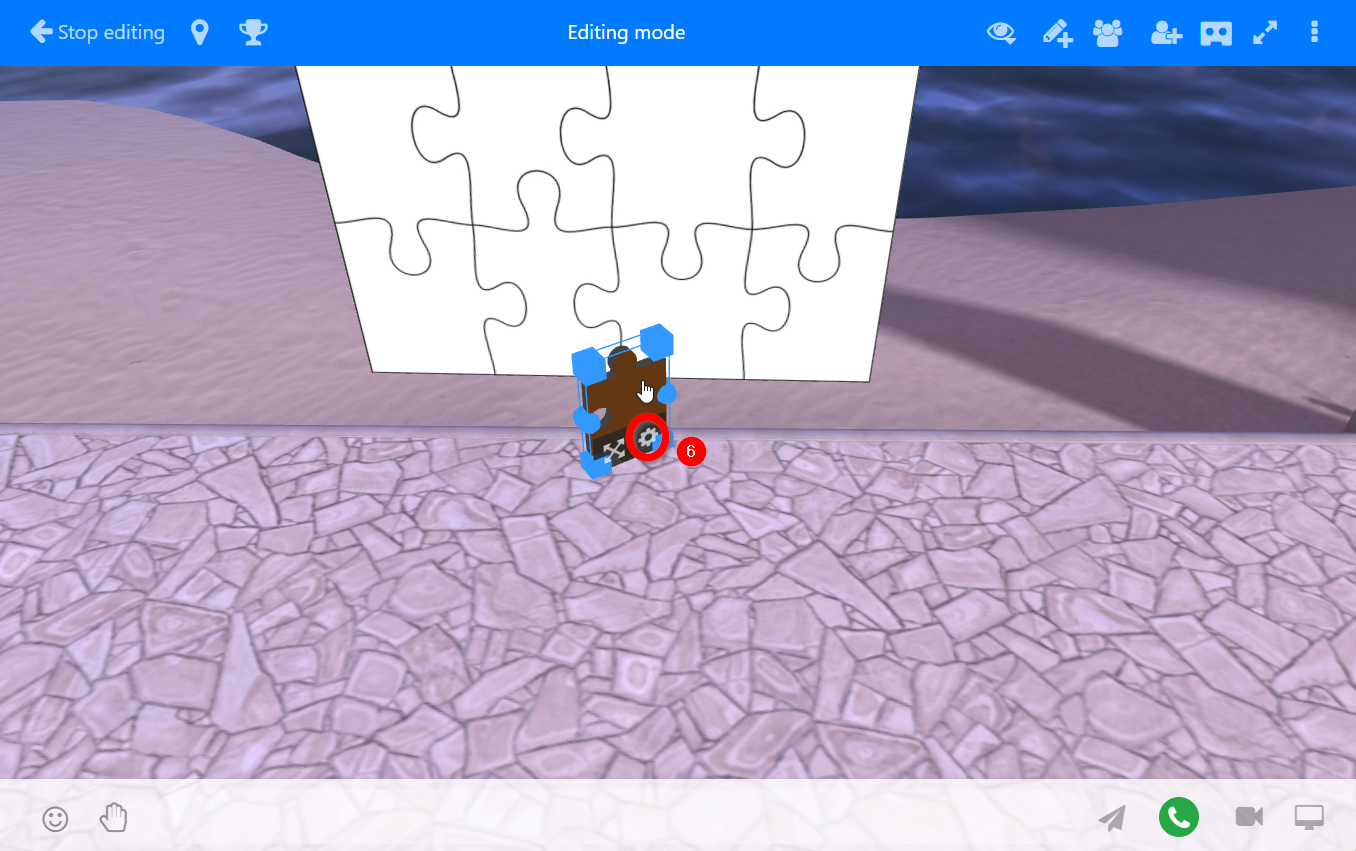
- Reposition the puzzle piece if necessary
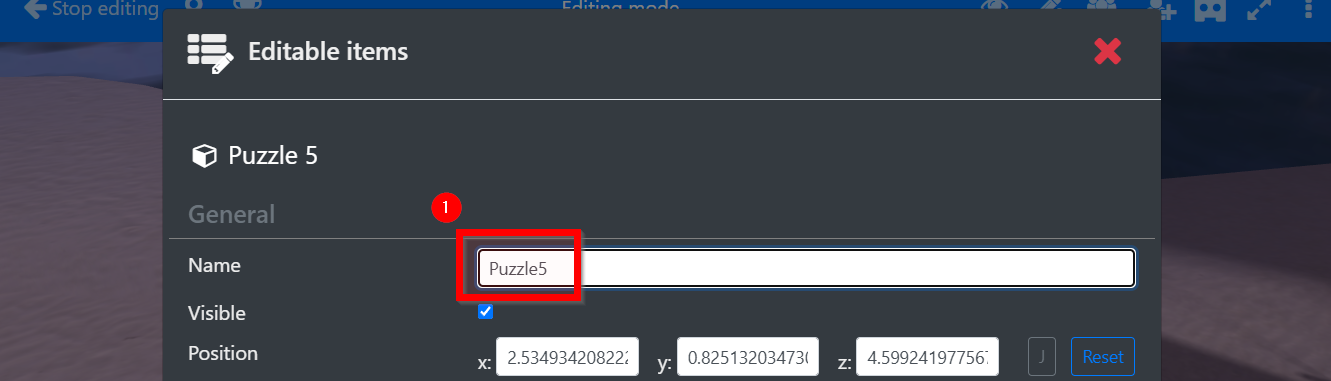
- Click the cog icon next to the puzzle piece
- Change the name
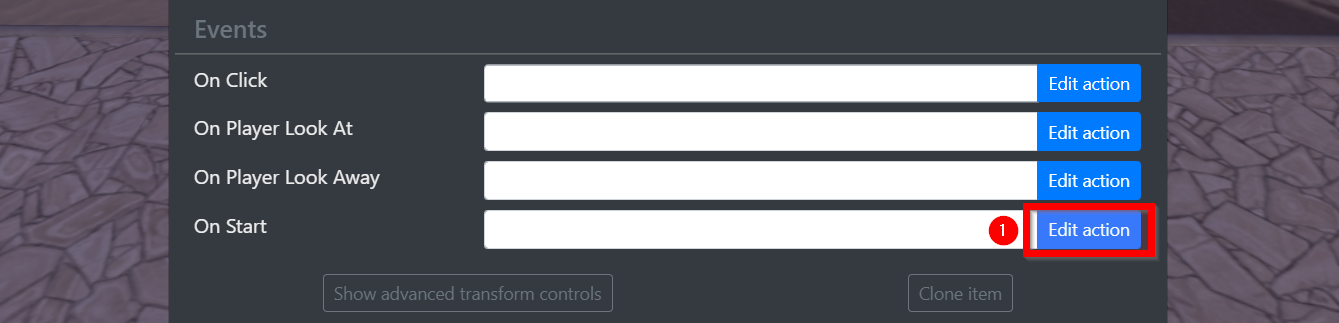
- Click the Edit action button next to the On Start field
- Delete the existing conversation node
- Click the More… button
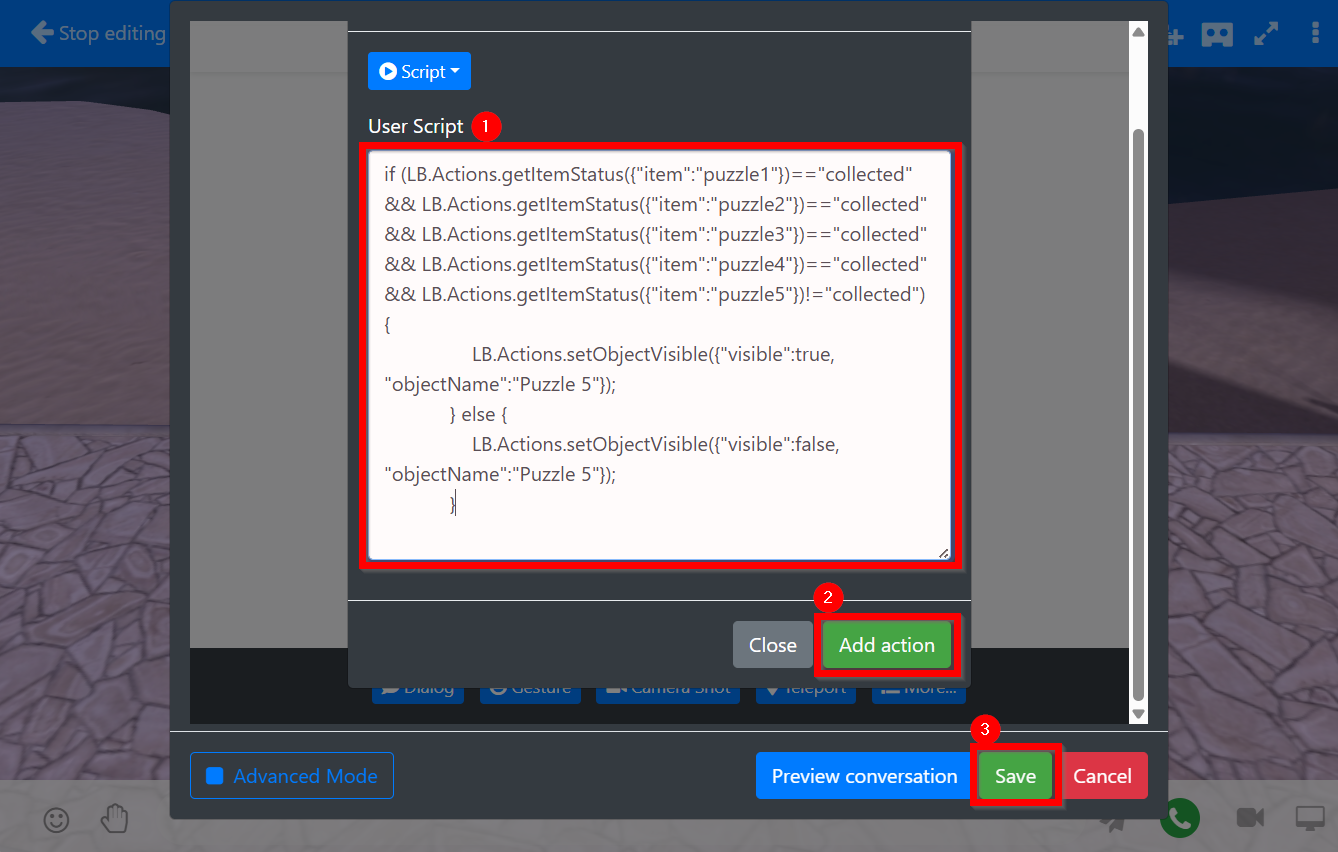
- Select the Script option
- Paste the following code into the User Script field:
if (LB.Actions.getItemStatus({"item":"puzzle1"})=="collected" && LB.Actions.getItemStatus({"item":"puzzle2"})=="collected" && LB.Actions.getItemStatus({"item":"puzzle3"})=="collected" && LB.Actions.getItemStatus({"item":"puzzle4"})=="collected" && LB.Actions.getItemStatus({"item":"puzzle5"})!="collected") { |
This will hide the puzzle piece #5 after entering the space without all the other pieces collected, and show it when all other pieces are collected.
Please note that this logic works only if this is the only puzzle piece in this space.
- Click the Add action button
- Click the Save button
- Paste the following action array into the On Click field:
[{"action":"collectItem","item":"puzzle1","isWorldItem":true},{"action":"playSFX","url":"https://cache.learnbrite.com/_assets_/audio/success_digital1.mp3"},{"action":"displayNotification","message":"You've found a puzzle piece!"},{"action":"fadeObject","direction":"out","objectName":"Puzzle5"},{"action":"setObjectVisible", "visible":false, "objectName":"Mediaboard_puzzle_empty"},{"action":"setObjectVisible", "visible":true, "objectName":"Mediaboard_puzzle_complete"}] |
- Click the Save item button
Space Scavenger Hunt
A collection of items found in one space and displayed in the Achievements (Trophy) popup only when in the space.
Add 3D items to each scene
- Click the Pencil+ icon in the toolbar
- Select Add content
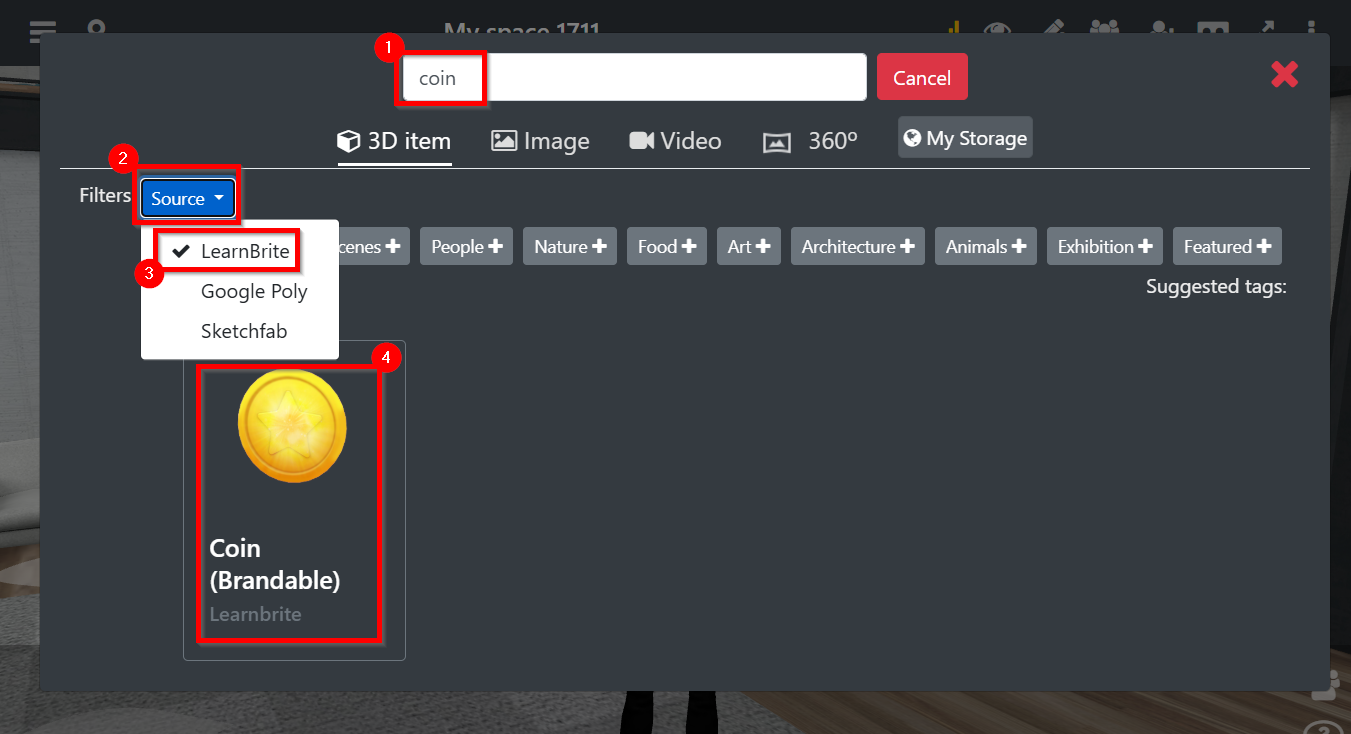
- Type coin in the search field
- Click the Filters dropdown
- Select LearnBrite
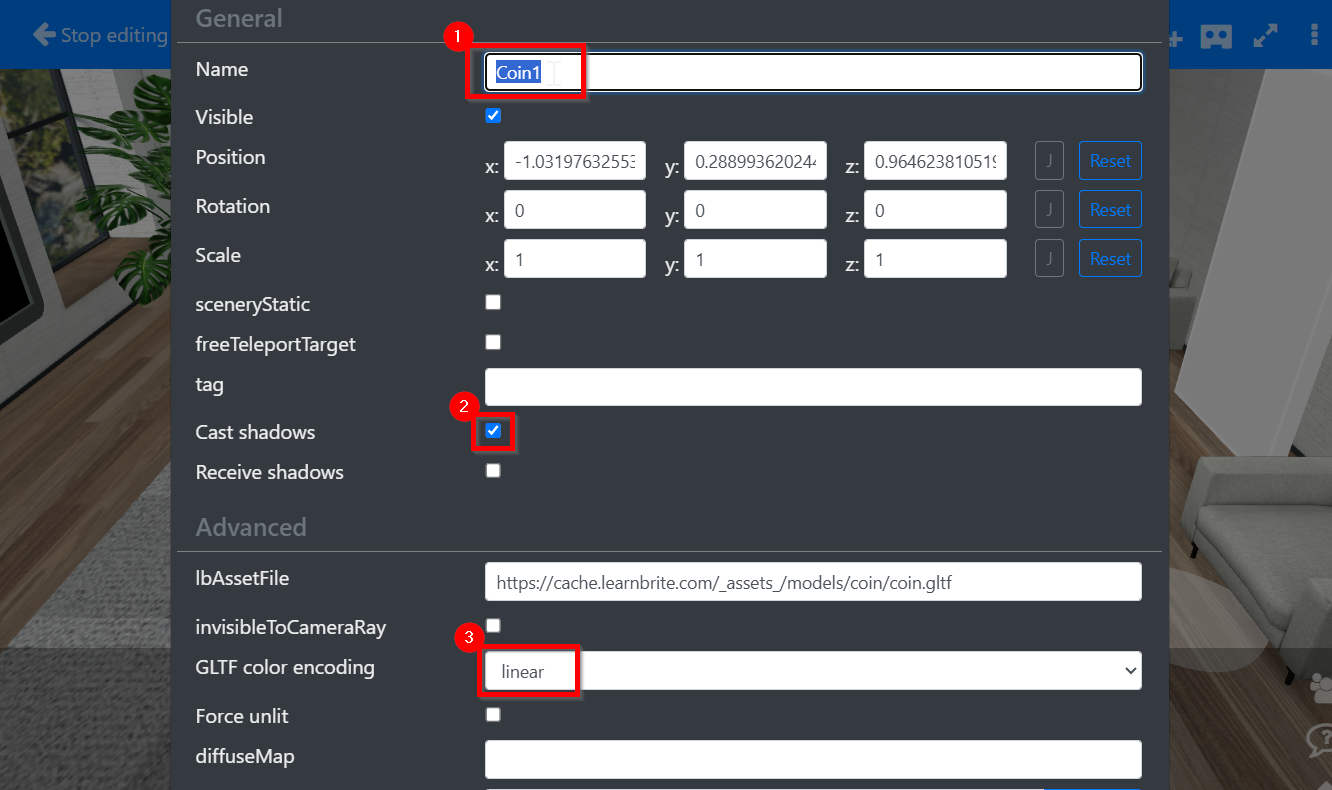
- Click the Coin (Brandable) to add it to the space
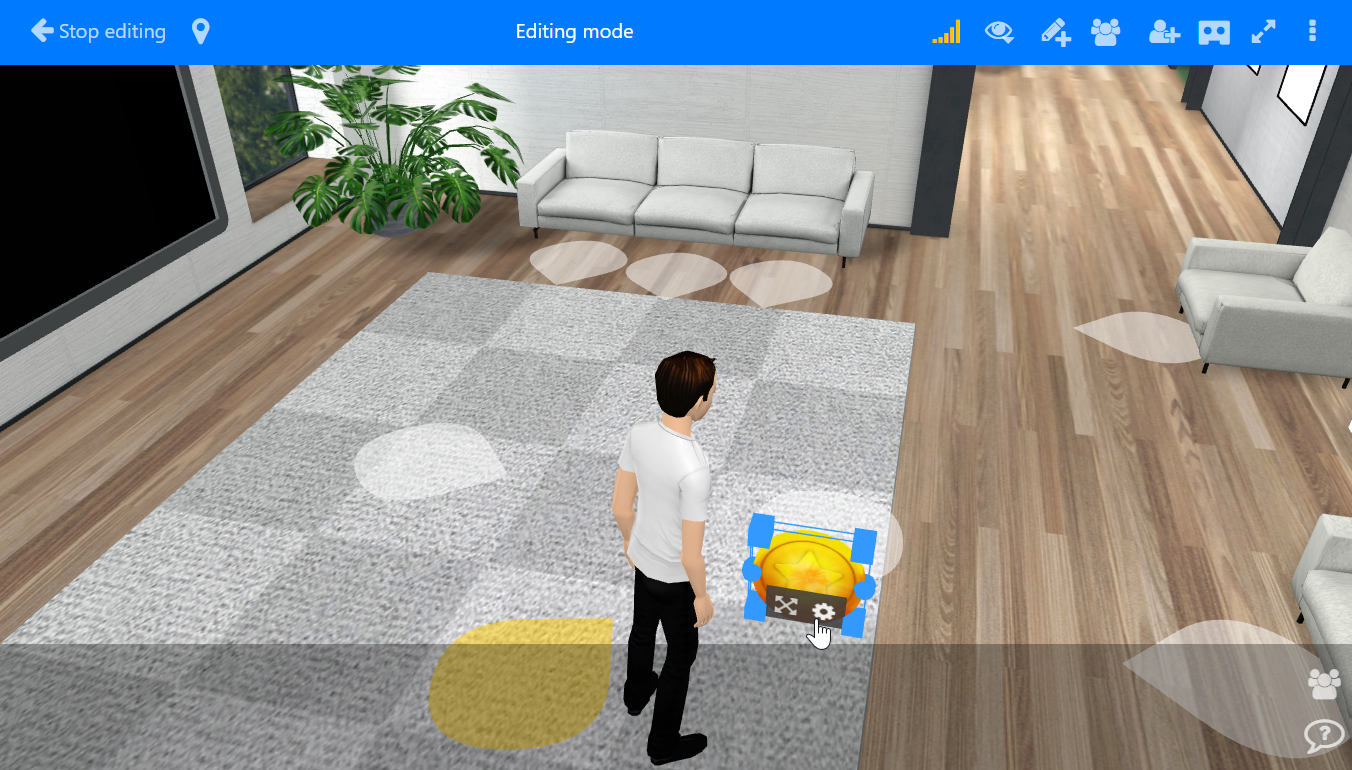
- Name the Coin 3D items, Coin1, Coin2, Coin3
- Enable Cast shadows
- Change GLTF color encoding to linear
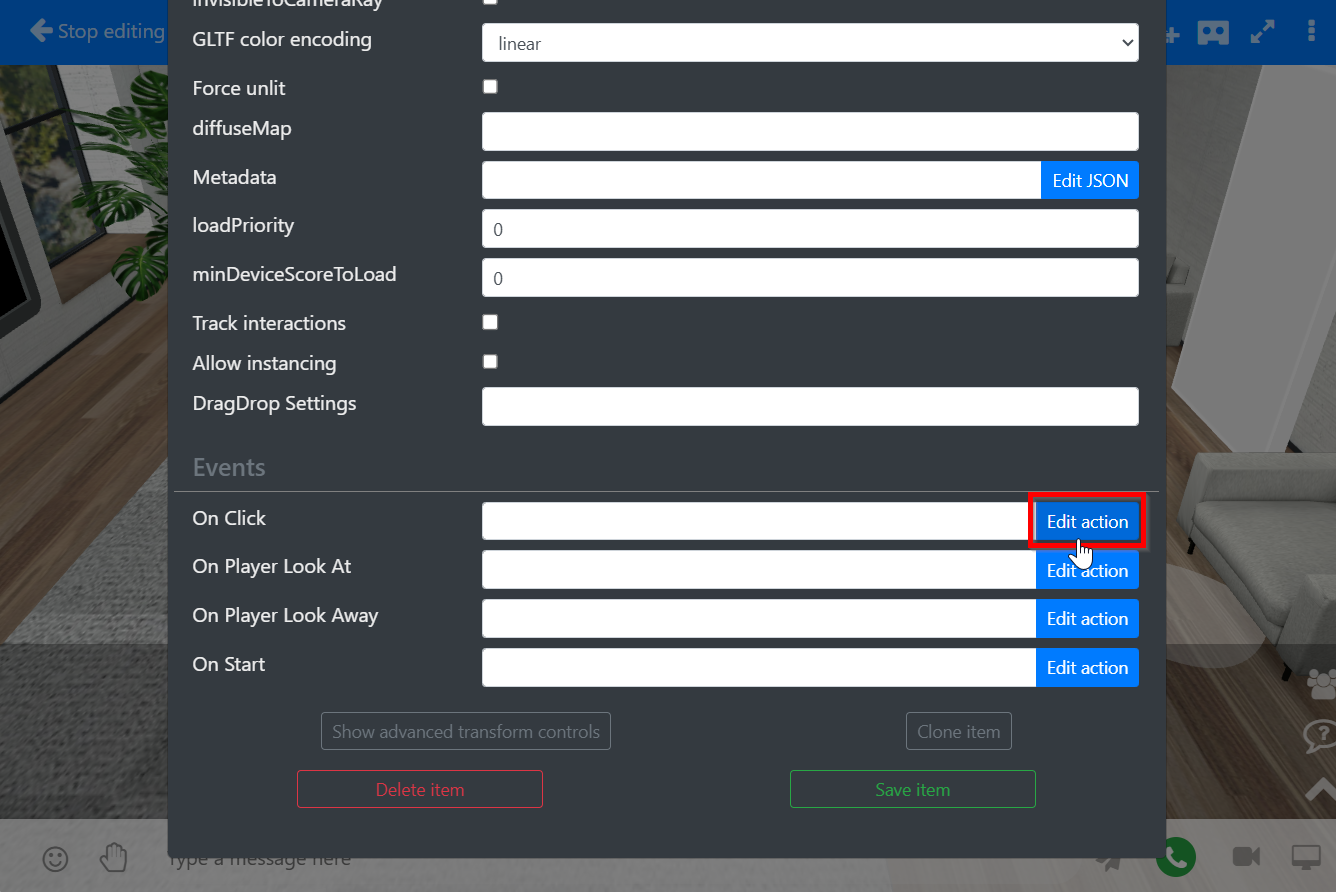
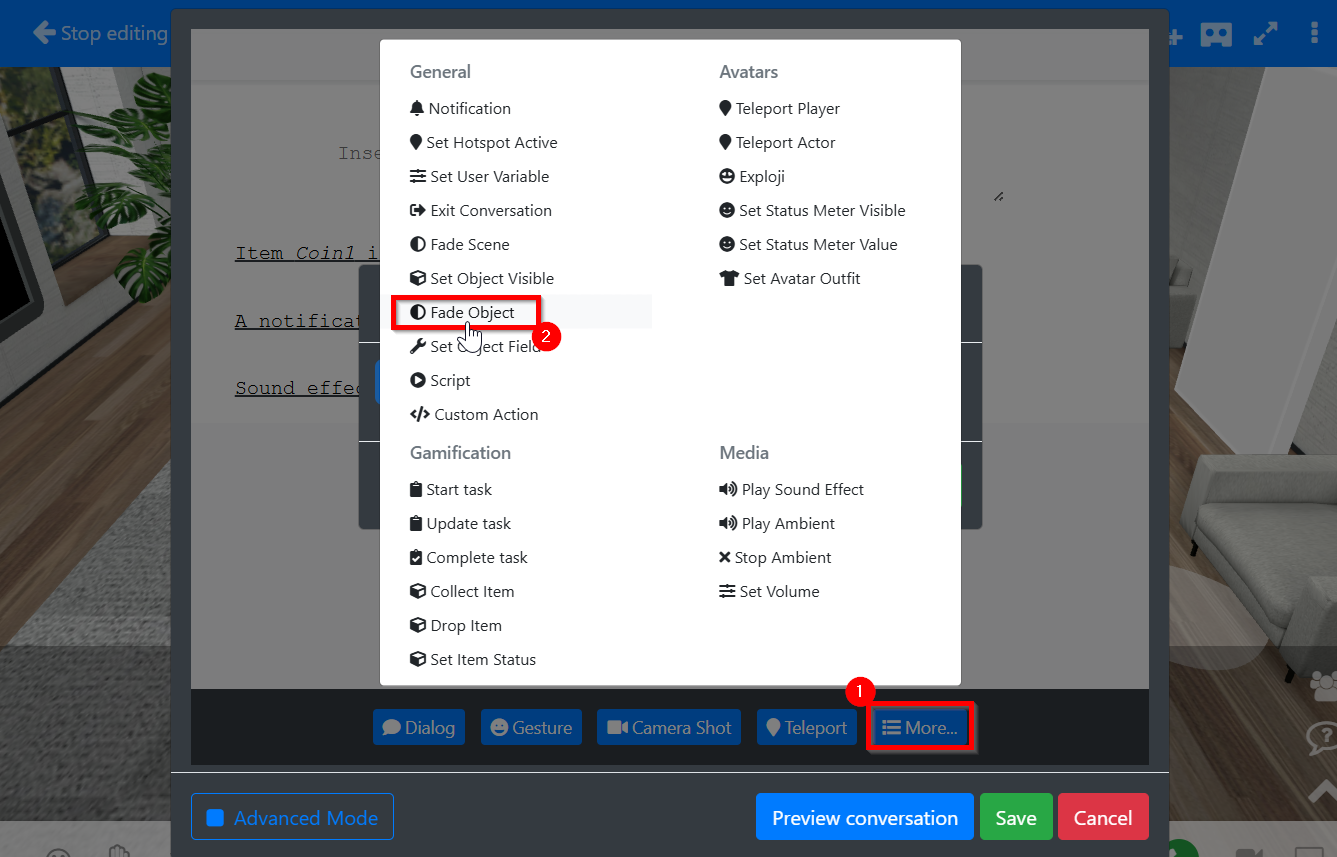
For each Coin item click Edit Action on the on click field

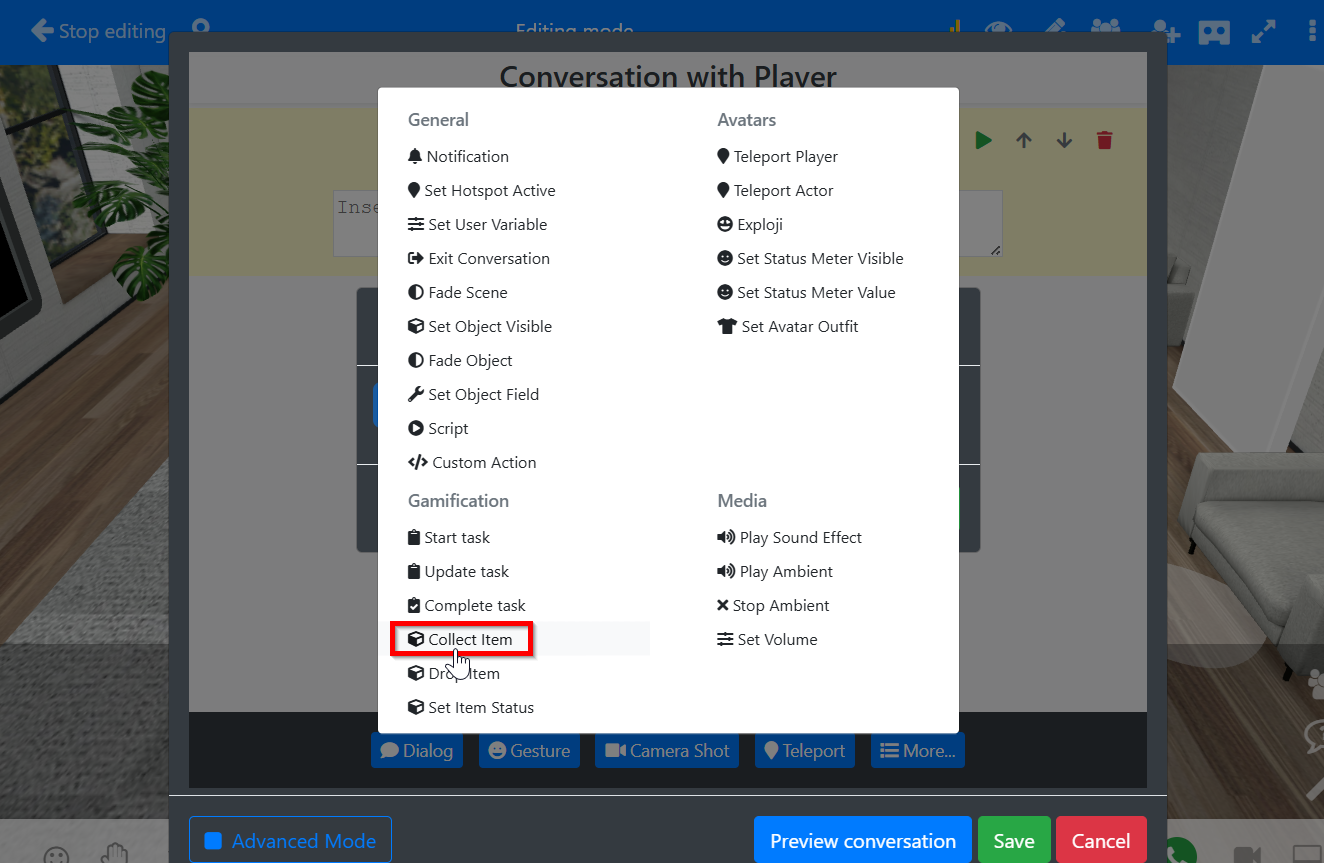
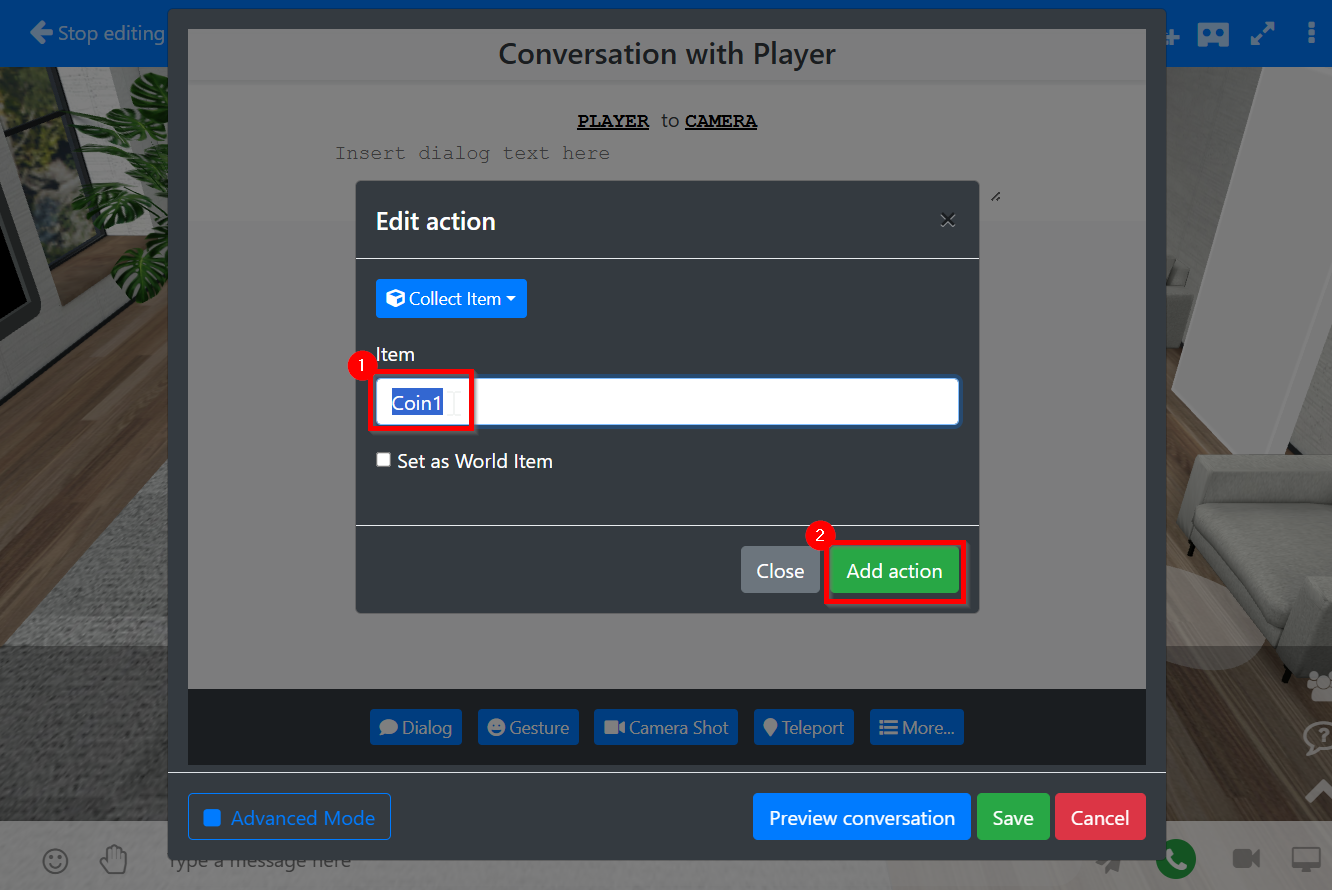
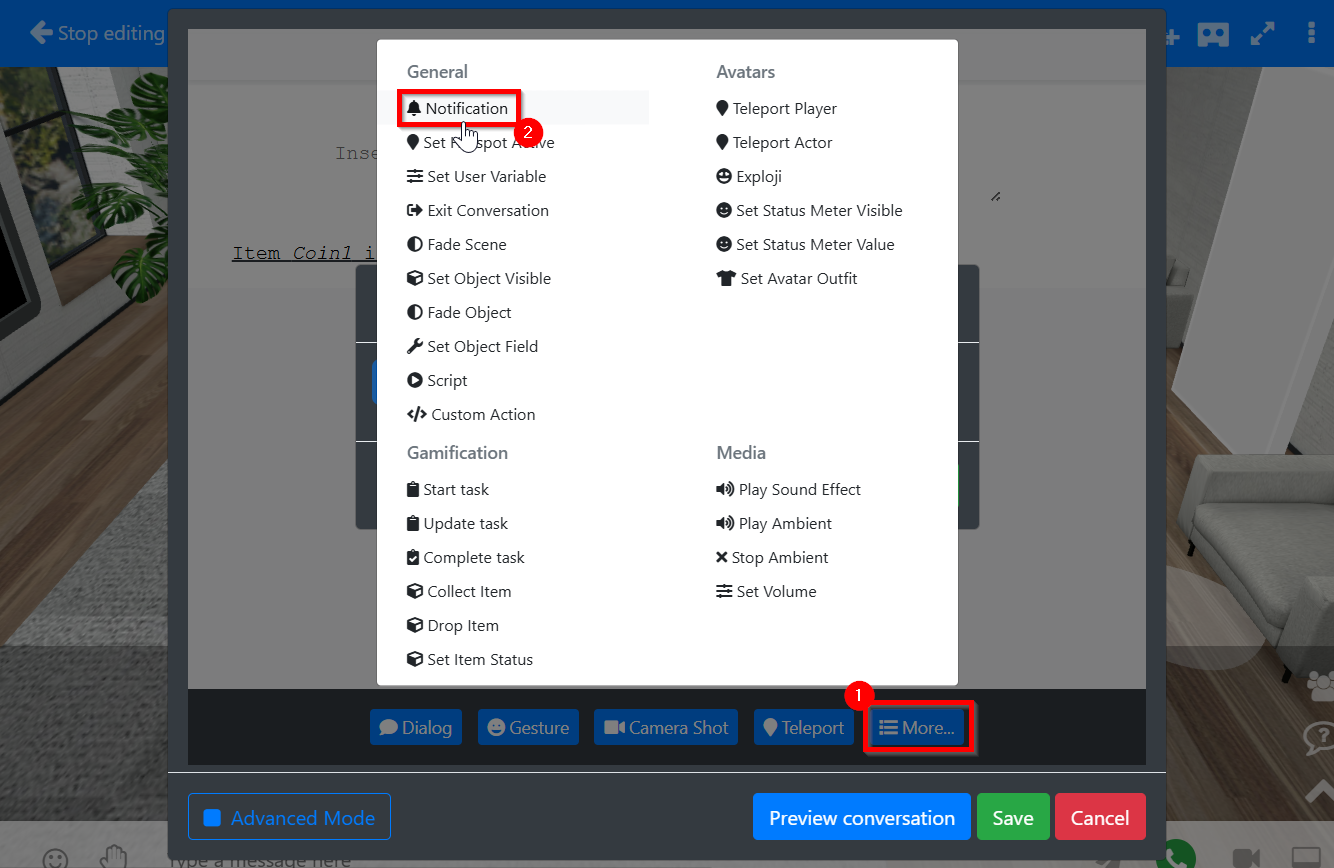
Click More button and select Collect item > Type Coin1 > Save action
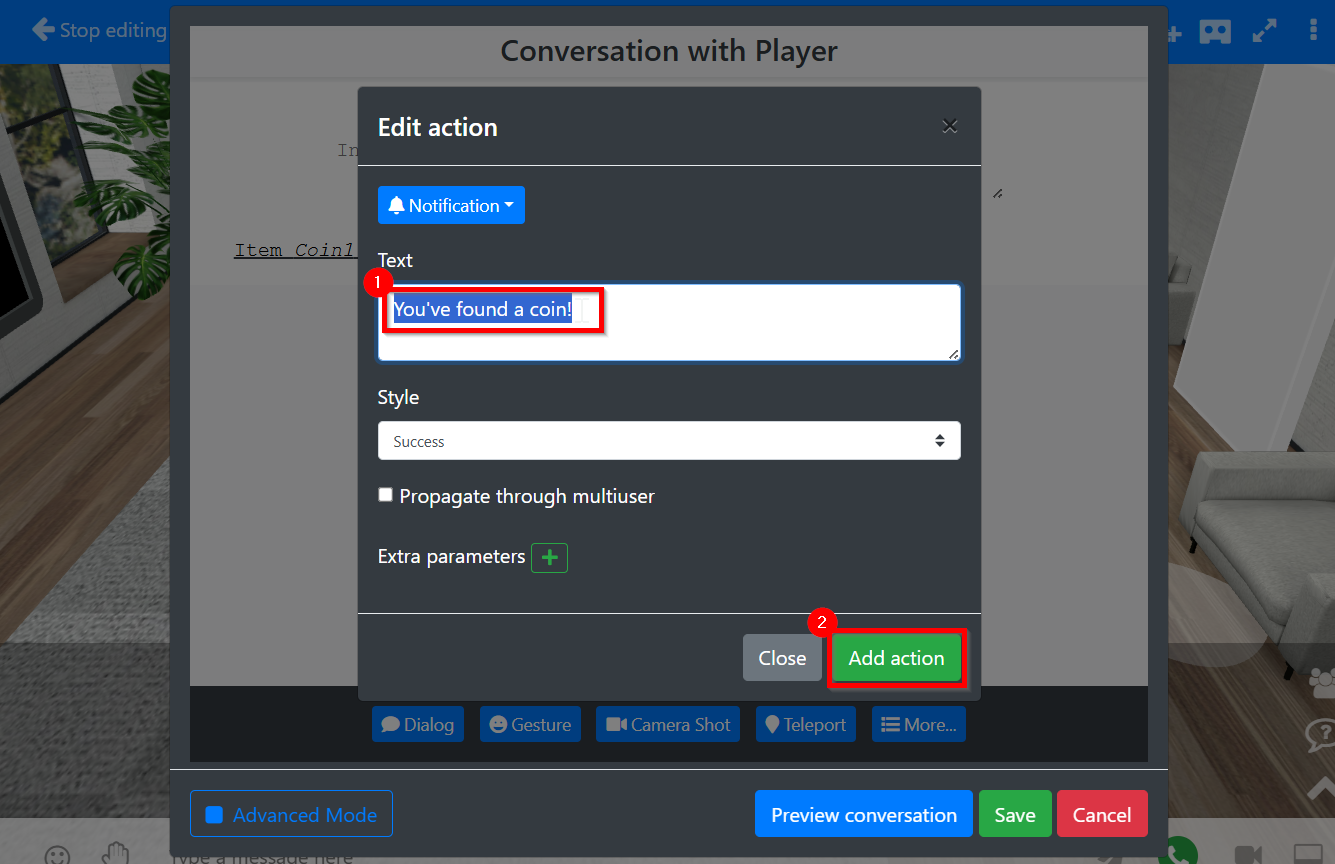
Click More button > select Notification > Type You've found a coin! > Style Success > Save action
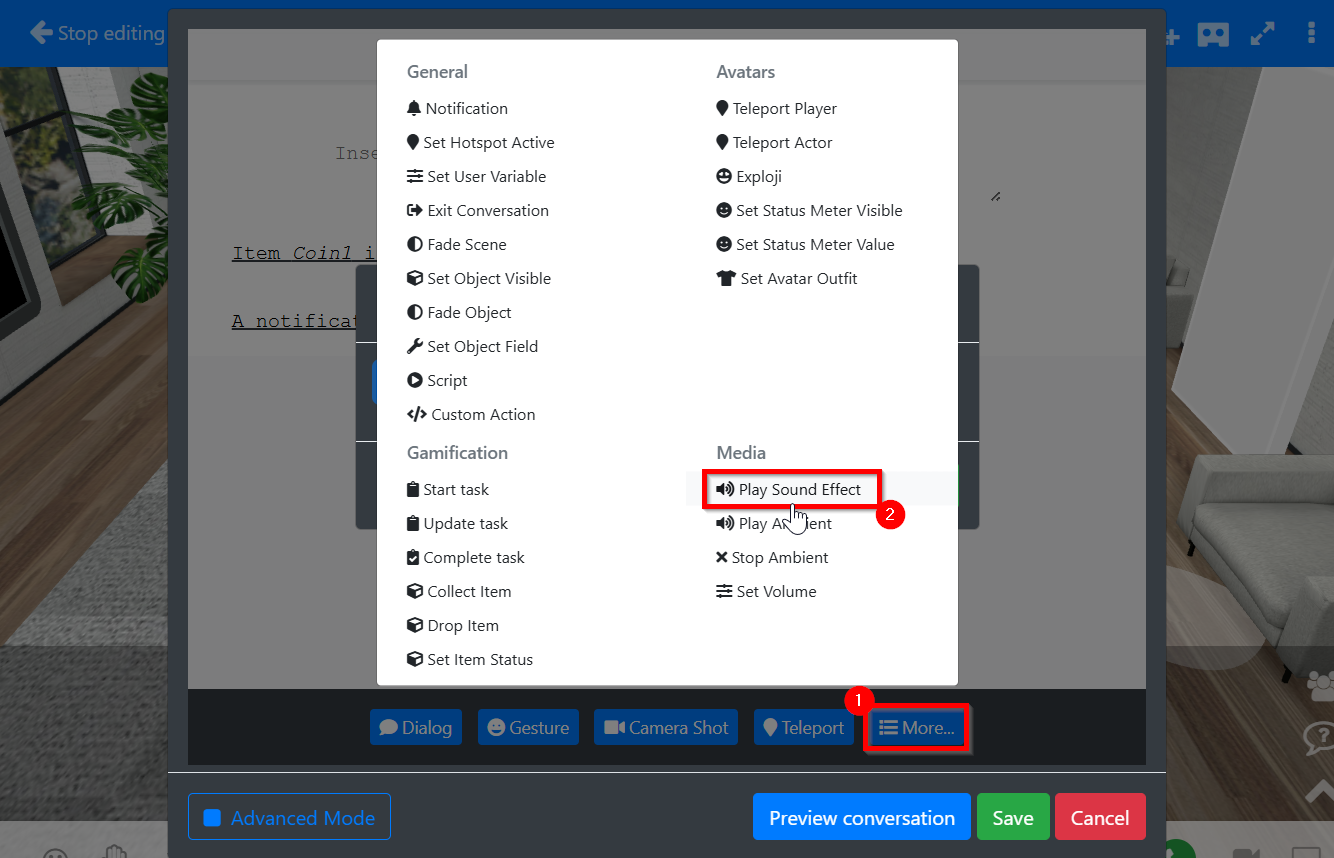
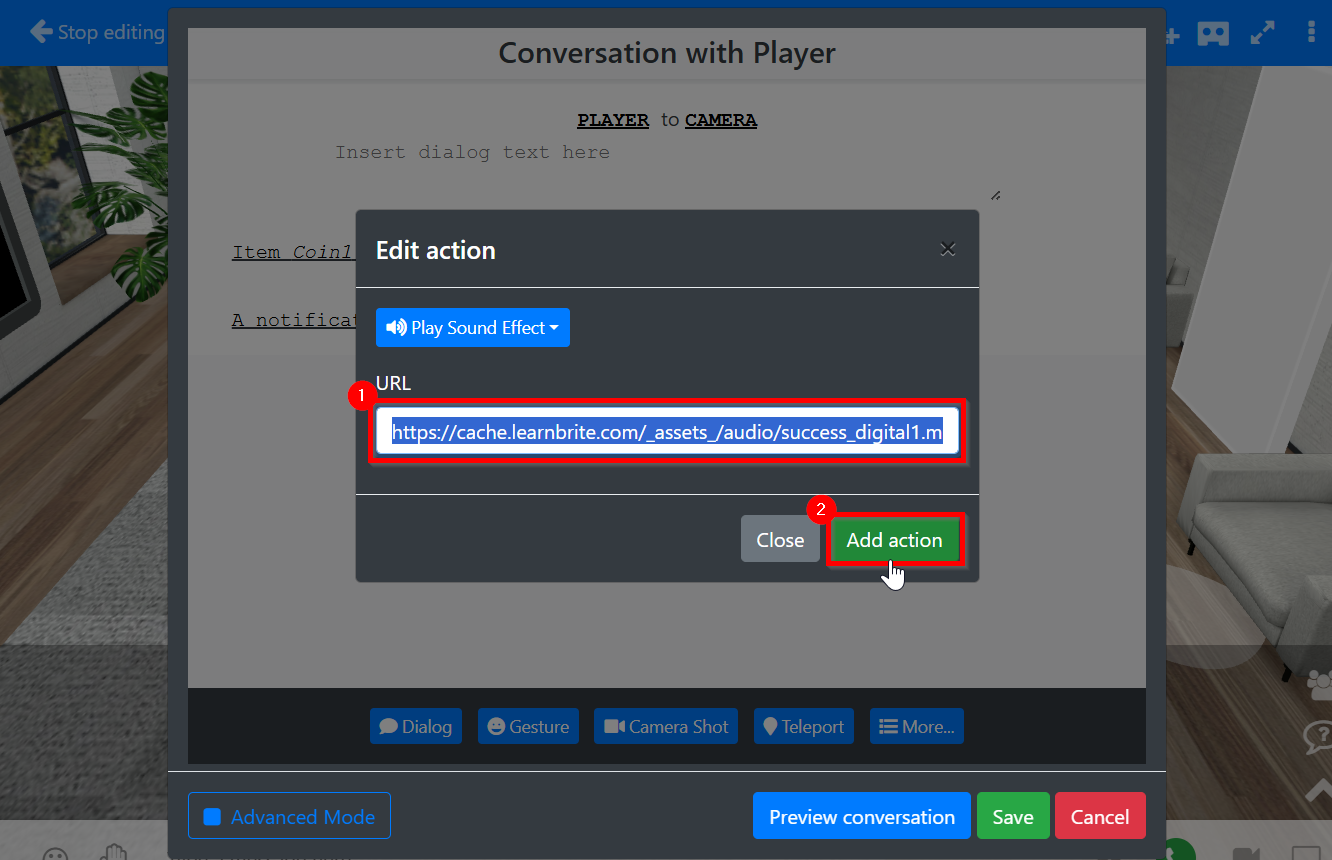
Click More button > select Play SFX > paste URL https://cache.learnbrite.com/_assets_/audio/success_digital1.mp3 > Save action
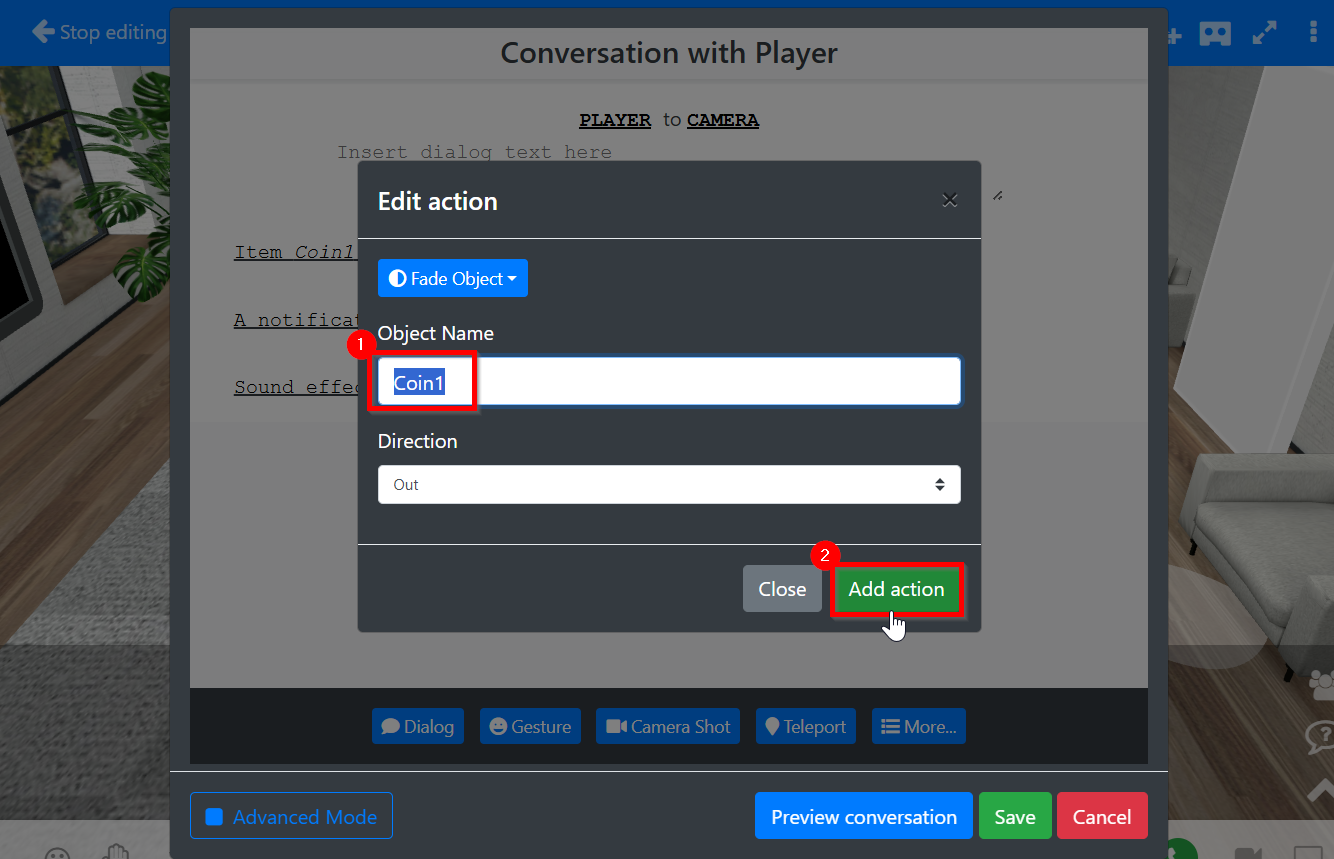
Click More button > select Fade object > select Coin1 item > Direction : out > Save action
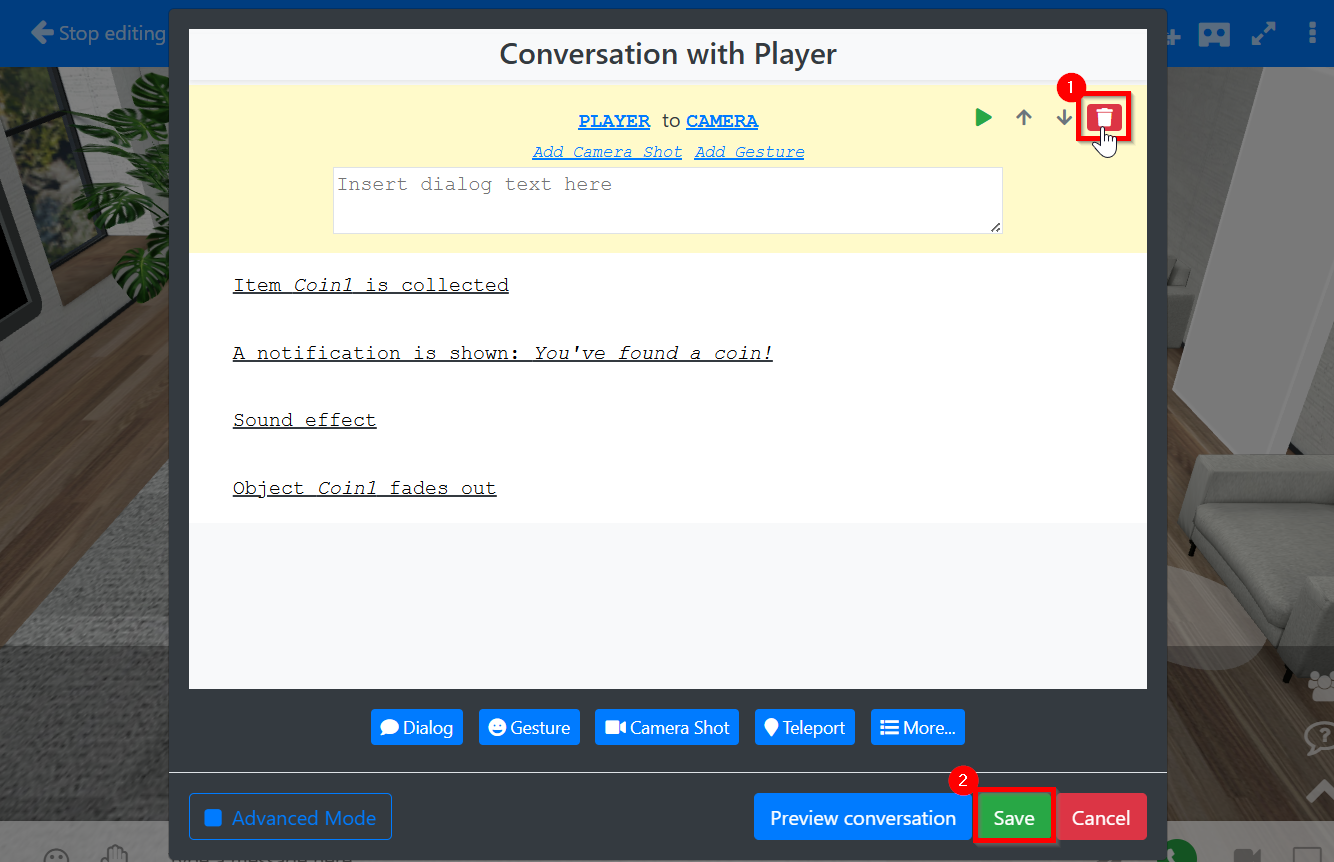
- You may delete the first empty dialog node, it’s not needed
- Click the Save button
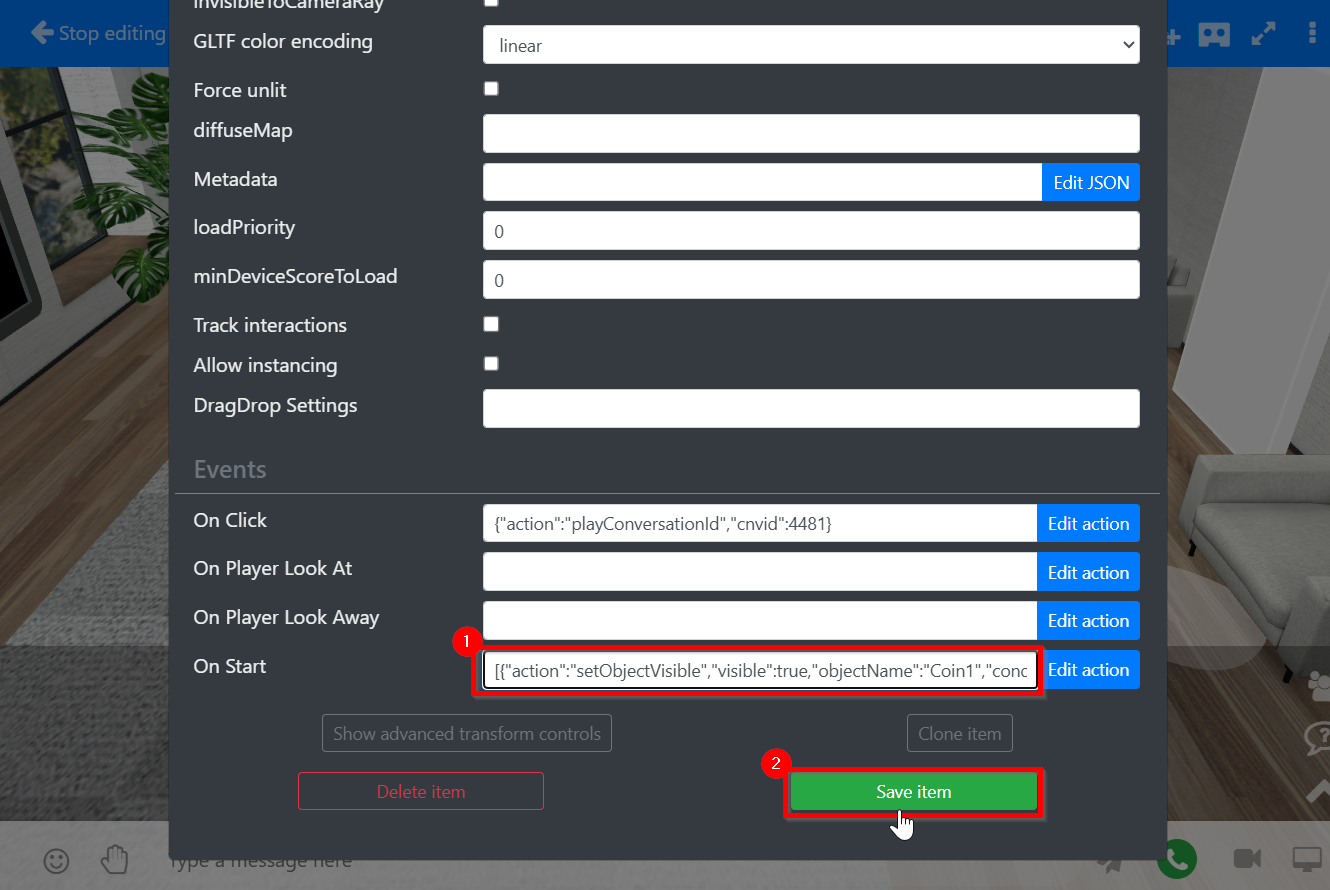
To ensure the collected coins are shown or hidden on next visit to the space
- Paste the following code in the On Start field of each coin item ( replace the 4 references to Coin1 for Coin2 and so on for each coin item’s On Start settings )
[{"action":"setObjectVisible","visible":true,"objectName":"Coin1","condition":"!item.Coin1.collected"},{"action":"setObjectVisible","visible":false,"objectName":"Coin1","condition":"item.Coin1.collected"}] |
- Click the Save button
Important! Do not use Clone item to add extra coins. If you do so and change the On Click action it will change the action for all coins rather than just one! Easy:
Advanced:
|
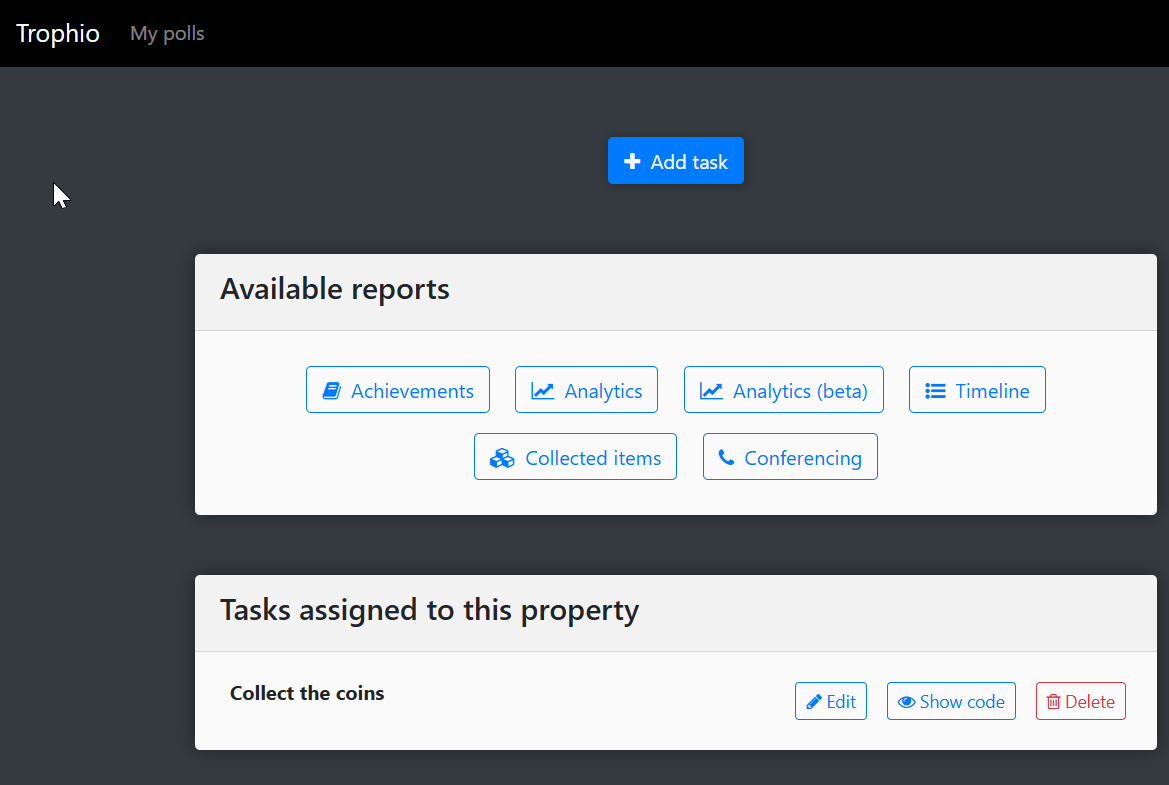
Create the Gamification Task
- Pencil+ icon
- Select Gamification
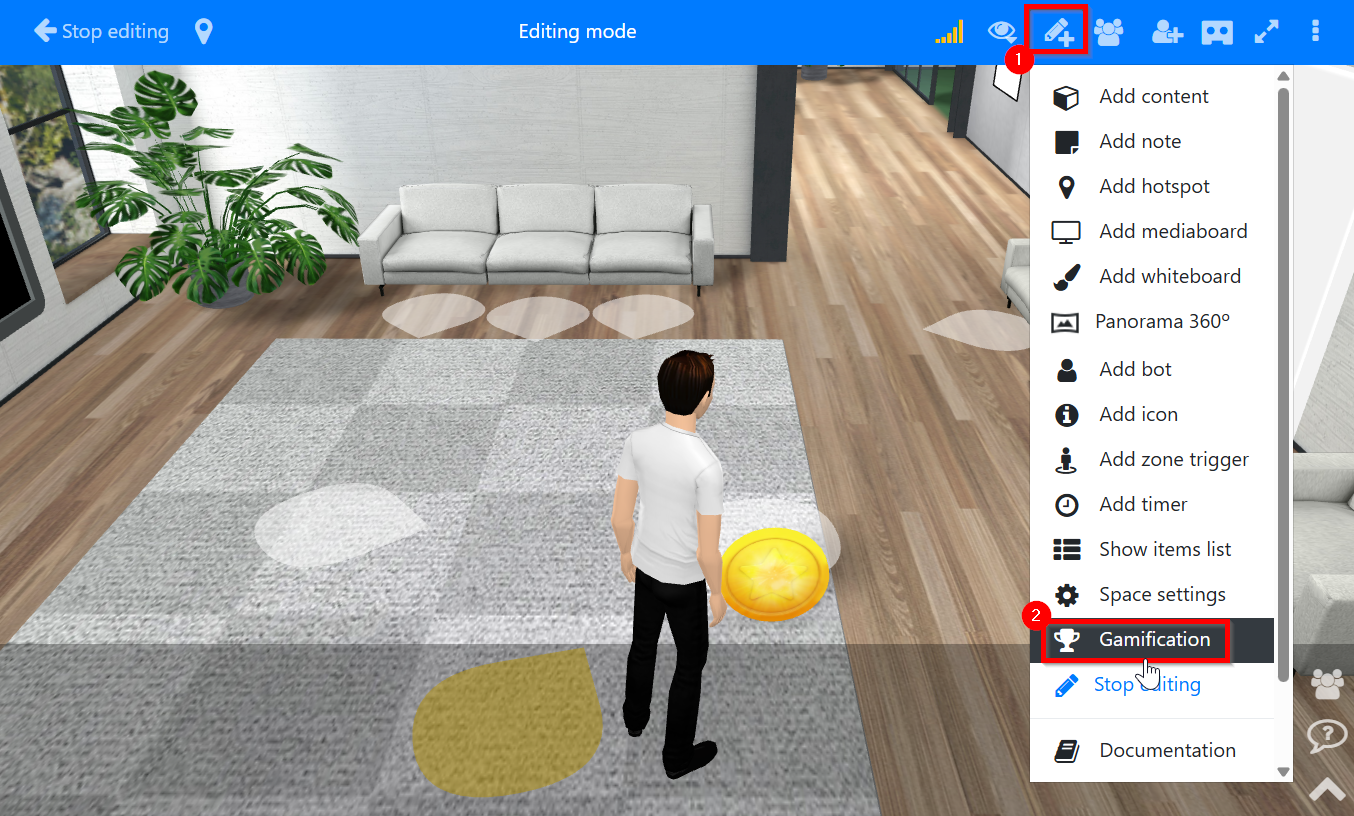
Click the Add task button
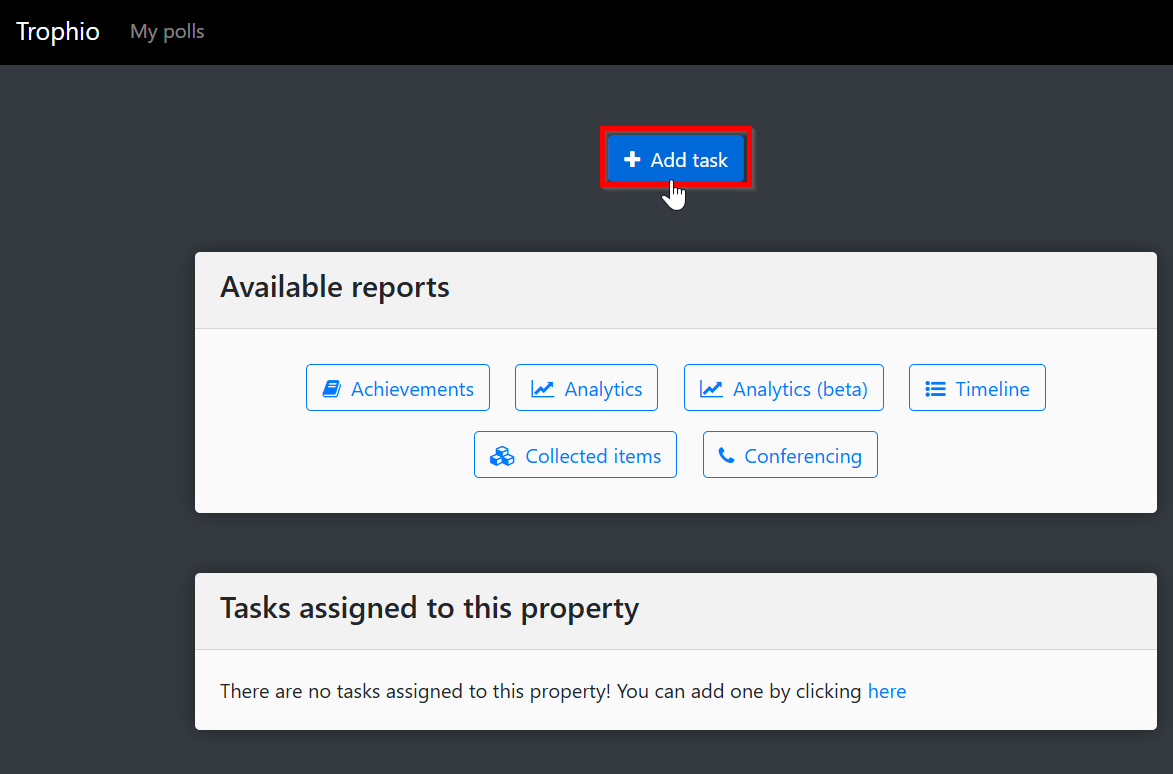
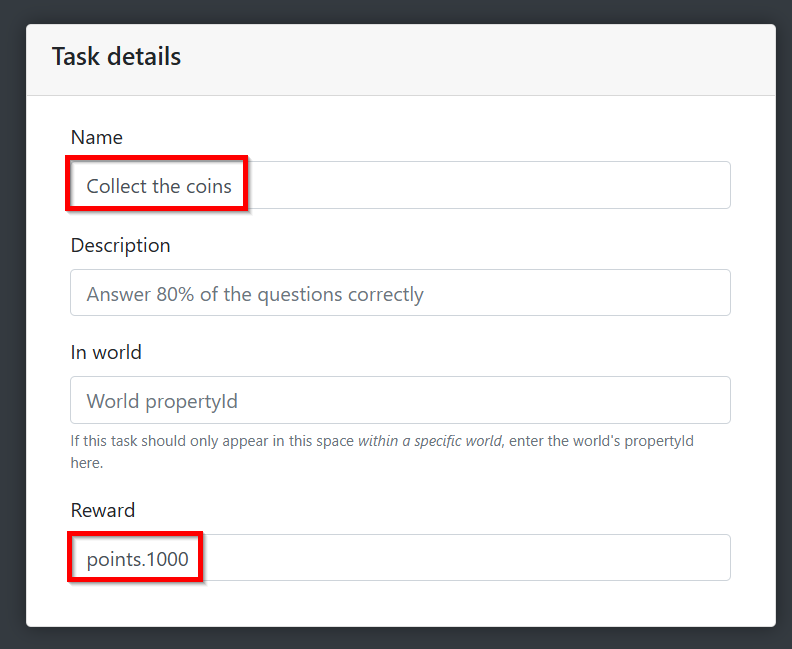
Name the task and allocate points
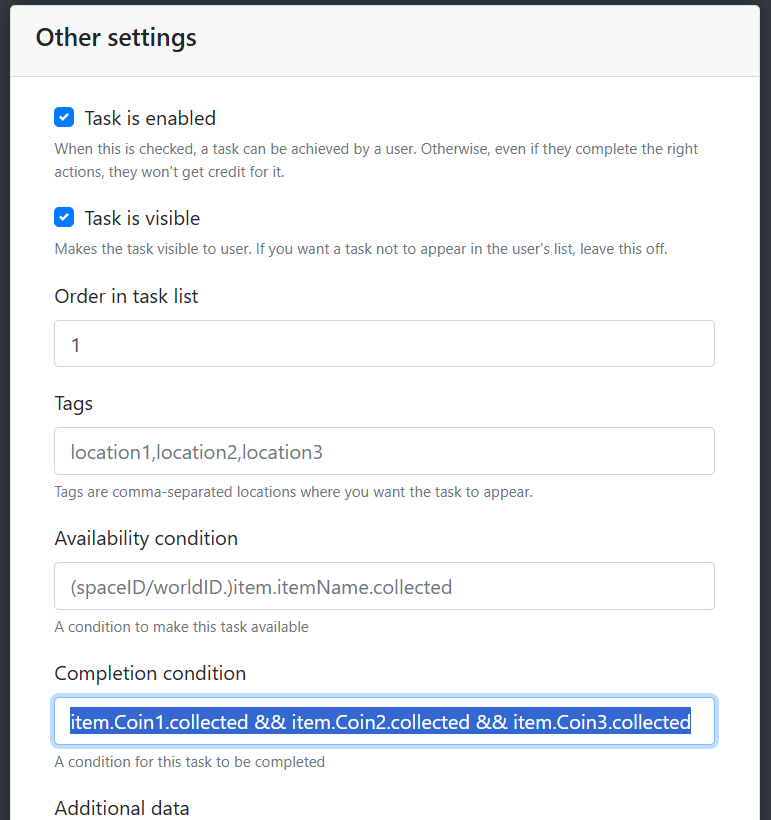
Scroll down to the Other settings panel
For example if I have configured 3 coin items configured in the space
item.Coin1.collected && item.Coin2.collected && item.Coin3.collected |
You can extend the condition if you’ve created and configured more coin items (eg. 4 coin items below)
item.Coin1.collected && item.Coin2.collected && item.Coin3.collected && item.Coin4.collected |

Click the Save task button
Go back to the 3D space and reload
Important! You must reload the space to see changes made in the Gamification dashboard |
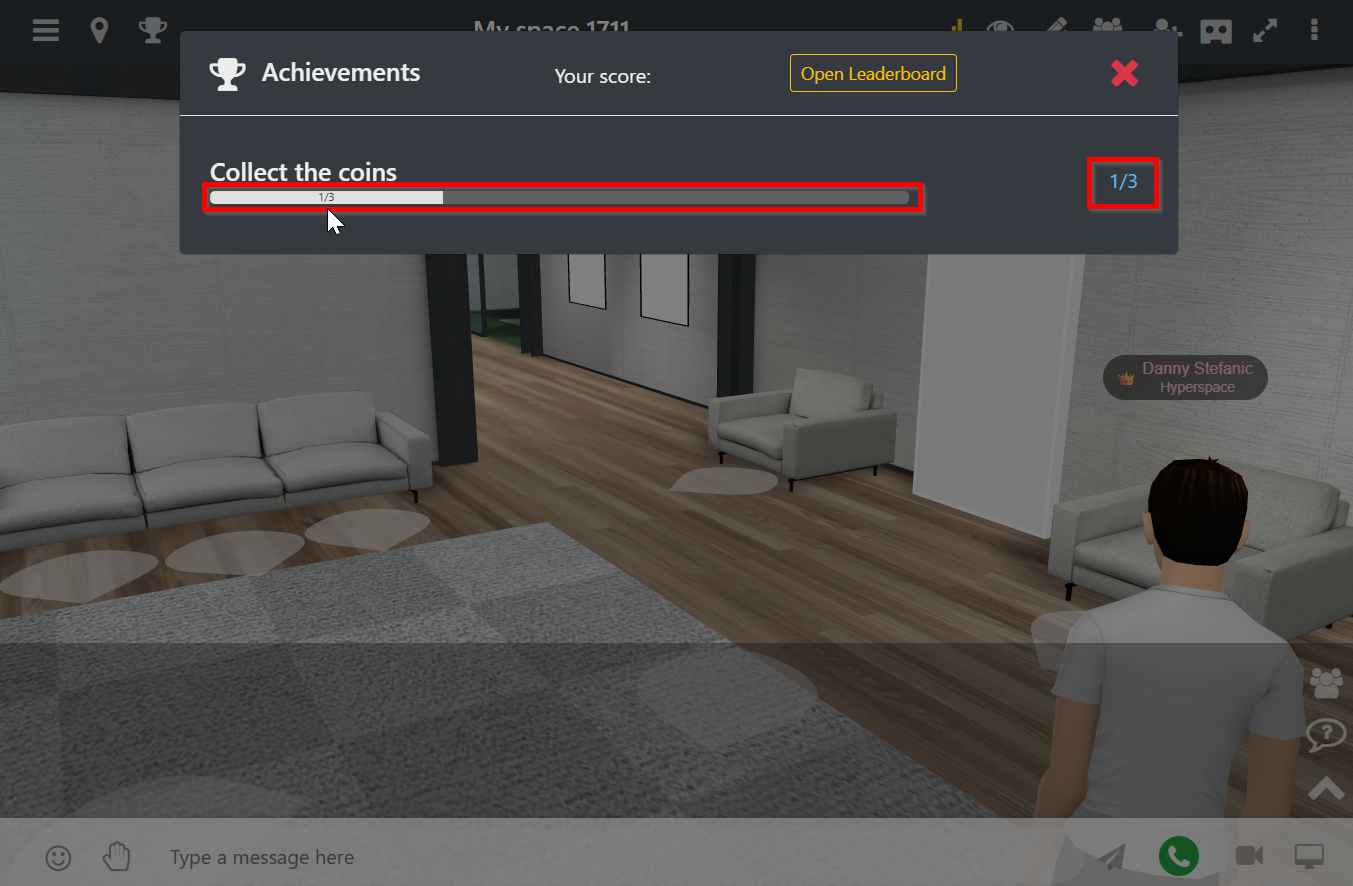
Once at least one task exists the Trophy (Achievements) icon will appear in the top toolbar for participants. Click the Trophy icon to see the tasks and their corresponding status.

As items are collected the progress bar and count will update in the Achievements popup
Trigger an action when the last item is collected
Find the shortcode for the task in the Gamification dashboard
Click More button > select Script > Paste:
if(LB.Actions.getTaskStatus({"shortcode":"your-custom-task-shortcode"})=="complete"){
// Your custom actions go below
LB.Actions.displayNotification({message:"You found all the coins!"});
}
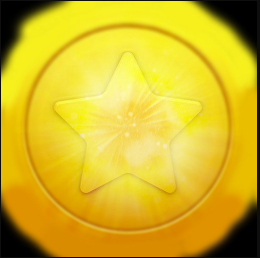
Change the branding of the coin
The 3d coin model can be customized with your own texture.
Assuming you’ve added a coin to your space with the following URL
https://cache.learnbrite.com/_assets_/models/coin/coin.gltf then follow these steps:
- Prepare the branding image
- Download the template file (then right-click this link https://cache.learnbrite.com/_assets_/models/coin/coin.jpg and Save as.. to your computer) and prepare it with your own branding resources.
- Export the resulting image as JPG or PNG
- Upload the image to Hyperspace Storage (see guide on Storage & Files);
- Once done, copy its URL by clicking on the small “globe” icon on the right side of the screen.
- Paste the URL you just copied in the following snippet (replace TEXTURE_URL)
{"materialPropertiesOverrides":[{"materialNames":["Branding"],"overrides":{"map":"TEXTURE_URL"}}]} |
- Update the booth to use the new image
- Go to the 3D environment
- Enter edit mode
- Hover over the booth and click on the cog icon
- Add the snippet you completed earlier with the URL of your texture in the metadata field
- Click Save item
